You will always see some type of barricade at any long-gun competition you choose to compete in. I have encountered barricades at Precision Rifles Series (PRS) matches, 3-Gun competitions, AK matches, 2-Gun competitions, and numerous outlaw-style matches. You can expect to shoot from one position at a minimum, but typically, you must choose five unique positions. Barricades vary in shape, size, position, and port holes; you may rarely encounter the same one. For this drill, I’m using the VTAC (Viking Tactics Barricade designed by Kyle Lamb) and shooting from more simple positions to replicate what I see most in competitions. I’ll share my techniques for different positions in this guide to barricade training.
SKILLS: Barricade Training
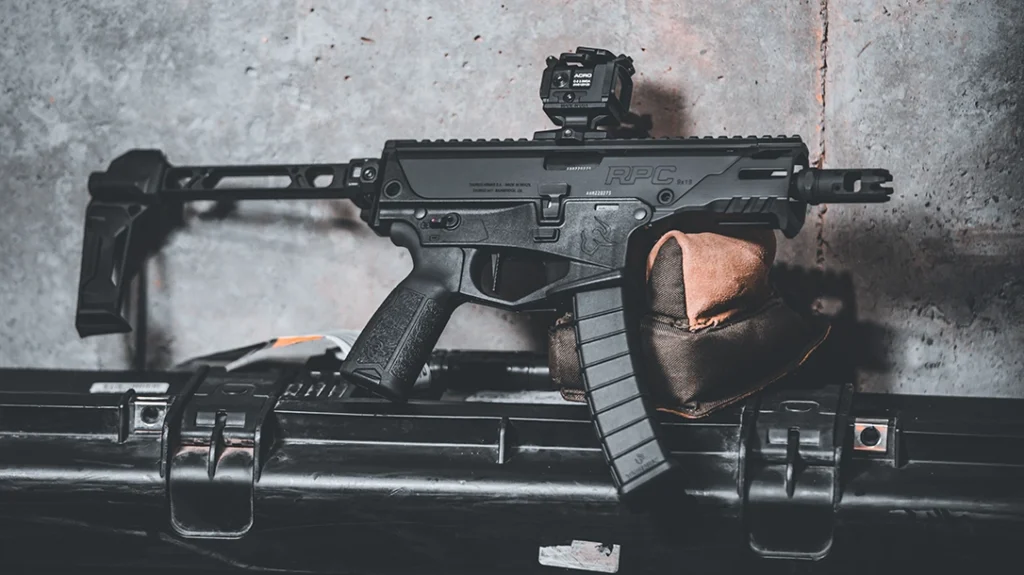
Equipment Needed
- VTAC Barricade with a minimum of five positions
- Carbine (Rifle or PCC) with zeroed optic
- Ammunition
- Steel Target (Caldwell Steel)
- Kneepads (optional)
Advertisement — Continue Reading Below
Barricade Training: The Drill
This drill requires the shooter to shoot from five positions using the barricade, with at least one position shooting through a port hole or window. Set up a Caldwell AR500 steel target at 50 yards minimum. The order of positions doesn’t matter, but once you master the positional work, try different orders to see what’s the fastest. Some shooters want to tackle the low positions, requiring getting on their knees last, versus others who can start low and stand up quickly with their rifles.
The goal of this drill is for you to learn how to move your rifle in and out of positions and ports without breaking any safety rules. Pointing your rifle muzzle up into the air or pointing it directly left or right when moving to a different spot on the barricade can be a quick disqualification (DQ) if you go past 180 degrees. Getting into and out of barricade positions is just as much part of the drill as positioning your body correctly for each shot. Keep the muzzle pointed downrange and throw your buttstock over your shoulder as you come out of position. Do not take steps backward while keeping the rifle on your shoulder to move in and out of positions. This wastes a lot of time and is the wrong way to move with a carbine.
The VTAC Barricade Positions
Before diving into the positional work, your rifle setup might hinder or help you in certain positions on the barricade. If you have a vertical or angled fore grip, a barricade or hand stop, a light or laser, a Picatinny rail attachment, or a permanently fixed bipod, these accessories can make barricade shooting even harder. If the carbine you run this drill with is your home defense rifle, it might be time to learn how to position the rifle with all the accessories mounted.
Advertisement — Continue Reading Below
Pro Tip: NEVER rest your barrel on a barricade. If you fire a shot with the barrel on the barricade instead of a handguard, the trajectory of your bullet can dramatically change. Your accuracy will be thrown off, especially the further you shoot.
Position 1: Side of the Wall
As I mentioned, handguard-mounted accessories can either help or hinder your ability to mount your gun on the side of the VTAC Barricade. I run a small-profile, single-point sling attachment on a Picatinny rail mount on the side of my rifle. I use it almost like a reverse barricade stop. So I can pull my rifle into my shoulder while that accessory keeps the gun lined up. I make an upside-down C with my thumb and pointer finger to support the handguard and position the rest of my palm on the barricade for stability. You should be comfortable in a natural shooting stance, legs apart and body bladed or with your hips square to the target.
Advertisement — Continue Reading Below
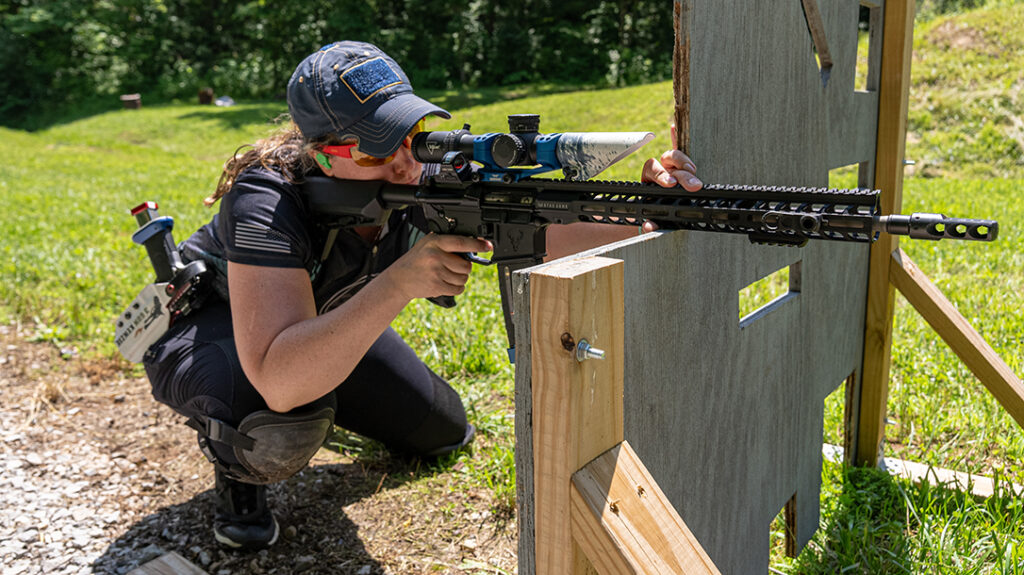
Position 2: At the Topmost Outer Barricade Position Level with Your Height
Find the outer barricade position that most aligns with your shoulders. This position should be the most comfortable and stable. I like to spread my legs wide and keep both hips pointed at my target. Do not just put your rifle anywhere on the barricade. Move the handguard as far left where the barricade forms an “L.” Make a C Clamp with your support hand around the handguard and as much of a flat palm as possible against the wall. Be cognizant of your fingers. They can easily creep in the way of your riflescope.
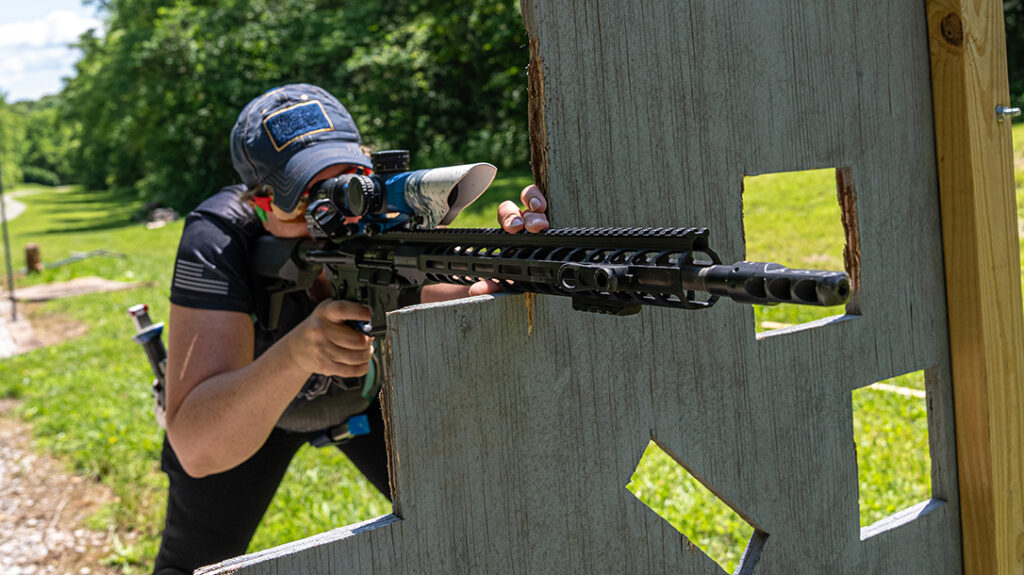
Position 3: Port Hole or Window
Shooting through the window requires you to insert your handguard into the port without accessories tilting your rifle. If your rifle is angled, your shot will be, too. I chose the higher barricade hole that lines my rifle up to my shoulder for a level shot. The most comfortable position for the height of this hole is to double kneel. Unlike position two, move your handguard as far right as possible. Use your support hand to create a C-Clamp on the handguard, with the rest of your fingers wrapping around the outside of the barricade, palm against the wall.
Note: I am a right-handed shooter. Left-handed shooters may move the handguard to the left in the window for a more natural support hand position.
Advertisement — Continue Reading Below
Position 4: 3rd Outer Barricade Position (In video – 2nd to Lowest)
Position four is like position two, but your height will dictate how to line up the shot in this position. I spread my legs as wide as possible until my rifle lines up with my shoulder blade, and my scope’s crosshairs are on the Caldwell steel target. I position the handguard as far left as possible to form a C-Clamp with my support hand and palm touching the barricade.
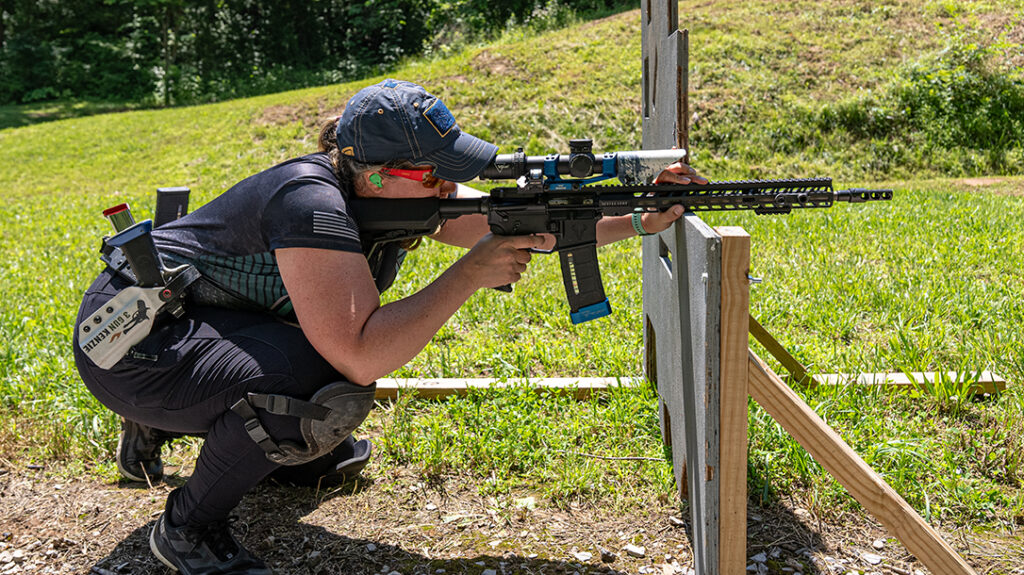
Position 5: Lowest Outer Barricade Position
The final position is my absolute favorite, as I have used it in every carbine-style shooting competition. The lowest outer barricade position will require you to problem-solve how to build a stable platform that works for you. Like positions two and four, move your rifle to the left and form a C-Clamp with your support hand against the barricade. Then, use your right knee to support your right elbow to eliminate any up and down movement. Your right foot might need to move forward to give you more height, rearward underneath you if you are shooting up at an angle, or you can kick your right foot out to find the sweet spot. Your left knee is on the ground supporting your body. Building this position to your body height, weight, and size will take the most amount of time to figure out what works for you.
Advertisement — Continue Reading Below
Note: Swap the knee and elbow side if you’re left-handed.