My first weapon of fascination was a rifle; it always has been. Since I was a boy, I’ve had a rifle in my hands. I started out with BB guns, then pellet rifles, then my first real rifle was an SKS, in 1991. It wasn’t until 2001 that I bought my first AR-15. Then I bought a Colt SP1 and swapped its barrel to a 14.5 inches. I used them to teach myself to build, tear down, and rebuild. I became a fairly good armorer in no time. Today, we discuss a special DIY 13.7-inch AR-15 carbine build.
Build It On Paper First: The 13.7-inch AR-15 Carbine Build
Building a rifle is an involved process which requires tooling and knowledge. If your goal is a good home defense gun, any AR-15 will suffice. Frankly, I would skip the “building process” and just buy an entry level gun, then upgrade it over time. You can buy a police trade-in rifle from Aimsurplus for $600, and you’ll have what you need, to get started.
Once you have that rifle, don’t do much to it, yet. First, you need knowledge, and training with professionals is the only way to get it. I would begin with Tactical Defense Institute or Personal Survival Solutions, then build from there. Training with those two companies is a judgment free zone, and you will learn more than you ever thought possible.
Advertisement — Continue Reading Below
If you want to go with a 13.7-inch build like mine, that is drilled, pinned and welded out to rifle length, I would go with an upper from Sons of Liberty Gun Works. SOLGW puts out pieces that are true Mil-Spec and they shoot like a dream. They are not over gassed and won’t beat you up like a lot of what is on the market right now. Their patrol series rifles are a great deal. But if you want to go all the way, go with their M4-L89 rifles. They will ruin you for anything else.
Component Choices Matter
I want to give you guys the understanding of what it is to build a rifle but, honestly, that is an entire article unto itself. Suffice it to say, the process is involved and requires lots of individual little tools. Worse yet, each little tool does one part of a process, then it has to be put down and another tool has to be employed. I used to build AR-15’s for a living, so trust me on this. You don’t want to go down this road. Its like Golf, it’ll just consume you!
Advertisement — Continue Reading Below
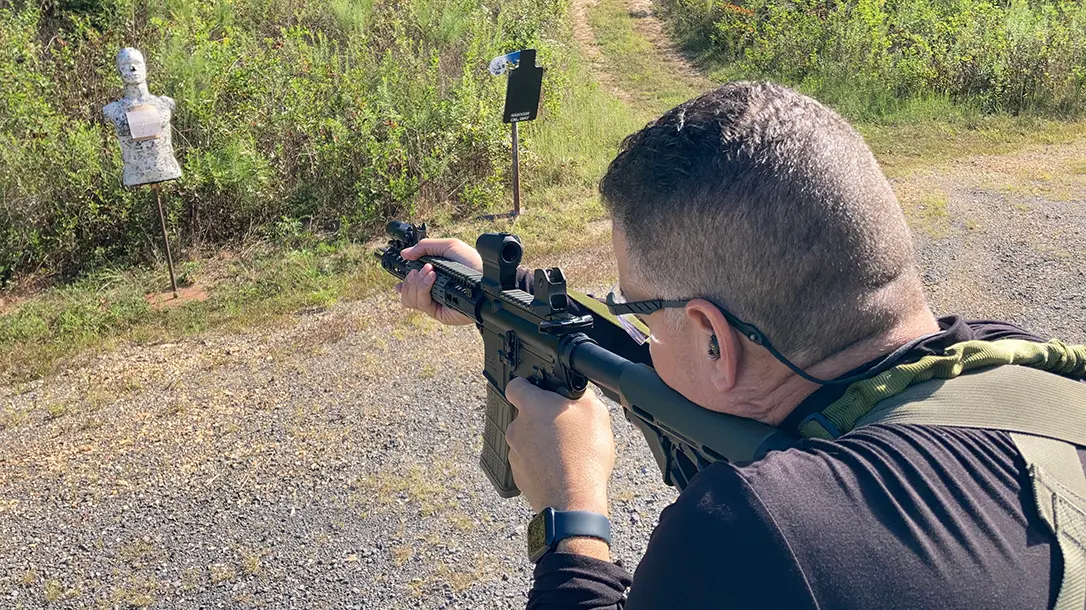
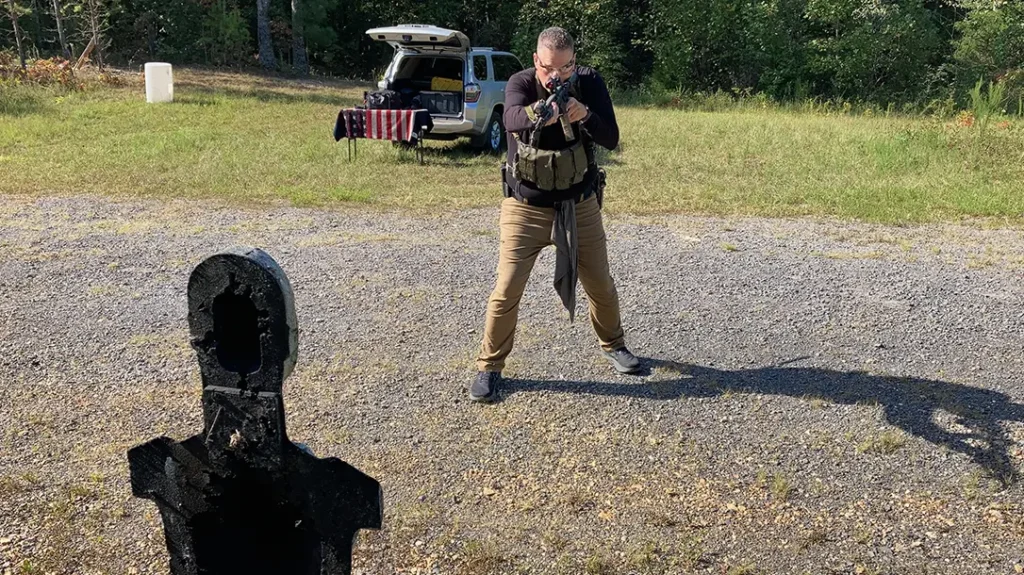
I chose to build a 13.7-inch because I have always enjoyed SBRs. However, this barrel length, when drilled, pinned and welded with a muzzle device long enough to reach 16.1 inches means that you get to enjoy the balance/weight of an SBR without any of the hassle and restrictions that go with them. Also, with a barrel of that length you have the ability to comfortably reach out to about 300 yards, with casual effort. I do this on a regular basis and it has become comically easy to accomplish.
I’m not the only one who states that 300 yards is the maximum range that one can comfortably identify a human male without magnified optics. My vision is 20/10 and I am able to clearly see the outline of an anatomical target from that distance. I put my to 2 MOA dot on the head and the bullet strikes between the pecs. Not bad for shooting PPU: M193.
Advertisement — Continue Reading Below
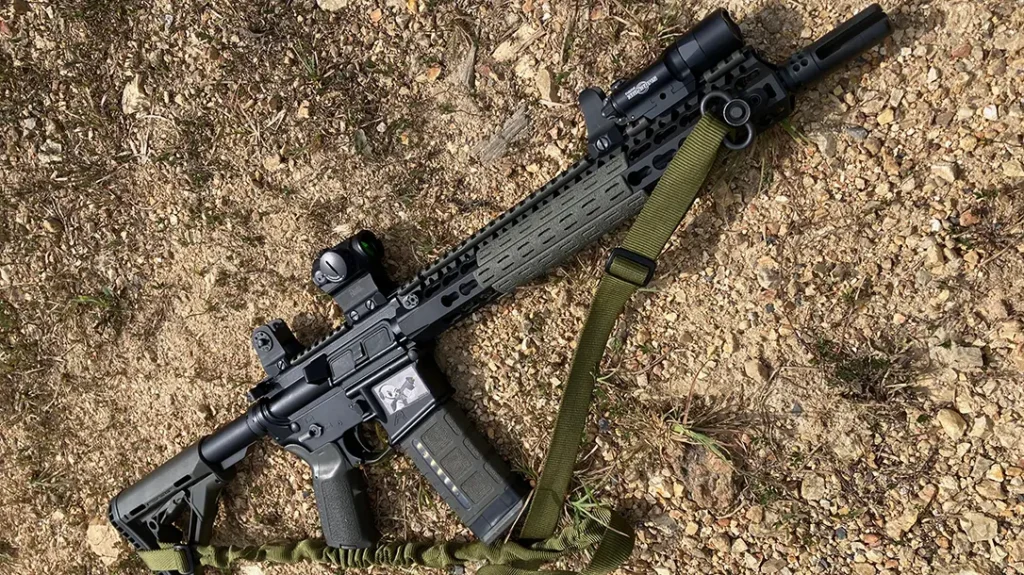
Rifle Build Specs
- Barrel: 13.7-inch Ballistic Advantage / Hanson / Carbine Gas
- Muzzle: Surefire Warcomp Pinned and Welded
- Gas Block: Ballistic Advantage / .750 / Milspec / Melonite
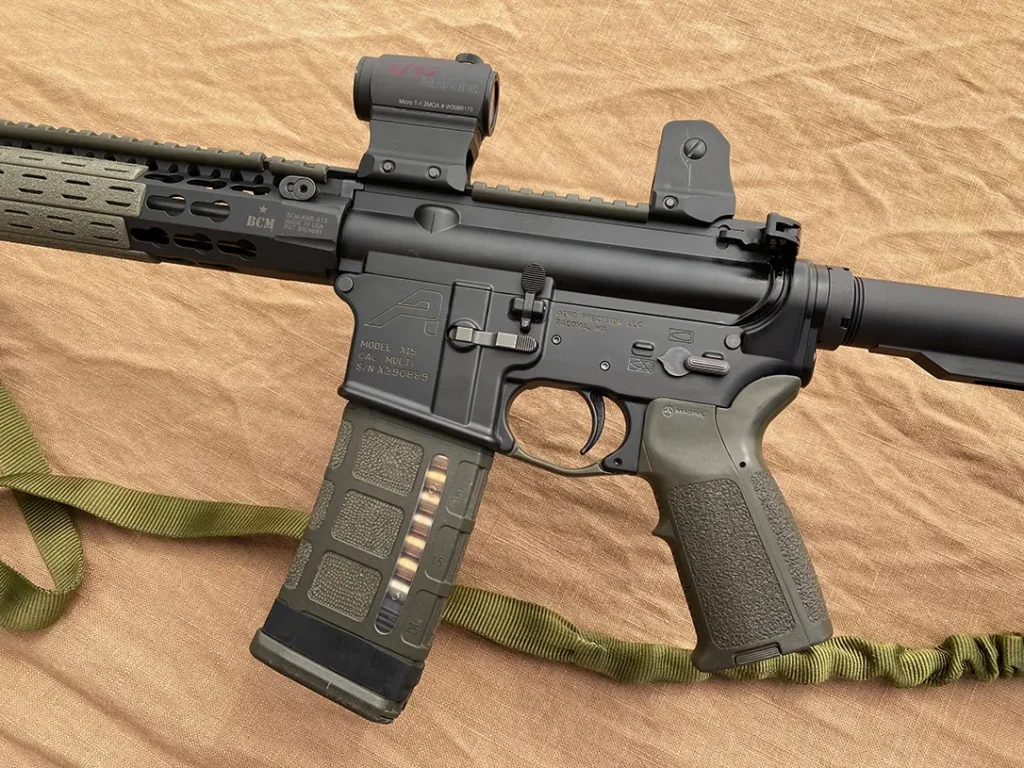
- Handguard: BCM / KMR / 13-inch
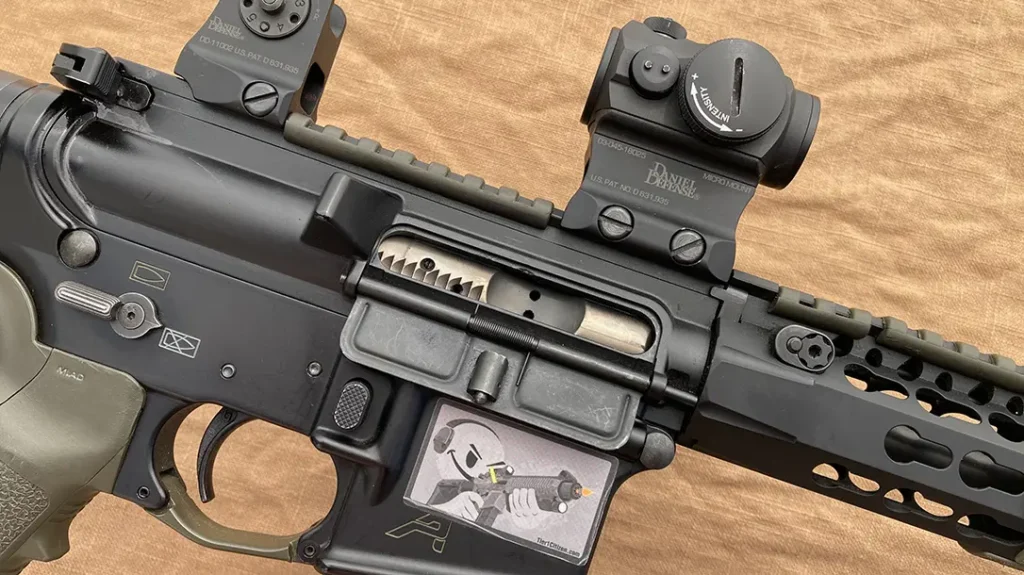
- Upper: Aero Precision / M4 Upper / No Forward Assist
- Lower: Aero Precision / AR15 Carbine / Milspec Lower / Fortis QD End Plate
- BCG: Aimsurplus / Milspec / NiB Coated
- Grip: Magpul / MIAD
- Trigger Guard: Magpul / MOE Polymer
- Stock: Magpul / CTR
- Trigger: Geissele / SSA
- Safety: SOLGW / Mil-Spec Ambi
- Mag Catch Left Side: NORGON Ambi
- Mag Catch Right Side: Seekins Precision / Billet
- Magazines: Magpul / P-MAG Maglevel / 30 Rounds
- Sights: Daniel Defense / Fixed / Rock & Lock
- Optics Mount: Daniel Defense / Micro Mount / Rock & Lock
- Optic: Aimpoint / Micro T-1
- Light: Surefire / X300U-B
- Sling: Tier 1 Citizen / 2 Point Bungee Sling
Assembling The Gun
My focus when building a rifle used to be almost entirely about the weight of the gun. I had an inane fascination with building rifles that were as light as possible. In so doing, I sacrificed the actual comfort of shooting the gun. Why? Because if you’re shooting a gun that is too light, the recoil will be a little bit on the higher side. To mitigate that you now have to start using an adjustable gas system, which means you have now added another potential failure point to the weapon.
Now, my focus is to build rifles that will shoot a wide range of ammunition and are as reasonably light as I can make them, without having to employ the use of exotic alloys to attain that weight. Really what that comes down to, don’t put a bunch of stuff on your gun that you don’t need just because you want to look like an operator.
Advertisement — Continue Reading Below
Most of what I chose for my rifle are components I’ve used for years, because they’ve proven themselves to me. Magpul because they make the best accessories I’ve ever used. Surefire because their lights, cans, and muzzle devices actually do what they say. Geissele because I like triggers that create a bio-mechanical link between me and the rifle. BCM handguards because they go on straight and true and are built like trucks. Ballistic Advantage because I like hitting things from distances that keep bad guys at bay. Aimpoint because I like optics that run for decades, in harsh environments, with nothing more than cleaning, and occasional battery changes.
The final component is the sling, and I need to make you aware that the Tier 1 Citizen: 2 Point, Bungee Slings I use are of my own manufacture. I hand make them from 100% USA-sourced materials, and I stand behind them, no matter what. I designed them many years ago because I was attending a lot of training and kept having issues with production-level slings. Necessity is the mother of all inventions.
Advertisement — Continue Reading Below
First Rounds
I don’t follow any kind of break-in period, as was a thing back in the day. Today’s melonite-coated barrels are so smooth, inside and out, that there really is nothing to clear out of the rifling. Once a rifle is built, I will pass a Boresnake through the barrel a couple of times to ensure that anything that may have made its way into the barrel during shipping is thoroughly removed.
Also, that little bit of oil that’s deposited into the barrel from the Boresnake helps start the bearing process of creating a combination of copper and carbon that gets smeared down the barrel. This helps with the process of getting your rifle to button up tight.
What do I mean by that? Whenever you get a new rifle on the range and start working with it, you can pretty much bet you’re going to have some form of malfunction. A combination of today’s low-pressure ammunition, and/or an over gassed rifle leads to initial malfunctions. What we typically see are extraction issues, short stroking, failures to load, and loose components.
Advertisement — Continue Reading Below
Why? Because the upper receiver is always the problem child. If some corners have been cut when the upper receiver was assembled, it might give you some issues in cycling. All new guns are going to have a bit of a “break-in period” in this respect. The weapon has to have enough rounds through it for every little nook and cranny to start filling with oil deposits, carbon molecules, and copper and brass dust. Once that occurs, it will start becoming buttery smooth and will button itself up “gas tight!”
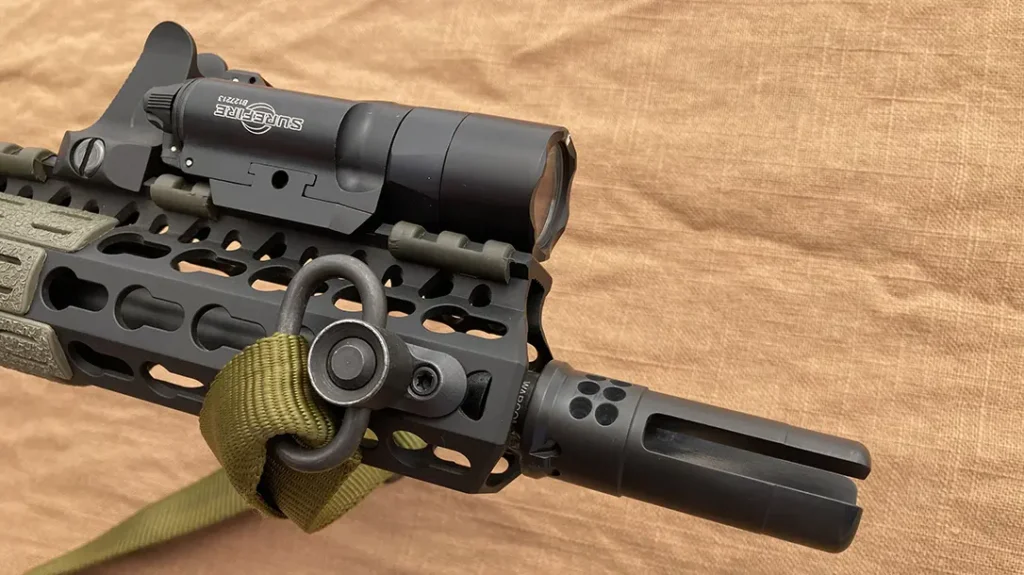
Suddenly your gun will start feeling like an extension of your thoughts. That’s when it’s time to start putting more money into it. Get a good optic like an Aimpoint T-2 or the new C-2 and your accuracy and speed will gel together. Then invest in a good light like the Surefire X300U-B. It is a handgun light, but it is tailor made for Picatinny-equipped applications, which means that you can mount it, flipped upside down, on top of the handguard. Make sure that you don’t advance it past the end of handguard so that it ends up over the muzzle device. All of the impact will soil the light and shorten its service life from excessive vibration.
Closing Thoughts
Invest in yourself by spending the least amount possible to get yourself operational, with a good rifle, and a lot of knowledge. Then start adding to yourself and that weapon. Remember how I mentioned Aimsurplus and the Police trade-in weapons? I wasn’t kidding. I’ve done it, and I’ve gotten some amazing deals. Yes, you’re going to get a rifle with some dings and scratches, and potentially a bit of rust. That doesn’t matter. It’s gonna look that way after you attend your first three-day rifle class. You don’t need much to get you off the ground. A good rifle, some hard sites, a good sling, a whole bunch of ammunition, a shot timer, and some property to train on. Go to it folks!
13.7-inch AR-15 Carbine Build Products
- Aero Precision: https://www.aeroprecisionusa.com/
- Aimpoint: https://aimpoint.us/
- Aimsurplus: https://aimsurplus.com/
- BCM: https://bravocompanyusa.com/
- Geissele Automatics: https://geissele.com/geissele-giveaway
- Magpul: https://magpul.com/
- Personal Survival Solutions: https://www.personalsurvivalsolutions.com/
- Surefire: https://www.surefire.com/
- Tactical Defense Institute: https://www.tdiohio.com/
- Tier 1 Citizen: https://tier1citizen.com/