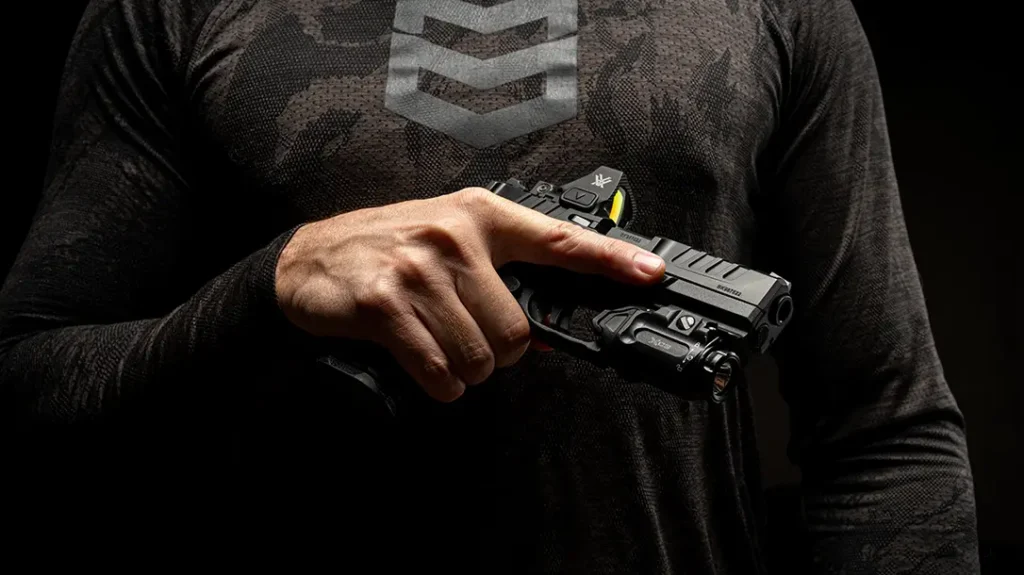
If you want to watch the fun little video we put together on this Glock 22 junkyard build, scroll to the bottom of this post.
Purchasing a gun can be expensive, and many people are forced to compromise due to budget constraints. They may sometimes pass on exactly what they want because they just can’t afford it. But this is where the used firearms market comes in, as you can find some amazing deals here.
Advertisement — Continue Reading Below
What if you find a used firearm that was a great performer back in its prime but has been used and abused during its life? Maybe it just has cosmetic issues. Maybe the issues are more mechanical in nature. Many people don’t understand how simple it really can be to refurbish a beat-up firearm. That’s why I decided to do just that and show everyone that it is sometimes better to buy used than new when it comes to guns.
The Starting Point
First off, I needed a budget. I wanted to build something popular that many people would relate to and do it all within a reasonable budget. After some serious thought, I decided a Glock was the way to go for this one. I wanted to make a custom Glock that was better than the original, so I set my budget at a realistic $850.
Obviously, I needed a gun. I hit up a few local pawn shops and gun stores, but everything I found was just too expensive. I didn’t want to eat up half of my budget just purchasing the gun. So I began looking for something really beat up. I wanted to show a true rag-to-riches story. Then I noticed a trend when it came to pricing Glocks online, namely that .40-caliber pistols were much less expensive than other chamberings. However, I’m really not a fan of the .40 S&W in general.
Advertisement — Continue Reading Below
That said, when I couldn’t seem to find a better deal, I settled on a .40-caliber Glock 22 for only $180. With shipping and everything, I only ended up spending $200. And, man, was it beat up!
My New Glock 22
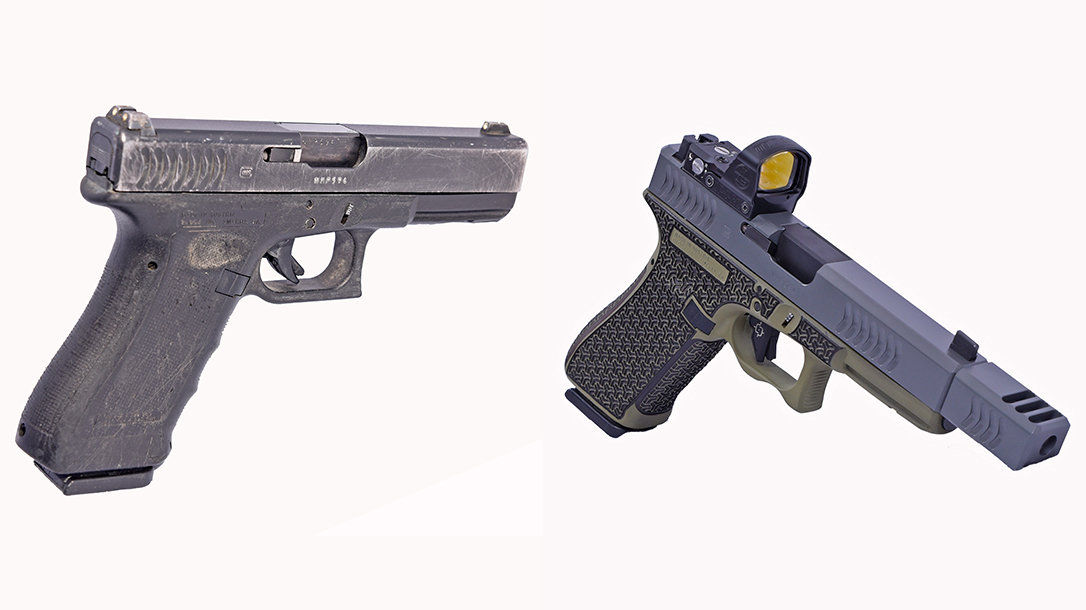
After the gun arrived, I opened its box to find scratches, gouges, cracks, dirt and, oh yeah, the gun’s .40-caliber markings. Someone had retired this thing for a reason. But to me, it was the perfect starting point. It could only get better from here!
All of the cosmetic issues were matched with a very poor trigger and a messed-up magazine release. The Glock 22 also turned out to be a very rare Rough Textured Frame 2 (RTF2) model that came out in 2009. While the frame design was a bit contentious on its own, the fish-gill-like serrations on the slide were quite unpopular. That’s why Glock did away with them shortly after releasing its RTF2 models. The company kept the RTF2 frames for a little while longer, however. This makes my Glock 22 quite rare in the Glock world these days.
Advertisement — Continue Reading Below
The Makeover
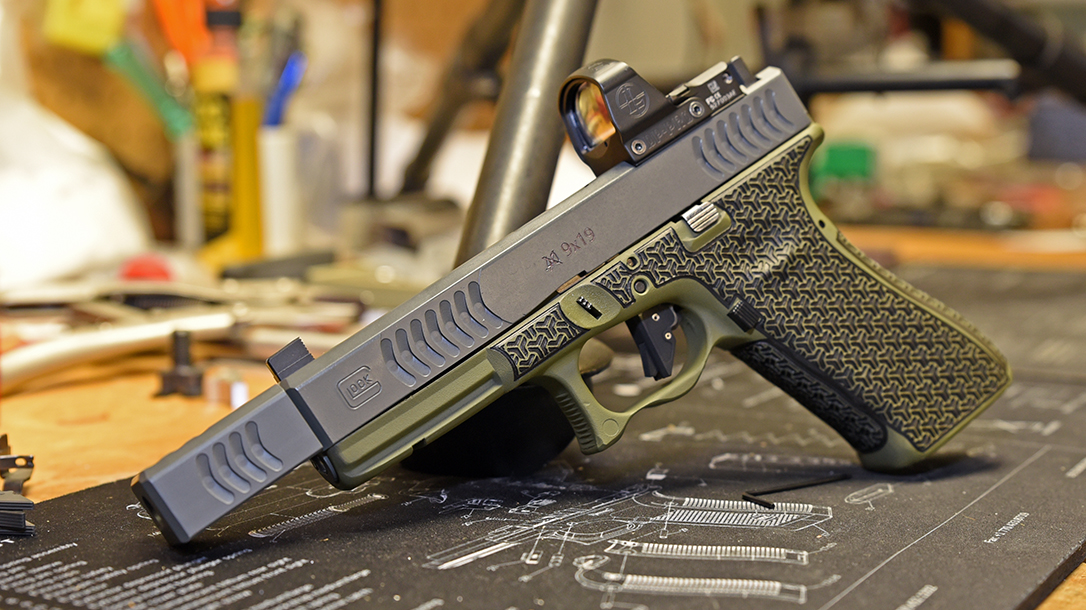
My first task was figuring out if I could convert this Glock 22 from .40 S&W to 9mm. As mentioned, I’m really not a fan of the .40 and didn’t want to have to add another caliber to my ammo locker. So, I decided to get an AlphaWolf conversion barrel from Lone Wolf Distributors that slipped right into the slide and made my Glock 22 a 9mm. I also decided on a threaded model so I could add a compensator, but the barrel also looks cool on its own with just the thread protector in place. After that, all I needed was an extractor and a new magazine to complete the transition.
Since the gun was pretty beat up and I was switching to the 9mm, I also picked up a stainless steel guide rod and a new recoil spring from Lone Wolf. This combination cut into the budget a little more than I wanted, but I feel it was worth it. The Lone Wolf order set me back $185.
Fish Gills
The next step was to figure out what to do with the slide. Those RTF2 fish gills are kind of ugly, but they also made the Glock stand out a bit. So I decided to get some matching serrations on the front of the slide. I didn’t want the back cuts to be curved and the front to be straight, harsh lines. And the machining needed to look stock, too.
Advertisement — Continue Reading Below
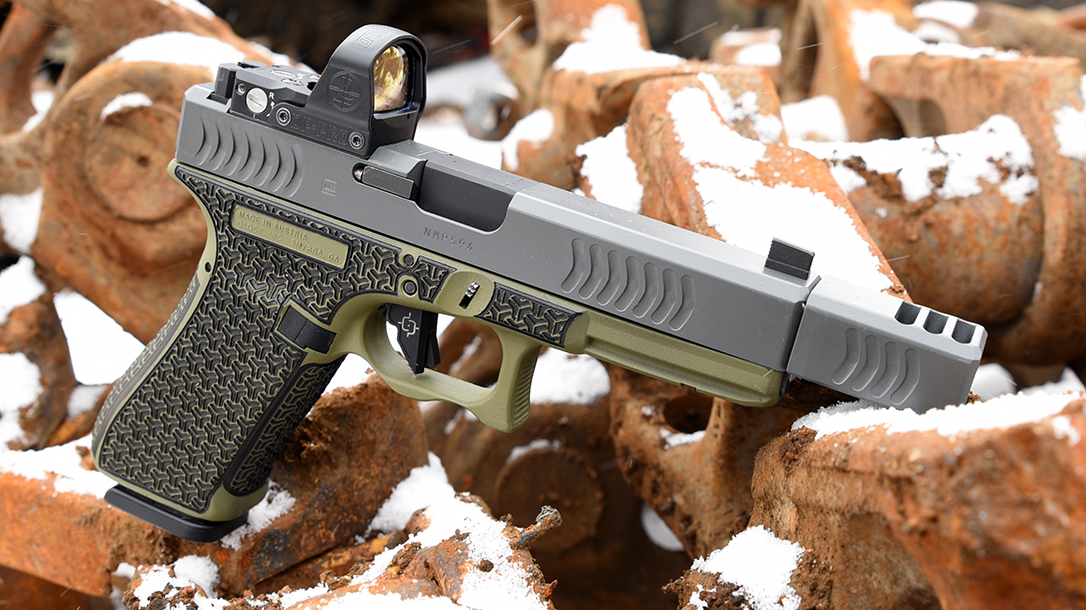
I finally found Continuous Precision, and the company’s owner, Jeff, was on board to take on the task of recreating the RTF2 fish gills on the front of the slide to match those at the rear. Continuous Precision hit a home run on the finished product, as the front slide serrations look like they have always been there. Then the company beveled all of the slide’s edges for a clean, smooth look that’s even better than the factory finishing. All told, Continuous Precision’s work added another $175 to the project.
The Odin Touch
After the slide work, it was time to address the Glock’s beat-to-hell frame, which looked like someone had used the gun as a hammer at some point. I wasn’t a huge fan of the weird RTF2 grip anyway, so I wanted to smooth everything out and add some stippling. Continuous Precision put me in touch with Odin’s Workshop to help out with the frame and perform some Cerakote work.
Advertisement — Continue Reading Below
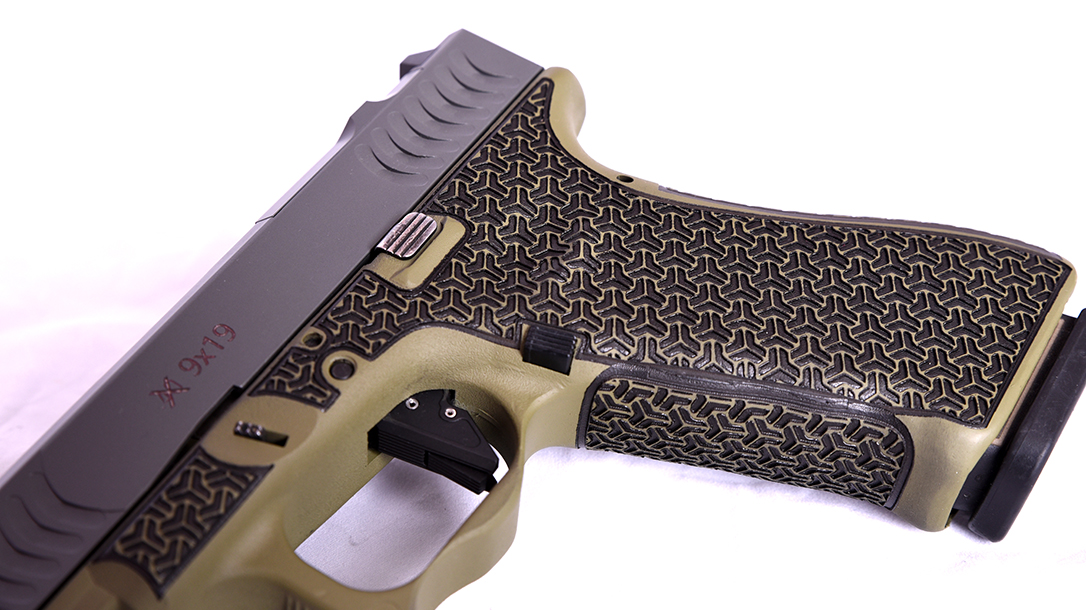
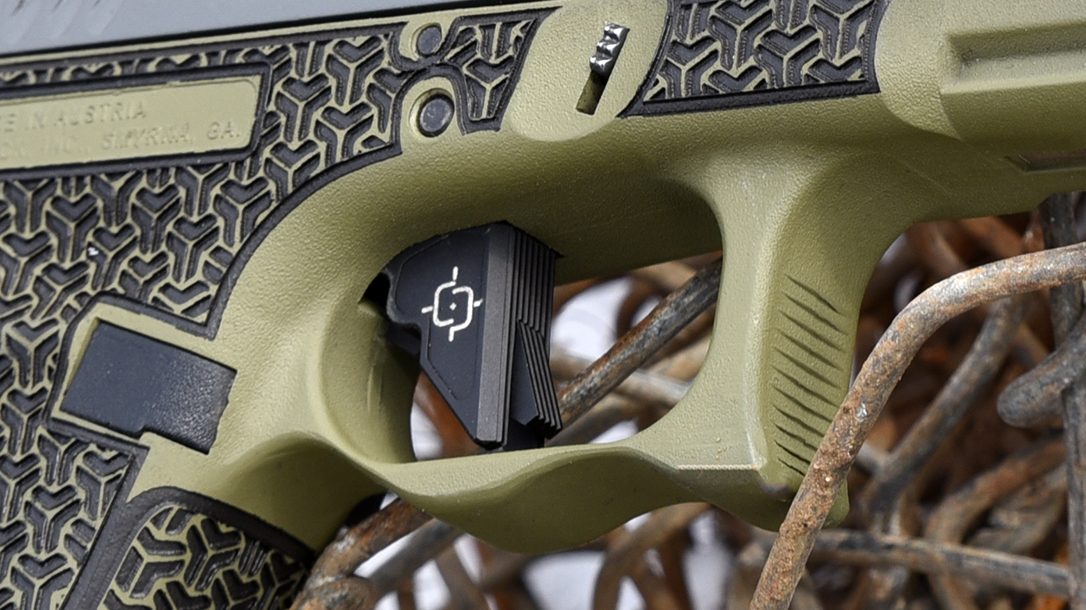
Odin’s Workshop took this gun over the top. This custom shop does some of the finest laser stippling on the market as far as I am concerned, and it took a frame that most people would probably throw away and created a work of art. When I got my Glock back from Odin’s, I had to check the serial number because I didn’t believe it was the same gun. There were no sharp edges, gouges or small cracks. Odin’s Workshop also gave the frame a double-undercut triggerguard.
The hardest decisions I made regarded the frame’s laser stippling pattern and color scheme. I decided to get a Tetris laser stippling pattern on the frame, and then Cerakote’s new Elite Series Jungle finish to accent it. The slide was then given a durable Elite Series Concrete Cerakote finish.
The entire trip to Odin’s resulted in the biggest bill for this build, but it was necessary. The company did an incredible job and even threw in a little bonus by lasering an “X” through the “.40” on the slide and etching “9×19” into the slide instead. All of this work cost $325 total, with the laser stippling on the frame accounting for $220 of that amount.
Advertisement — Continue Reading Below
The Icing on Top
I managed to bust my budget by only $35, which took a lot of restraint after seeing everything else I could have done to this gun. In all, I spent $885—only a couple hundred bucks more than a brand-new Glock. Unfortunately, if you have ever owned a custom, one-of-a-kind handgun, you know it’s hard to stop customizing it, especially when you get your tax return back about the same time you finish up your custom build. I have to admit that I went a little crazy with the Glock 22 once I decided to use some of my tax return money. The government pretty much wrote me a check that said, “Pay to the order of gun parts.”
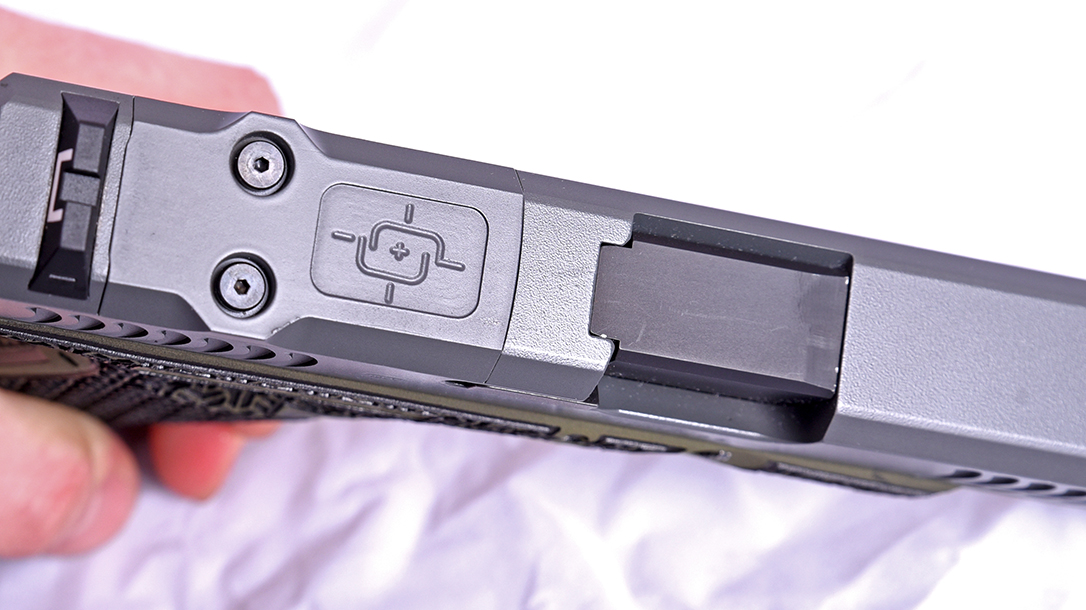
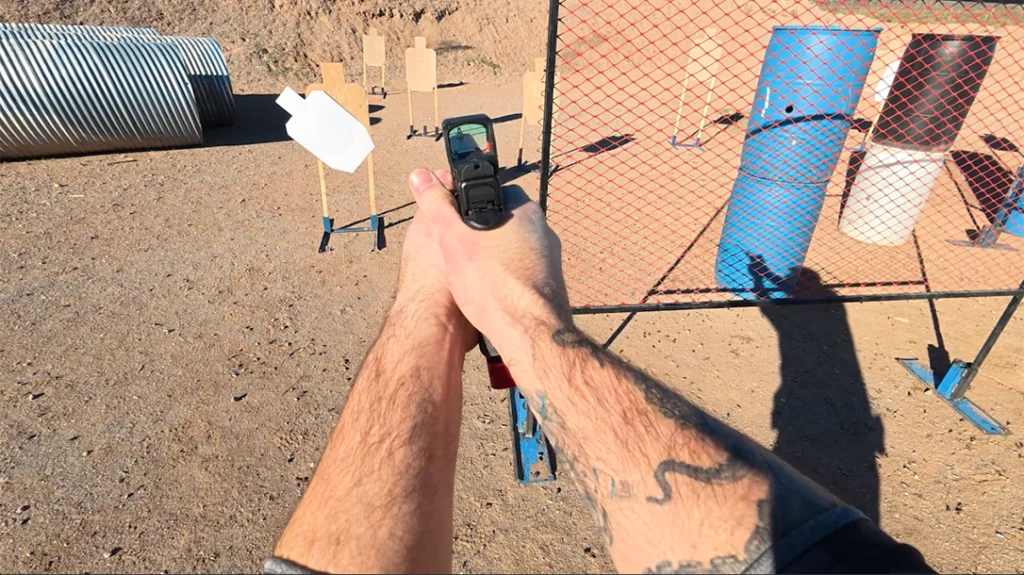
I sent the gun back to Continuous Precision for something it had recommended in the first place—its Duty Series customization package—which involves cutting the slide to accept a miniature reflex sight. With this lovely upgrade, I installed a Leupold DeltaPoint Pro. Why? Because it has a tough magnesium housing and some of the clearest glass I have ever seen on a reflex sight, making it a perfect choice for a pistol-mounted optic. The DeltaPoint Pro runs on a single CR2032 battery and is lightweight with a minimalist design.
I wanted to co-witness my iron sights with the reflex sight, so Continuous Precision designed some taller custom sights for the updated Glock, and installed a new trigger that is a vast improvement over the stock unit. Finding a good Glock trigger isn’t too hard. I also picked up an AlphaWolf compensator from Lone Wolf and had Continuous Precision match the muzzle device to the slide by beveling the edges and putting the same RTF2 fish gills on it.
Advertisement — Continue Reading Below
Final Touches on My Glock 22
Finally, Continuous Precision provided a cover plate for the slide in case I removed the DeltaPoint Pro. The total price for all the new Continuous Precision worked tallied up to $430, the Lone Wolf compensator came to $40, and I found the DeltaPoint Pro for $399. Odin’s Workshop refinished the slide and compensator for $20.
Now I have a badass, one-of-a-kind Glock 22 that started as a piece of junk and came out looking like a million bucks. So the next time you are in the market for a new gun, think about use an old one instead.
For more information, please visit the following sites:
Advertisement — Continue Reading Below
- Continuous Precision: cpcustomguns.com
- Leupold: leupold.com
- Lone Wolf Distributors: lonewolfdist.com
- Odin’s Workshop: odinsworkshop.com
This article is from the 2019 Concealed Carry Handguns edition of Personal Defense World magazine, available May 7. Grab your digital and physical versions at OutdoorGroupStore.com.
