Having a strong foundation is essential to consistent, accurate shooting, whether it’s with a handgun or long gun. As a range master in the United States Navy for many years, where I taught a lot more than square range shooting, I worked with a lot of sailors. Consequently, I saw all kinds of different shooting foundations. Not all of them were good.
Initially, I started out shooting small-bore rifles. The fundamentals learned there served as my foundation for years and gave me a base for accuracy—think breathing, sight picture and trigger control. But the small-bore rifle fundamentals I trusted for years proved not to be ideal for the types of shooting I would encounter as part of an expeditionary unit in the Navy. For example, I learned that exaggerated blading in the off-hand position reduced the coverage of any protective equipment I might utilize and in no way helped to tame recoil. Additionally, it didn’t facilitate movement, whether it was forwards, backwards or side to side.
Isosceles and Weaver Stances
There are many different shooting stances and variations, but for this article I’ll only talk about three. These are the isosceles, Weaver and fighting stances, all of which have their own pros and cons.
Advertisement — Continue Reading Below
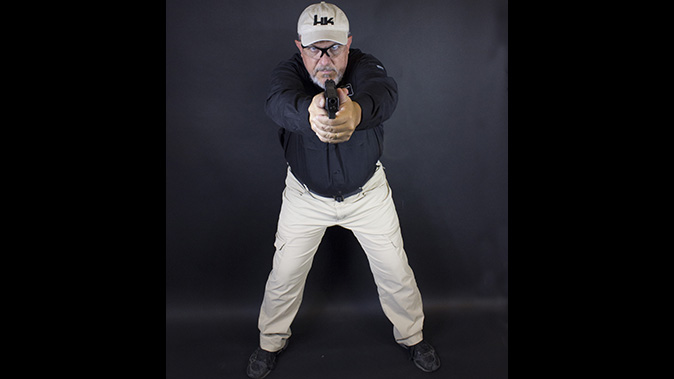
The isosceles stance was taught as the standard for many years. The shooter faces the target, feet shoulder-width apart and even, knees slightly bent, shoulders forward and arms locked out. While this is a very stable position, it does very little to help absorb recoil (think long guns) or provide stability in the front and the back.
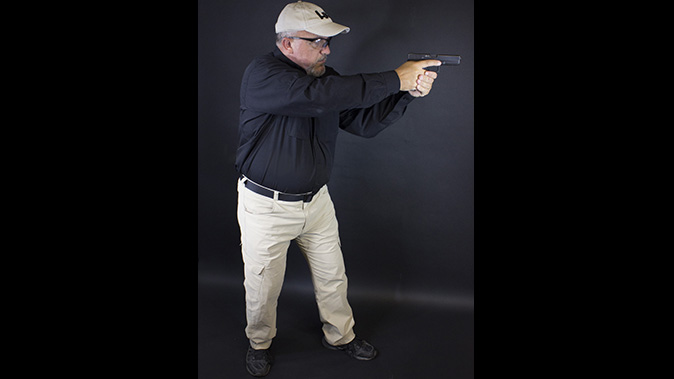
The Weaver stance blades the body, providing a smaller profile to the target. Again, your feet are shoulder-width apart but the non-dominant foot is slightly forward. Your knees are bent, your shoulders are forward, and your non-dominant arm is bent. This provides a push/pull tension in your arms and shoulders. While stable, this position reduces your ability to move efficiently and quickly while maintaining a solid shooting foundation.
Advertisement — Continue Reading Below
Fighting Stance
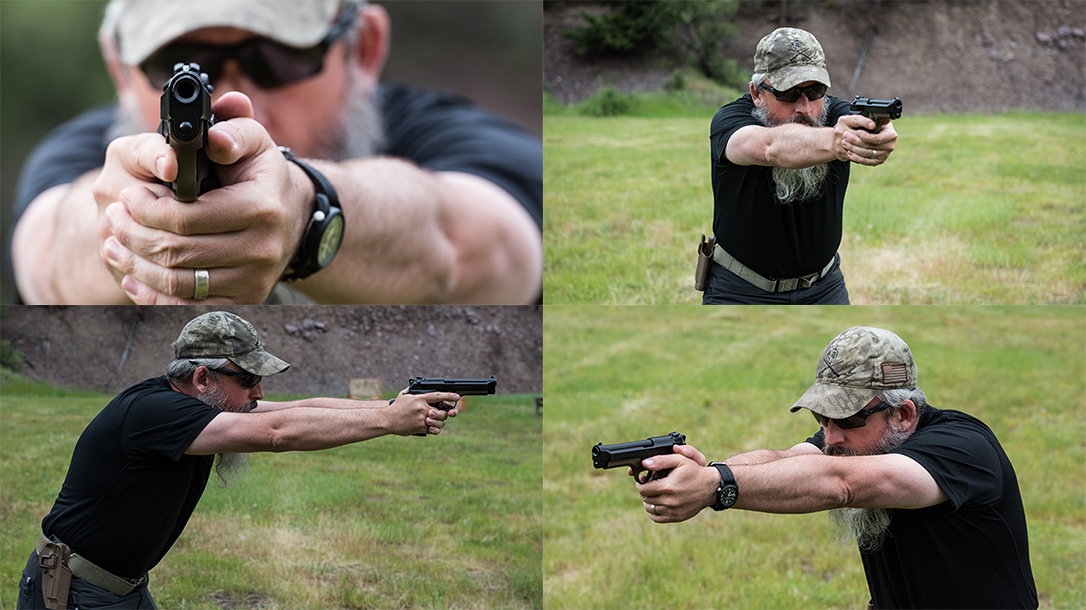
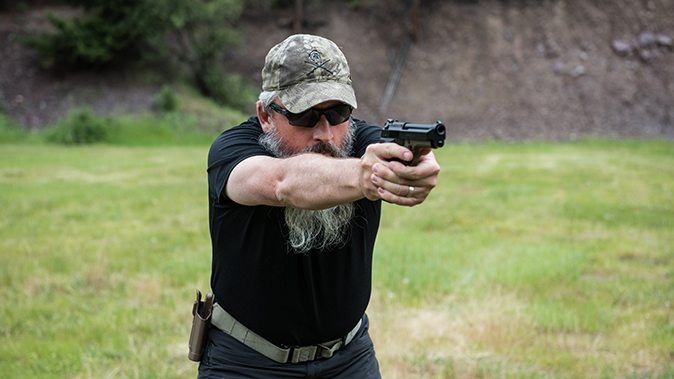
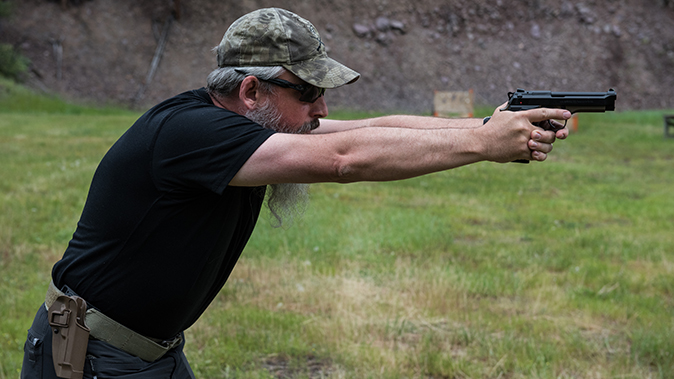
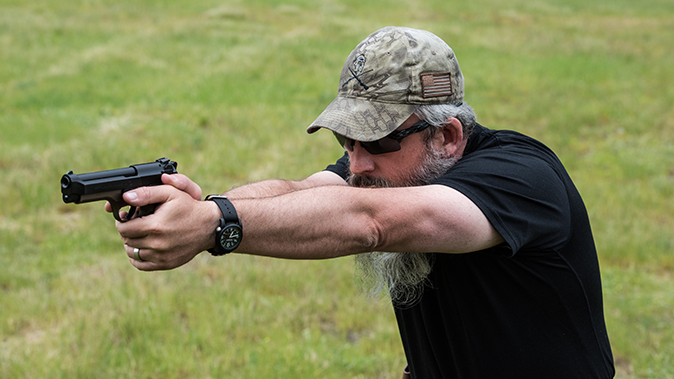
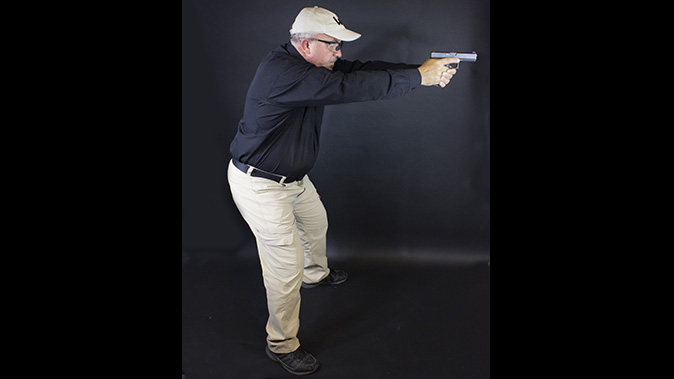
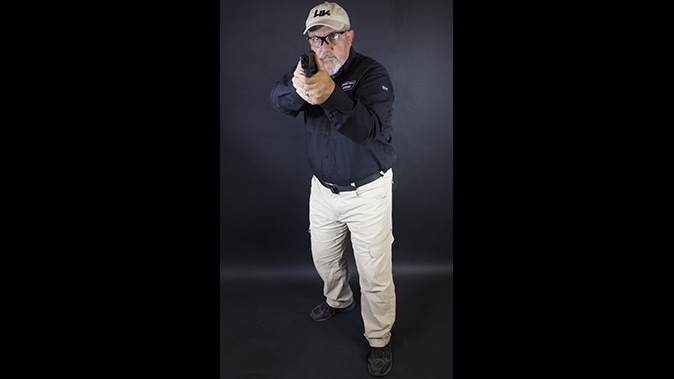
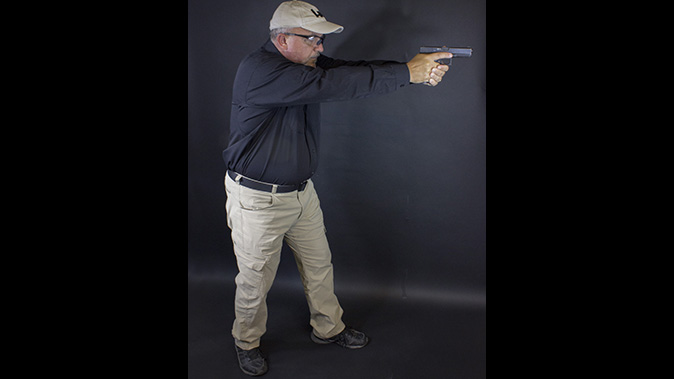
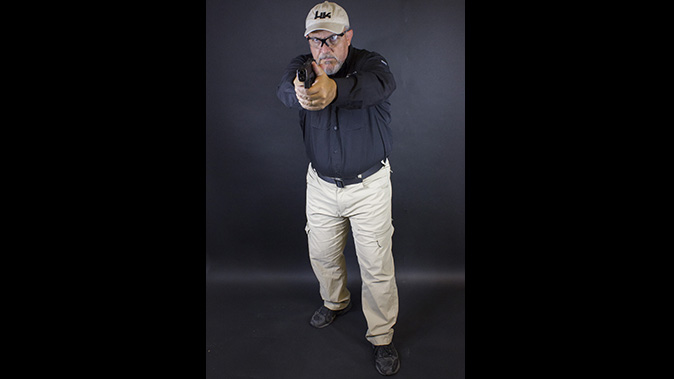
The last stance we will cover is the fighting stance, sometimes referred to as the modified Weaver or boxer’s stance. In my opinion, this is an outstanding foundation that is very versatile. It provides great forward and lateral movement. The shooter can maintain his or her foundation while on the move, and it provides the best exposure for any protective equipment he or she might have. Let’s take a closer look at the fighting stance by breaking it down into several components, including where your knees, hips, shoulders, arms and head should be as well as how you grip your particular firearm.
Feet: You are square to the target with your feet shoulder-width apart. The non-dominant foot is slightly forward. Your weight is evenly distributed on the balls of the feet. Your toes should not leave the ground while experiencing recoil. This is a sure sign that your weight is on the heels of your feet, not your toes where it should be.
Knees: While you don’t want to be straight up and down, you don’t want to be squatting, either. Your knees should have a slight bend to them. In this position, they act as shock absorbers, helping to maintain a level shooting position while moving.
Advertisement — Continue Reading Below
Hips: Your hips should be slightly back and in a comfortable position, helping to keep your weight on the balls of your feet. This allows you to lean slightly forward and provides a stable, smooth base so you can engage targets from side to side.
Shoulders: Rolling your shoulders forward helps reduce the use of muscles to hold the position. Instead, it allows the body’s joints and bones to help support the weight. Keeping your shoulders forward lowers your head and helps you get a quicker sight picture.
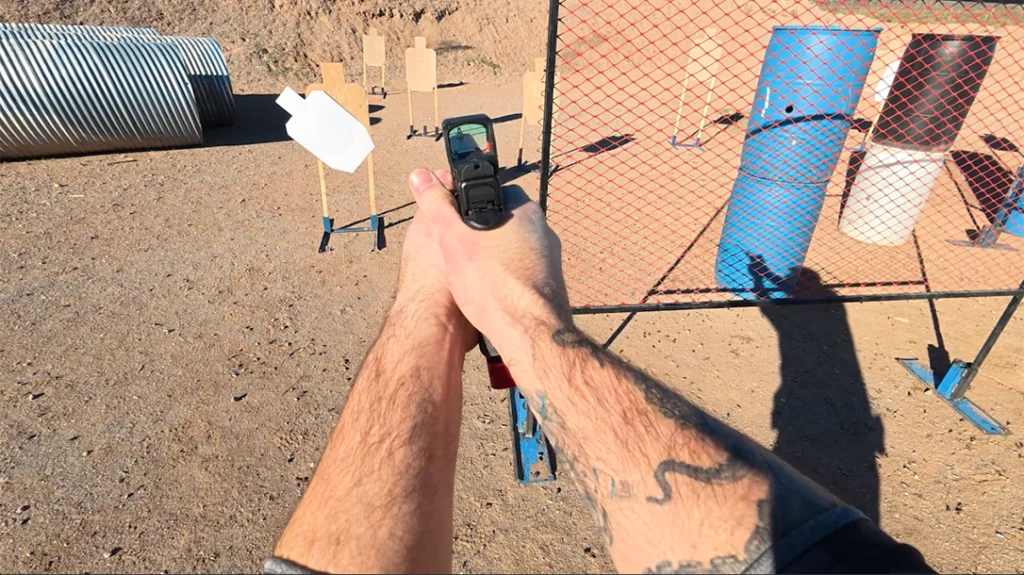
Arms: From this shoulder-forward position, both of your arms should be locked out straight. Your head should be in the middle, not off to one side or the other. Backward tension can be put on both arms equally to help lock in your shoulder joints and reduce the dependency on muscles alone when gripping the firearm. This tension also aids in absorbing felt recoil and maintaining a consistent sight picture, enabling faster, more accurate follow-up shots on target.
Advertisement — Continue Reading Below
Head: Rolling your shoulders forward brings your head, centered left and right, in line with the sights. It does not matter if you are right- or left-eye dominant—the weapon can easily be adjusted for either.
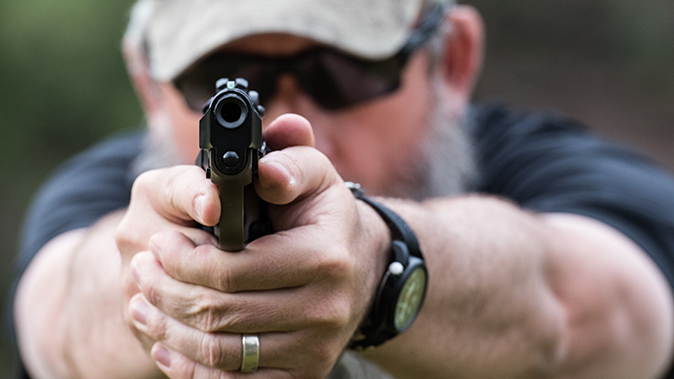
Grip: This section could take several articles all by itself. For this discussion, ensure 360-degree coverage with both hands and exert equal pressure. The webbing between the thumb and forefinger on your dominant hand should be high up on the weapon, with your fingers wrapping around the grip. The meat of your non-dominant hand is placed on the grip portion not covered by the dominant hand, and these fingers wrap lightly over the strong-hand fingers.
Your thumbs should be aligned and pointing at the target, with your strong-hand thumb resting on top of the other. Care should be taken not to let your thumbs rest on the slide lock, as this could prevent the slide from locking open on an empty chamber. Also make sure you don’t “teacup” by placing your support hand under the grip or dominant hand. This does not facilitate a stable grip.
Advertisement — Continue Reading Below
What Works Best
Though we could debate the pros and cons of each stance and its many variances forever, I’ve outlined what’s worked best for me over the years. The fighting stance is a versatile foundation on which to build. Providing a stable foundation for left and right engagements, it is an easy, natural way of pointing at your target. There is ample stability and control while moving or transitioning. It doesn’t matter if you are right- or left-eye dominant. And if you’re wearing protective equipment like a vest, it allows the equipment to perform at its best.
There are many stances out there to choose from. Find the one that works for you and your shooting situation and use it. Once you’ve made your choice, practice, practice, practice until it’s second nature. Because if your foundation is flawed or weak, the rest of your shooting is destined for major problems.
This article is from the January/February 2018 issue of “Combat Handguns” magazine. To order a copy and subscribe, visit outdoorgroupstore.com.
Advertisement — Continue Reading Below
