Some days, the world can seem like a really small place. My brother-in-law, Jim Wilson, recently told me that he wanted me to meet a new member of his church. The guy had a common interest in guns, he said. A few days later, I was discussing 80-percent weapon builds with my editor and the new “players” in the business. Then, when my wife and I visited my brother-in-law’s church, where we met Dan McCalmon—not only a fellow firearms aficionado, but also the national sales manager for Polymer80.
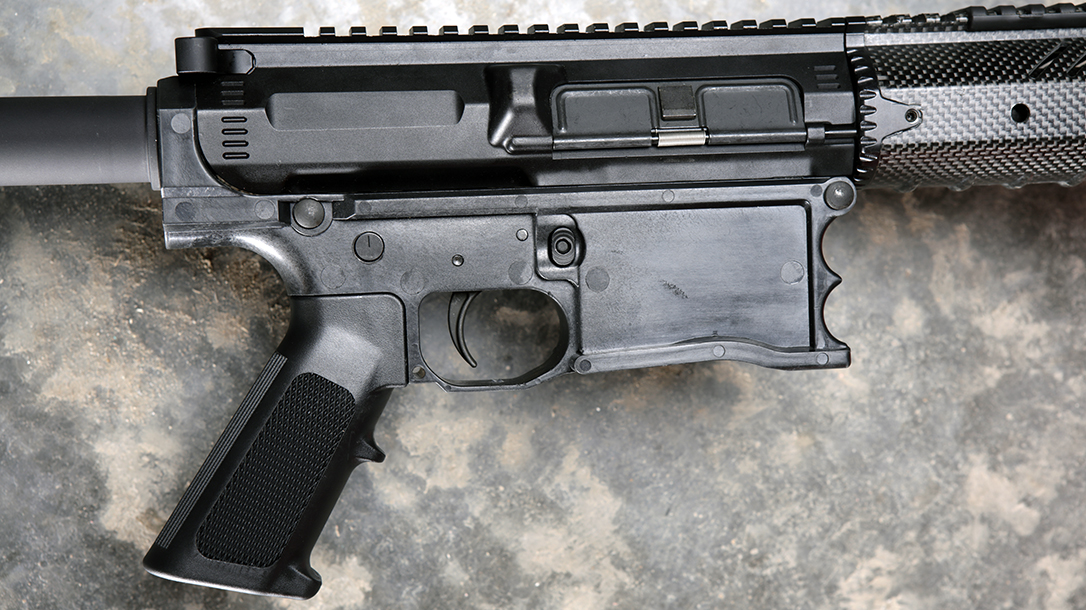
Within days, I was building, finishing and testing a .308 Winchester/7.62mm NATO rifle using a new Polymer80 lower receiver kit—the most recent addition to the company’s other AR and Glock-like products.
Advertisement — Continue Reading Below
Enjoying Freedom
I drove 15 minutes to Dan’s shop to get some firsthand coaching for my first 80-percent lower, but first we talked about his recent move to the Volunteer State. When I asked why he had moved, he said, “To escape California oppression. Actually, extended family members moved here, and we followed. We wanted to move to a more family-oriented state for our kids.” McCalmon has lived in Middle Tennessee for five years, but just recently moved to the “country.”
“After I moved to Tennessee, all my friends asked me what it was like, and I told them that I finally felt like I got to America,” McCalmon said. “When I bought my first firearm here, when the guy I bought the gun from said, ‘You’re good to go,’ I just stood there. I couldn’t believe there wasn’t more to the process. It’s nice to be in a place where somebody isn’t going to tell me what to do with my guns.”
Building Your Own
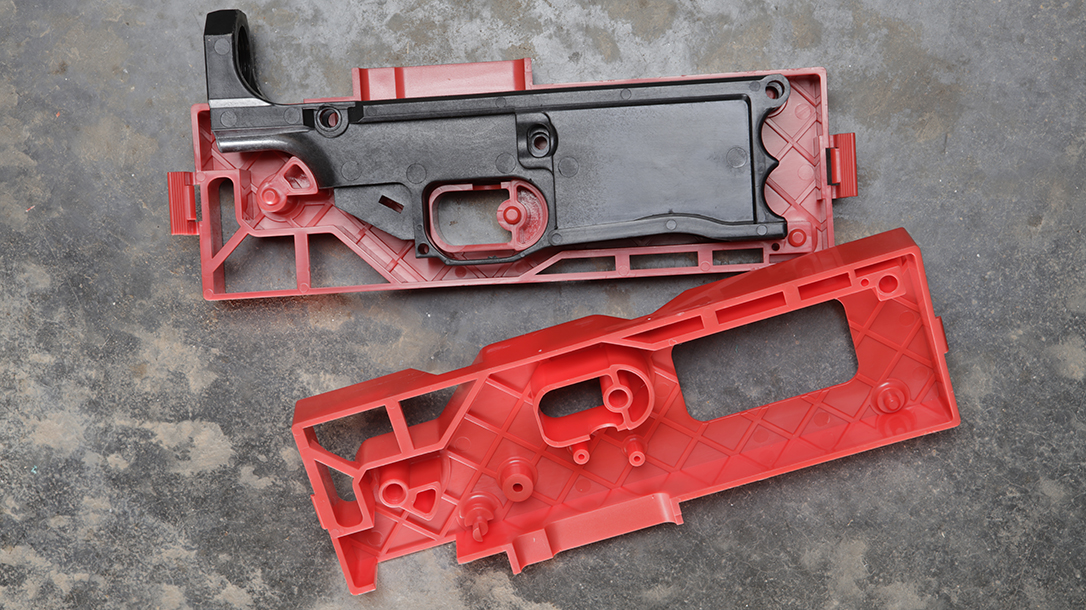
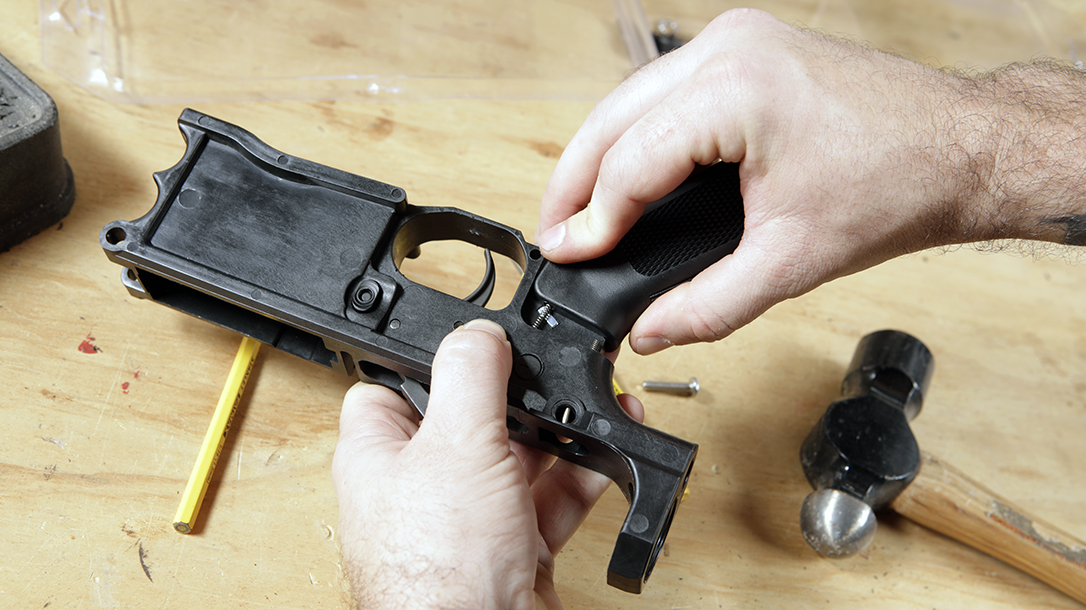
Then it was time to start building. To get an idea of how simple milling an 80-percent lower can be, let’s review the parts list for Polymer80’s .308 Lower Receiver & Jig Kit. You get an 80-percent fiberglass-reinforced polymer lower receiver, a Warrhogg .308 jig; a trigger guide; a 7/16-inch end mill bit; 3/8-, 5/16- and 5/32-inch drills bits; and a screw and nut for installing the pistol grip. To finish out the build, Polymer80 also offers an $86 Lower Parts Kit.
Advertisement — Continue Reading Below
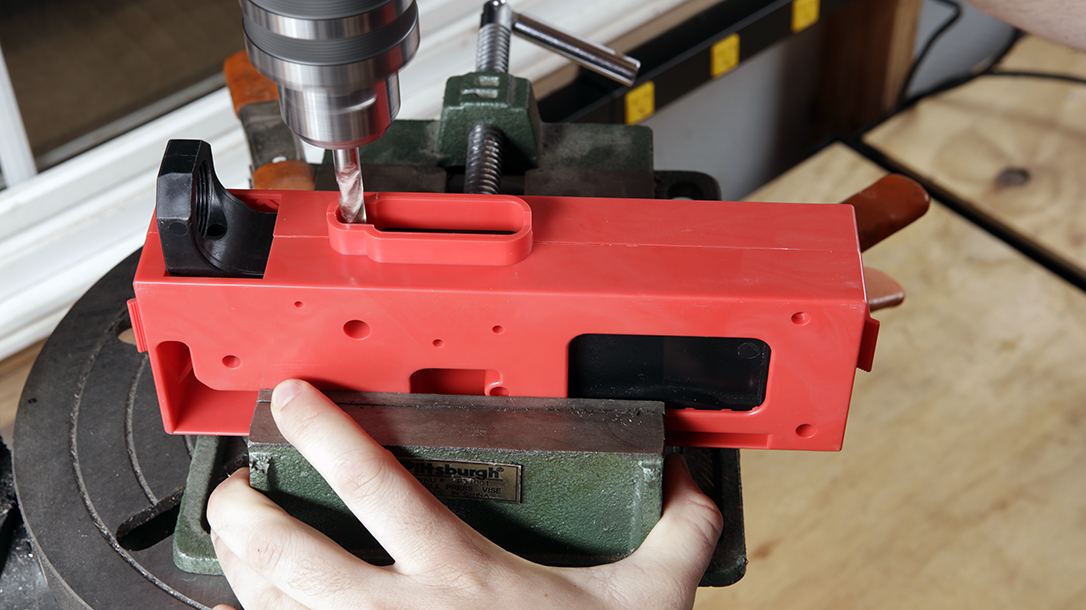
We utilized a drill press for most of the process, and a word of advice: Be sure the jig is level in the drill press’ vise. Other tools that will come in handy are a Dremel tool, a bench vise and a handheld drill. “I prefer to utilize the drill press because it is faster, requires less time to set up, and you have absolute control if the vise is utilized properly,” McCalmon said. “Use a Dremel tool for fine-tuning after utilizing the drill press or milling machine. The challenge with the Dremel is to shave off small amounts. Don’t get in a hurry.”
Even though Polymer80’s website has a pretty good PDF describing the whole process, McCalmon took a bit different approach. He suggested milling out the trigger group pocket prior to drilling various pinholes in the sides of the receiver. But it doesn’t seem to matter which order you prefer.
Polymer80 Milling Time
The milling and parts assembly took less than two hours. Here are the steps we took:
Advertisement — Continue Reading Below
Step 1
Snap the jig around the lower receiver. Set the small red trigger guide aside for the moment. Make sure that the front and rear snap clips are firmly closed. On the drill press with the jig and lower tightly installed on the vise, install the large regular drill bit used for the safety selector holes to create a pilot hole in the fire control pocket area. Don’t drill too deep; do not penetrate beyond 40mm from the top of the jig to be safe. This hole will help once you start using the end mill bit.
Step 2
Insert the end mill bit on the drill press and adjust it so it is hovering out over the center of the fire control pocket where your pilot hole was drilled. The material used to create the lower is extremely tough. Therefore, while using an end mill bit, it will create lots of tension and vibration if things aren’t tight.
Adjust the drill press stop to 44.5mm. Notice that the end mill bit also has a black mark that indicates a depth of 44.5mm. Start drilling down slowly through the pilot hole, taking just small sections of material off slowly. Go down exactly 44.5mm, watching the top of the jig and end mill bit. Don’t allow the black line on the end mill bit to go below the top of the jig. During each and every drill procedure, visually check to make sure the bit is not sliding up or down within the drill press chuck.
Advertisement — Continue Reading Below
(There’s a slight yet important indentation that you can’t drill through because the safety selector detent hole is drilled through this area, underneath the lower near the pistol grip.)
Step 3
Once this hole is done, you can start clearing out material from the wider fire control pocket area. It’s important to clean out the hole so you can see what you are doing. A strong light and a shop vacuum are useful. “When you drill and clean out the main fire control pocket using a milling procedure, it’s important to note that the drill bit in a drill press is spinning in a clockwise direction towards you, from right to left,” McCalmon said. This keeps the end mill bit from “grabbing and running.”
Step 4
Use the drill press to clear out the majority of the core section, plunging and lifting the press, moving to the next section, plunging down again, etc. After using the drill to remove a majority of the material, use the mill end bit as it was intended by moving the jig back and forth while holding the bit at its lowest position.
Advertisement — Continue Reading Below
Step 5
Now move to the rear side of the pocket where the safety selector is installed. Drill straight down the middle, then go back and start on the right side, swinging down, around the edge, and then back towards the front of the receiver. Don’t mill out the indentation on the magazine release side.
Step 6
The next step is to drill the side pinholes for the hammer, trigger and safety with the lower receiver in the jig. Put the jig and lower in a regular vise on your bench, select the proper bits provided and drill on one side only, then flip the jig and drill the holes on the opposite side. Don’t try to drill through both sides at one time or the bit will drift and created misaligned holes. These holes have to be exact.
Step 7
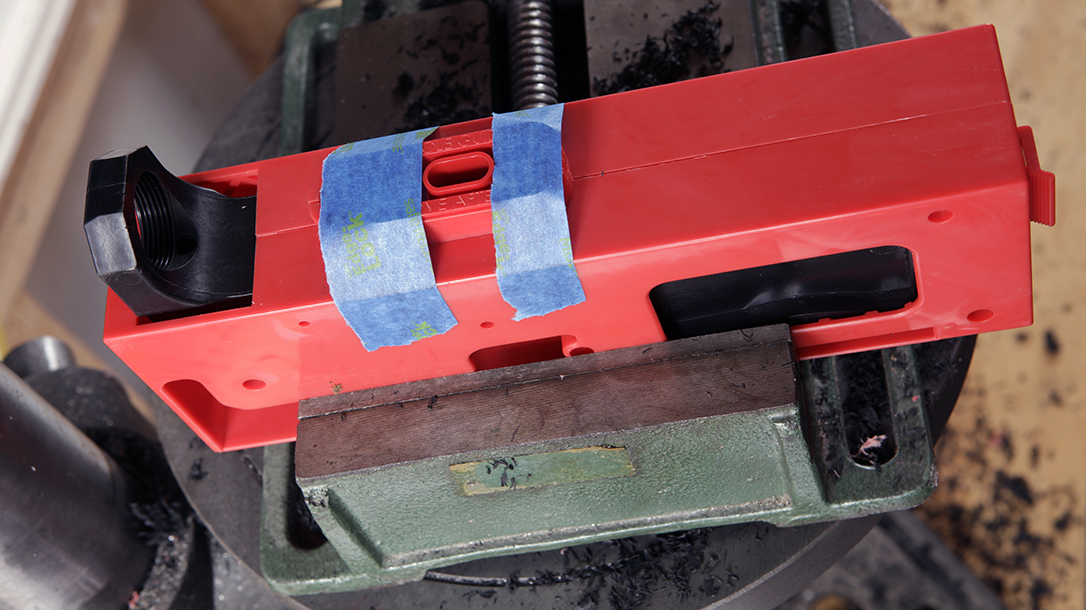
Move the jig and lower back to the drill press, and secure them in a vise. Once the trigger guide is snapped and securely taped into position, use the 5/16-inch bit to drill out the trigger hole. Drill down slowly, letting the drill bit do the work. Don’t allow the drill bit to float sideways out of alignment as it passes through the receiver. Drill all the way through, then clean out the trigger hole with a small Dremel.
Advertisement — Continue Reading Below
Step 8
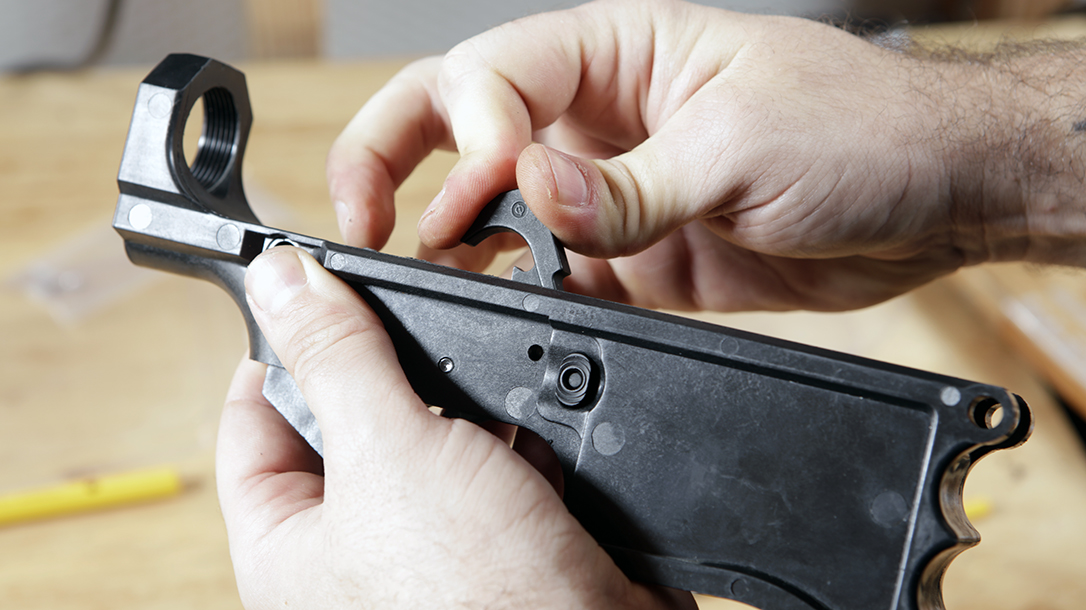
Next up is installing the trigger. It should just drop straight down into position cleanly, but it rarely happens without some additional fine tuning. Using the Dremel bit on the slowest setting, carefully and slowly trim surfaces to make sure the trigger operates smoothly. The rear section on the left side of the trigger well is where you need to be careful not to penetrate too far. The safety selector switch detent and spring are very close to this area, and mil-spec dimensions leave very little room for error.
Step 9
After installing the trigger, it’s time to install the safety and other components like the pistol grip. Some touchups with the Dremel might be required to help the pins fit better. And a few strokes with a round 0.303-inch machinist’s file measuring can also help for tuning the safety and takedown pinholes.
Advertisement — Continue Reading Below
Wrapping It Up
All that was left was to mate it with a Proof Research upper receiver. The carbon-wrapped barrel’s light weight made for a nice, fast-handling .308. Then I hit the range with several miscellaneous loads. I loaded up a 20-round Magpul PMAG several times and sent rounds downrange with only one problem that I couldn’t necessarily attribute to the lower receiver. The bolt failed to lock back after firing the last round, which is typically a gas regulation issue.
Getting a bit more focused, I selected three factory loads to get some accuracy testing completed. I mounted a Bushnell Engage 3-12x42mm scope and got the rifle dialed in pretty quickly. The first load was my go-to, Federal’s 168-grain Gold Medal Match BTHPs. This load put five rounds into 1.23 inches at 100 yards.
The next load I tested was Black Hill’s 168-grain Match ammo, which had a slightly wider group measuring 1.48 inches. And my last group, just 1.52 inches, came with 168-grain Federal American Eagle OTMs. So, as you can see, the end result is an accurate rifle that can keep groups under 2 inches out to 100 yards.
Advertisement — Continue Reading Below
AR-15-style 80-percent lowers have been around for a while, but Polymer80’s new .308 kit is a lightweight option that you can build on your own. Couple it with a matching upper and you’ve got a functional weapon that can provide loads of fun.
For more information, visit polymer80.com.
This article is from the November-December 2018 issue of Tactical-Life magazine. Grab your copy at OutdoorGroupStore.com. For digital editions, visit Amazon.
