A DIY paracord rifle sling is easier than you probably think. For our family in the wilds of Idaho, 550 paracord is like the American Express card is to city slickers—we never leave the homestead without it! And you can bet on this, if yesteryear’s mountain men had 550-pound-test paracord at their disposal, they’d have packed it into their possibles bags without blinking an eye.
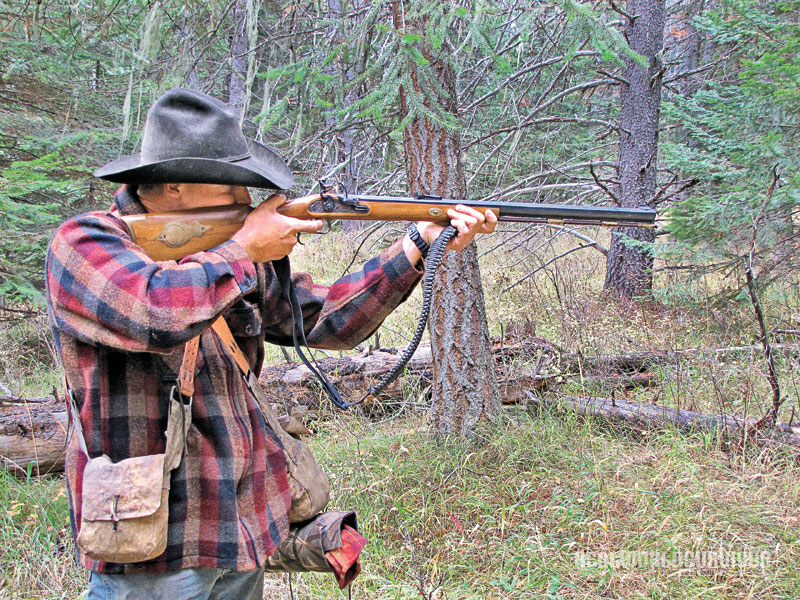
Each member in our family carries a well-thought-out pack of equipment into the wild, whether it is a hiking trip, a hunting trip or we are enjoying time in the backcountry for a couple of days. Carrying the right tools is essential to our survival, and light weight, multi-purpose tools are chosen for the job. One of the items we carry is an item our son made for each of us, an adjustable 550 paracord-wrapped gun sling for each of our Rossi Trifectas.
What You’ll Need for Your Paracord Rifle Sling

Advertisement — Continue Reading Below
- (1) Inexpensive, adjustable rifle sling
- (1) 0.75-inch D-ring
- (2) rivets
- (1) 0.75-inch-wide by 1.15-inch-long piece of scrap leather
- (1) 75-inch piece of paracord
- Lighter
- Leather hole punch or a nail
- Hammer
- Scissors, pliers and tweezers
Starting the Paracord Rifle Sling Build

To get started you will want to place the inexpensive, adjustable sling on your gun to gauge how it fits you best while wearing only a T-shirt. Leaving the sling set on your comfortable, casual setting, remove the sling from the gun and place it on a solid surface so you can work on adding the leather and D-ring to the sling. Place a scrap piece of wood behind the sling before you add your holes to protect the underlying work surface.
First you will want to trim the corners of your leather piece, creating a nice oval shape. The leather helps provide a place to attach your paracord.
Advertisement — Continue Reading Below
Next you will want to use your leather punch or nail. Place the leather on the sling directly below the adjustment piece in the middle of your sling, on the single strand of nylon. Once you have it lined up, punch in your first hole. Your D-ring will be inserted in the center of your leather and you will then punch the lower hole directly below it, in line with your first hole. Your holes should be through the leather and the nylon.
Next, place the rivets up through the holes you created. Use a lighter to melt the loose strands around the rivet posts.

Advertisement — Continue Reading Below
Making Progress
Now secure the piece of leather with the D-ring placed in the center between the rivets. Secure the gun sling to a wall, tree or anything solid. We used a nail on the wall of my son’s shop to secure our sling. Secure the bottom of the sling by tethering it to something heavy on the floor. This will help to keep tension on the sling for the project ahead.

Start weaving by taking your 75-inch piece of paracord and folding it in half, matching up the ends. Take the loop side and insert it from the top side of the D-ring down.
Advertisement — Continue Reading Below

Take the two end pieces of paracord and come down into the loop of paracord, pulling the ends completely through.

Advertisement — Continue Reading Below
Now take the end piece on the right and bring the paracord down through the right side of the clasp at the bottom. Do the same with the piece on the left.

Next, take the end on the right and bring it up and down through your original loop at the top. Do the same on the left side. Be careful not to pull things too tight. There should be no pull or tension on the D-ring.
Advertisement — Continue Reading Below

Holding the two ends, take the left side and go around the back. Then take the right side and go around the back. Cross the left over the right, and bring the left up and through the right like you would when tying your shoes. Pull securely and remember not to add tension to the D-ring.

Advertisement — Continue Reading Below
The Weave
Start your weave by taking the right side and crossing over the front of the sling. Now take the left side and go over top of the right paracord string, then under the back of the sling and up through the loop on the right side that you created. Pull snug. When pulling snug, be sure not to make it so tight that the sling begins to buckle in the center.

Next, you will do the same and reverse the weave, starting on the left side. Repeat until you get to the bottom of the sling. You will continue by starting your weave from one side to the next. Be sure after each weave to push the weave upward to keep it secure and even.
Advertisement — Continue Reading Below

Once you have reached the bottom of the sling and have woven as close to the clasp as possible, it is time to finish the sling. We have found the best tool for this job is actually a pair of fishing pliers, but long tweezers will work also. Measure down 6 inches from the last weave and cut the paracord. Do this on both sides. It will be easiest to finish the weave if you burn the ends of these 6-inch pieces on both left and right. You will want to burn the ends of the extra pieces as well.
These extra pieces of paracord are a great addition to your survival or hunting pack because paracord is always useful. Now you will take the tweezers or pliers and, from the bottom side of the weave, come up through so you can pull the paracord down through with the pliers.

Hit the Trail
Continue this process through several weaves and be sure to pull snugly each time you have woven another stitch. You will want to end this process with your paracord going through to the back of the sling so that you can cut the paracord. Next, use the lighter to melt the paracord against the back of the sling, using the bottom of the lighter to push down on the hot, melted cordage. Repeat on the other side.

You now have a comfortable paracord rifle sling and useful piece of equipment for many survival situations. If you are not a DIY kind of person, but would like to purchase a paracord gun sling like the one mentioned above, check out Mountain Boy Journals.
