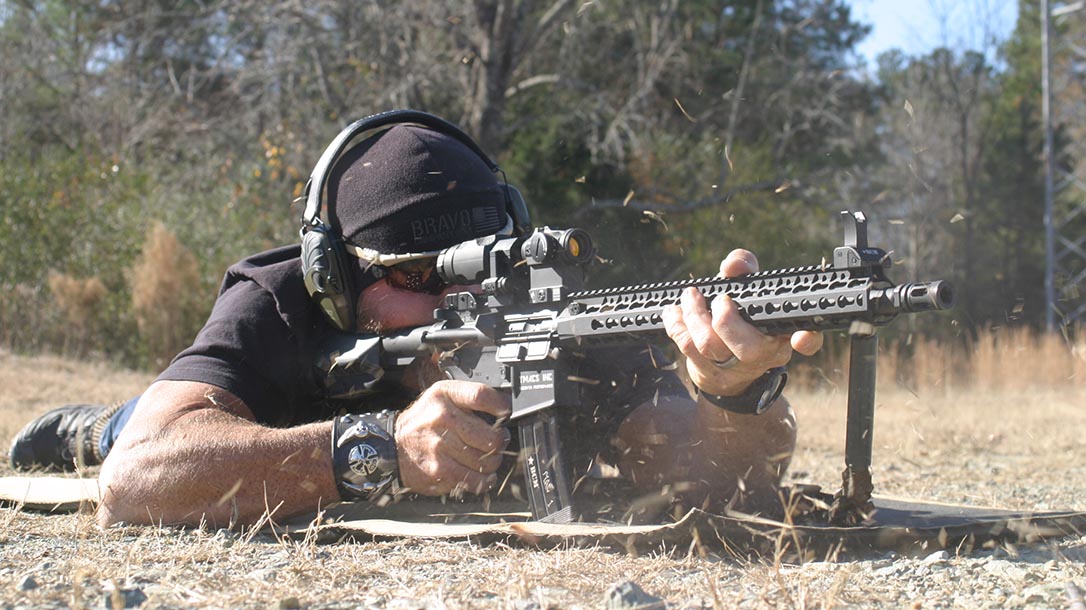
We sometimes neglect working on the fundamentals. These are the core skills around which everything rotates. It’s sometimes necessary to lie flat on your belly and work on your basic rifle marksmanship (BRM). Practice building a position to achieve a natural point of aim. Understand that without a natural point of aim, there is muscular input, and where there is muscular input, the weapon will move when fired. This will have an adverse effect on your desired point of impact.
I like to define “natural point of aim” as being comfortably on target with zero muscular input. When prone and building a natural point of aim, I like to leave my support hand off of the rifle initially so that I can breathe in and out and watch my sights fall and rise in a straight line. This also allows me to check that my sights fall directly into the center of the target during my respiratory pause.
Basic Training for Rifle Marksmanship
Basic rifle marksmanship can be mundane, but we must have an acute understanding of the fundamentals in order to advance in our overall marksmanship. BRM allows us to exercise introspection and objective self-critique. It helps us to build skills into our hard drive that we can access on a subconscious level.
Advertisement — Continue Reading Below
When you practice BRM, you appreciate external ballistics and the effects that wind, temperature, humidity and angle have on desired impact. And you develop an understanding that this differs from one round to another depending on the make, grain, caliber and type of projectile. In fact, you should practice by firing one single shot at a time. This forces you to concentrate on the fundamentals, which should be engraved into your hard drive because, as tactical gun handlers, we must be able to perform these basic skills intuitively.
The BRM Checklist
There are certain facets that must be felt and performed on a subconscious level, including loading, pre-combat checks, safety manipulations, building a position, achieving a natural point of aim, sight alignment, trigger control, feeling the metal-on-metal imperfections in the trigger group, calling your shot, seeing how far the sight rises, seeing where the sights settle, following through, realigning the sights and resetting the trigger. These must be practiced in slow motion.
We want to perform certain tasks at a subconscious level because we humans are not multi-taskers. We can task switch, or task stack, or perform certain tasks intuitively barring that we have performed the appropriate amount of meaningful repetitions. Also, we must have a firm understanding of minute of angle (MOA) and our rifles’ inherent accuracy. We must know how our sights adjust.
Advertisement — Continue Reading Below
BRM allows you to establish a tempo or demeanor. It also allows you to zero your carbine. You can’t zero a gun if you can’t create groups. And you can’t do that until you abide by the fundamentals of marksmanship.
The Rifle Marksmanship Curriculum
Once zeroed, I typically “storyboard” a target. I shoot all of my groups using a center-mass hold. With one group, I will purposefully break my cheekweld to force a parallax. With another, I’ll cant the rifle a full 90 degrees, and with the last, I’ll rest my barrel on a hard surface. The results are pretty telling.

Advertisement — Continue Reading Below
More recently, I started to reincorporate “calling your shot” drills, as the photo above depicts. Knowing where the sights are when the hammer falls is not only good marksmanship training but a liability concern and a tactical necessity. We must know whether the shot is good or not before the rounds impact the target.
You should perform this drill at a distance where you cannot see the impact of the round register on the paper target, say 50 to 100 yards. You should also reduce the amount of stability in your shooting platform to increase the “wobble area.” Consequently, shooting from prone is out. Use a standing position for this drill. You can’t expect a great group, but that isn’t the point. Instead, do you know where the shot landed?
Use a marksmanship data book or a simple notebook with your target drawn in it. Break this target into quadrants. Fire five rounds. After each round, annotate on your drawn target where you believe that round hit your target. Then compare your notepad to the target downrange. Your notes and the actual target do not have to match up perfectly. For example, if you called two high, two low and one left, and your target’s feedback mirrors your notes, you have succeeded in this drill.
Advertisement — Continue Reading Below
What Does It All Mean?
Groups on paper are telling. Each has a story. If you know what the story is saying, you are better equipped to correct yourself or someone else. Consistently tight, dime-sized groups say that you are abiding by the fundamentals. A group that drifts left to right, or vice versa, might indicate that your natural point of aim is off. A high or low group indicates that your rifle is recoiling too much because of your loose shooting position. Because of the recoil, you’re probably moving too quickly at the tail end of the trigger pull, yielding some north-to-south stringing on paper.
A big group means you are too fast on the trigger. Keep in mind that trigger control is the king of all of the fundamentals. Two separate groups can be a result of breaking your cheekweld and reacquiring a different position in relation to the sights. When using an optic, your eyeball can be considered your rear sight. We want that eyeball, or rear sight, to be in the same spot every time to mitigate parallax. (All optics have parallax to some degree, even though the manufacturer might state otherwise.) Two separate groups might also be a result of canting the rifle. The rounds are going to fall in the direction of the cant.
We shooters tend to be very good at practicing what we are good at. Embrace the suck and get back to the basics.
Advertisement — Continue Reading Below
The above story is from the February/March 2020 issue of Ballistic Magazine. Grab digital or physical subscriptions at OutdoorGroupStore.com.
