All of us have met people at shooting ranges, gun shops or gun shows who love to give advice about the best handgun, cartridge or ammo. But have you ever seen anyone extolling the virtues of “the best” paper targets for shooting? I can count the times I have on one hand in the 60-plus years that I’ve been shooting.
Are Paper Targets an Important Aspect in Shooting?
The simple fact is that except for matches that require specific paper targets like IDPA and bullseye, targets are usually considered to be the least important aspect of shooting if they’re considered at all.
Most of us just focus on placing our shots into small groups no matter what the target looks like? This kind of thinking led to the development of “Center Mass” silhouette targets. Unfortunately, the center of mass in the human body is just above the spleen.
Advertisement — Continue Reading Below
A wound in this area is serious and might eventually be fatal. But it’s not the most likely hit to cause rapid incapacitation. Therefore, target practice and tactical training are not at all about putting every shot in the middle of the target. They’re about putting shots where they will be the most effective.
Getting Started
There’s a process for learning how to do this. And it doesn’t exclude using bullseye targets and other targets that have scoring rings as first steps. After all, the good old bullseye is very useful for sighting in a new gun and building basic skills.
All new shooters need to build competence, and targets that have scoring rings or zones provide an important way of tracking a new shooter’s progress toward acquiring essential shooting skills like sight picture, grip, and trigger press.
Advertisement — Continue Reading Below

As the new shooter develops higher scores, self-confidence increases. This is critically important for using handguns for both self-defense and hunting.
This first stage in building competency with firearms begins with the shooter standing 5 to 7 yards from the target. As the trainee progresses, then he or she can move farther back. At the same time, it’s possible to see how well the shots are grouping.
Advertisement — Continue Reading Below
If the center of the groups are consistently different than the trainee’s point of aim, a “correction” target like Thompson Targets’ “Group Shooter” can be very effective. It will immediately indicate any problems in aim, grip, or trigger press so that appropriate corrections can be made.

Once the shooter displays competence at the distance he or she believes he or she will be shooting, it’s time for handgun hunters and tactical shooters to move on to targets that impart more specific skills.
Advertisement — Continue Reading Below
Targets with Multiple Aiming Points
One example is the targets that have multiple aiming points, like the IQ target from RE Factor Tactical. These help shooters see the whole target rather than just focus on the center.
The IQ target has squares, triangles, and circles randomly numbered from 1-3 or randomly labeled A, B, or C. In addition, the squares, triangles, and circles are randomly colored blue, green, yellow, red, or white. There is no pattern to how the individual shapes, colors, letters, or numbers are displayed on the target. This makes the level of difficulty even higher.
I begin shooting this target with my eyes closed and the gun at low ready pointed at the berm, and my trigger finger in the register position off of the trigger. Then I simply say to myself, “Shoot all triangles,” or “Shoot the green number 3 targets,” etc. At the start signal from my Competition Electronics shot timer, I open my eyes and engage the target.
Advertisement — Continue Reading Below

It’s not as easy as you might think. As an aside, nationally recognized trainer John Holschen has used this type of target to successfully train shooters to hit moving targets. One word of caution, however, be sure to ask the Rangemaster if the range you’re using is designed for the use of targets with multiple aiming points.
Tactical Targets
When training for self-defense, the targets available today allow for a three-step approach. Step one is a silhouette target with scoring areas that have different values and different colors. This makes it easy to identify where shots need to be placed to produce a high likelihood of incapacitation.
Advertisement — Continue Reading Below
Once again, it’s best to start closer to the target and gradually move back to get an idea of the trajectory of the ammunition you’re using. Especially when shooting a large format pistol like those based on AR, AK and sub-machinegun platforms. These often have a 3-inch offset between the line of sight and the line of the bore.
Photographic Targets
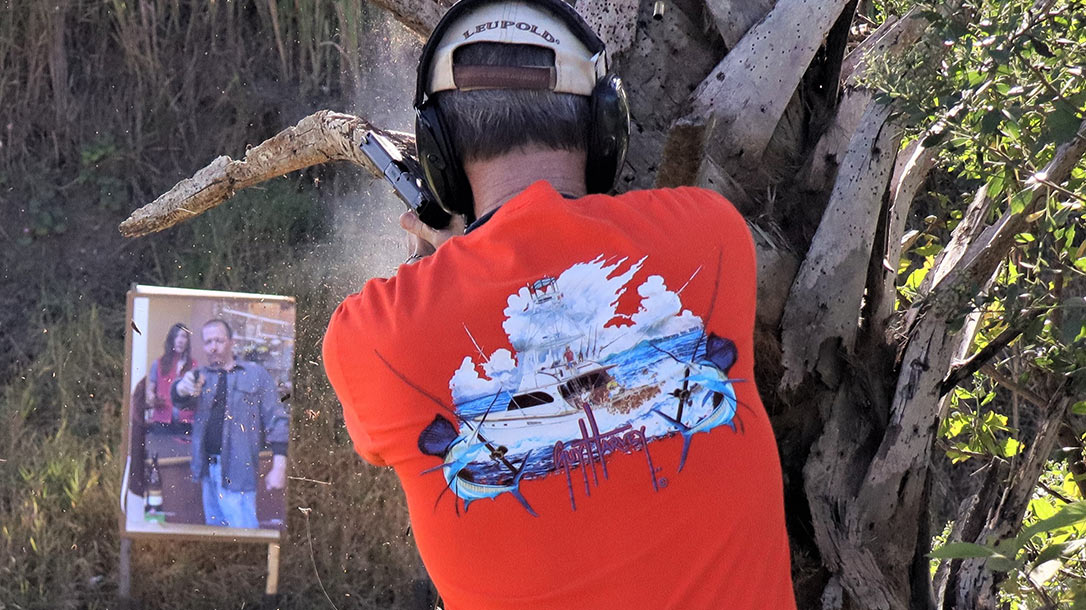
After becoming familiar with shooting silhouettes, the shooter can progress to photographic targets. There are two types. The first has lightly drawn scoring zones, and the second has no scoring zones whatsoever.
Given that I’ve had quite a bit of training, I prefer to shoot those that do not have any scoring zones. This requires me to visualize and rely on anatomical landmarks to locate the vital zones.
Advertisement — Continue Reading Below
Photographic targets open a whole new level of skills development. They normally have at least one armed individual presenting a threat. But these targets can get quite a bit more complicated and difficult to shoot.
The assailant in the target can be in a bladed stance or may be partially obscured by cover or concealment. So, you need to visualize very carefully. The armed offender may have an armed partner. So, which one do you shoot first? The guy with the shotgun or the one with the pistol who is closer to you?

Advertisement — Continue Reading Below
Or how about the would-be assassin who has his finger on the trigger and a gun pointed at an innocent party? In addition, what if there is a no-shoot target who is partially obscuring the armed offender? Then there’s the target that depicts an armed assailant who’s partially behind cover.
And there are a variety of targets depicting situations that cause the person shooting in self-defense to exercise good judgment. Furthermore, if the trainee has access to action bays with side berms like those at the Flagler Gun Club, you can use movable target frames and stackable plastic barrels to combine multiple targets and obstructions, creating complex tactical problems to resolve.
Use a shot timer to create a sense of urgency. It’s about as close as you can get to force-on-force training by using paper targets.
Hunt/Survive Targets
Those who hunt for recreation and for subsistence/survival purposes have a wide variety of targets for building their competence in taking North American big and small game.
There aren’t as many articles today about hunting and long-distance shooting with handguns as there were when Bob Milek, Steve Herrett and Elmer Keith were alive. However, handgun hunting articles and columns do appear in some gun magazines. And there are still a number of handgunners who hunt with their handguns and shoot in metallic silhouette matches.
In addition, there are hunters and hikers like myself who have regularly carried large bore or magnum handguns loaded with deep penetrating ammo and/or snake loads when out and about in the woods, swamps, and deserts.
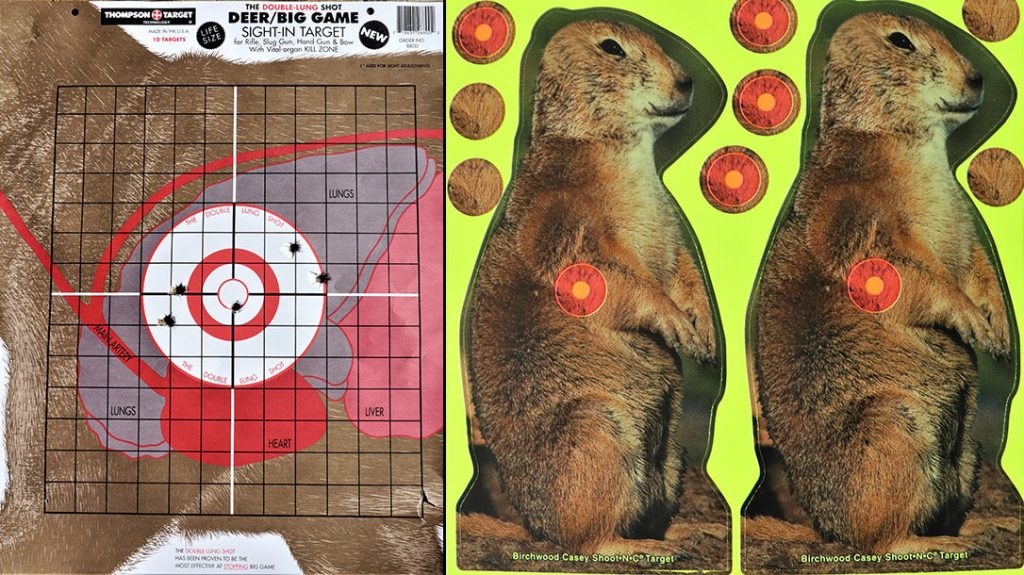
My one complaint about targets depicting game animals is that many of these paper targets have either scoring zones or aim points printed on the front. I would prefer that they have scoring zones printed on the back of the target. Because animals encountered while hunting rarely offer broadside shots.
Visualizing Vitals
Because of this, while practicing on game targets, it’s important to develop skills in visualizing where the vitals are from various angles. One of the best ways I’ve seen is the “ball” method.
Imagine the vital areas as a ball that rests just inside the chest cavity. Make sure that the size of the ball is appropriate to the size of the game you’re hunting. And then fire your shot so that it passes through the center of the ball. If you hunt reptiles, on the other hand, the ball is often very small and is located just behind the eyes.
Another method used when hunting four-legged mammals is to aim for the shoulder that is farthest from you. Usually, a shot for the far shoulder passes through at least part of the vitals ball. Then it moves on to limit the animal’s mobility. This is especially good for quartering shots taken by hunters using hard-cast semi-wadcutter or other bullets that penetrate deeply.
Regardless of the type of bullet chosen, the hunter should eventually use a target without scoring zones on its front. Because it forces the hunter to use anatomical landmarks as aiming points. As much as we might wish, there are no X-rings on game animals.
Respect The Paper
Targets are so much more than something you punch holes in. They’re valuable educational tools for maintaining perishable shooting skills, sharpening those skills, and developing new ones.
Given today’s rate of inflation, a lot of us won’t have the disposable income to acquire 500-1,000 rounds of ammo and pay up to $2,000 for travel and fees to attend shooting schools on a regular basis.
However, by properly using paper targets that depict hunting or tactical scenarios, we can do much to affordably preserve the skills we may have learned from professional trainers. Likewise, we can develop further skills in solving the types of potential threat scenarios that may exist in the communities where we work and reside.
For more information, please visit ActionTarget.com, BirchwoodCasey.com, ChampionTarget.com, RefactorTactical.com, and ThompsonTarget.com.
This article was originally published in the Combat Handguns July/August 2022 issue. Subscription is available in print and digital editions at OutdoorGroupStore.com. Or call 1-800-284-5668, or email subscriptions@athlonmediagroup.com.
