As the interest in precision rifle shooting has soared, so has the interest in serious optics. The secret challenge for many new to this world, however, is the turrets. Simply put, they wonder just how they work and how to use long-range turrets for precise adjustments. Used correctly, they can help you make precision shots at extended distances. The key is simply understanding what the heck they do.
Turret Talk: Understand Long-Range Turrets & Adjustments
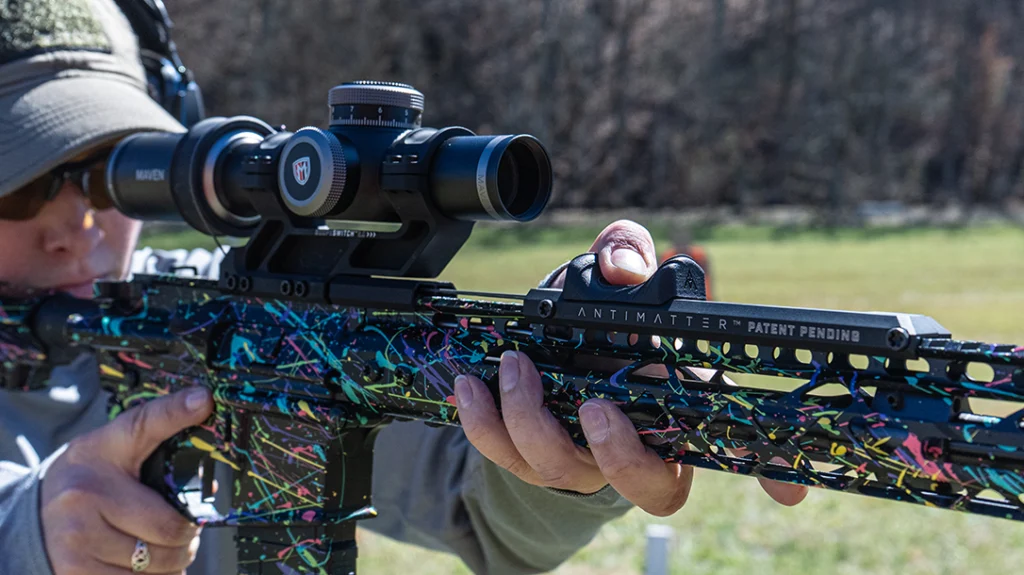
The main job of the turrets is to adjust the point of impact of the bullet by moving the scope’s reticle in relation to the target. The two most used turrets on scopes are the top turret, which is for elevation, and the right turret, which is for windage. Of these two, the elevation turret is the one that sees the most use. This turret adjusts the bullet’s point of impact based on each shooting distance. As a general rule, most people understand that. Where we got off in the weeds is when it is time to turn them and try to adjust the scope.
MOA & MILs
Scopes have hash-style markings on them that indicate units of measure. Each click on the turret moves the bullet’s point of impact a certain amount. The amount of motion is determined by which type of scope you have. It will either be set up in MOA (minute of angle) or MILS (milliradians). These are two different measurement systems that tell you how far the reticle will move at certain distances. As a general rule, both of these systems use a 100-yard target as a baseline.
Advertisement — Continue Reading Below

On the MOA optics, at 100 yards, one MOA is basically one inch (1.04 to be more precise), so at 200 yards one MOA would be equal to two inches, three inches at 300 yards, and so on. In most cases, MOA optics have 1/4-MOA adjustments. That means each time you click the scope, it will move 1/4 of an inch at 100 yards. At 200 yards that becomes 1/2 an inch, 3/4 of an inch at 300 yards, a full inch at 400 yards, and so on. The math really starts though when you get under 100 yards. At 25 yards, for example, one click will move the reticle essentially a 1/4 of an inch. At 50 yards it will 1/2 of an inch and so on.
MIL-style scopes are different primarily because they are based on metric measurements. A MIL at 100 yards is equivalent to 3.6 inches. At 200 yards it is 7.2 inches and so on. Most modern MIL scopes have a 1/10th adjustment. So, a click at 100 yards will give you a .36-inch adjustment. Like the battle over 9mm vs .45 ACP, there are two camps that say their version is best. The truth is that they both work well, and it comes down to which one you can use most easily.
Advertisement — Continue Reading Below

Parallax Adjustments
The turret on the left side of the gun is to adjust parallax. Parallax occurs when the reticle and the target are not on the same focal plane. It causes the reticle or the target to appear blurry. While it may seem like the parallax adjustment is somewhat of a focusing knob, accuracy can be greatly affected if the reticle and the target aren’t focusing on the same plane. In other words, a clear sight picture is just the byproduct of lining up your reticle and your target in the same focal plane. This is one of the most underused turrets on rifles in my experience. I cannot emphasize enough just how important parallax adjustment is to get a solid, accurate shot.
A turret that I believe should see minimal use is the windage. I encourage you to zero your rifle on a day with minimal or no wind. Set your windage and then leave it. I say that because wind is not a constant. During a shot, you may see a 10-mile-per-hour wind. My experience is that once you dial for wind, it will inevitably change forcing you to make a change again. My suggestion is that you learn to read the wind and make windage holds inside your scope reticle.
Advertisement — Continue Reading Below
Adjustment Basics

As I mentioned earlier, the scope turrets have hash marks on them. Each one is an indicator of one unit of measure for that specific optic. For example, a MIL scope with 1/10th adjustments will have a hash mark for each click. These will be set in groups of ten with usually the fifth hash line being slightly larger. Every ten marks will have a number on the optic as well, letting you know that you have moved one complete MIL. As you continue to turn the turret more, you will see horizontal lines become visible. This is yet another helpful indicator of where you are in the scope’s adjustment spectrum. For most people at relatively close distances, this will not be a factor. However, when you really stretch your rifle out, you will begin to use the scope’s full capabilities and these lines will appear.
Scope turrets can initially be overwhelming. Trying to figure out how many clicks and different distances can be a challenge. Taking a little time on the range to make adjustments and seeing the effects is a good way to get a good feel. Ultimately, I encourage you to take a class and get professional training. Regardless, don’t be afraid to give the turrets a turn and get a feel for what they do. Just keep track of which way you are clicking and how far.
Advertisement — Continue Reading Below