Advertisement — Continue Reading Below
“Lady, you’re about a half bubble off plumb, and that’s fer sure and fer certain,” said Mathew Quigley. Now unless you want to name your scope Crazy Cora, I need to level with you.
Putting a scope on a rifle properly requires numerous little, but necessary actions. After lapping the scope rings to ensure uniform contact on all sides of the scope body, it’s time to get the scope level. Is using a leveling kit truly necessary? Only if you want to be truly accurate.
Advertisement — Continue Reading Below
There are several ways to properly level a scope. The Wheeler Engineering Professional Reticle Leveling System just happens to be one of the easiest and most precise. Because of that, it’s my level of choice.
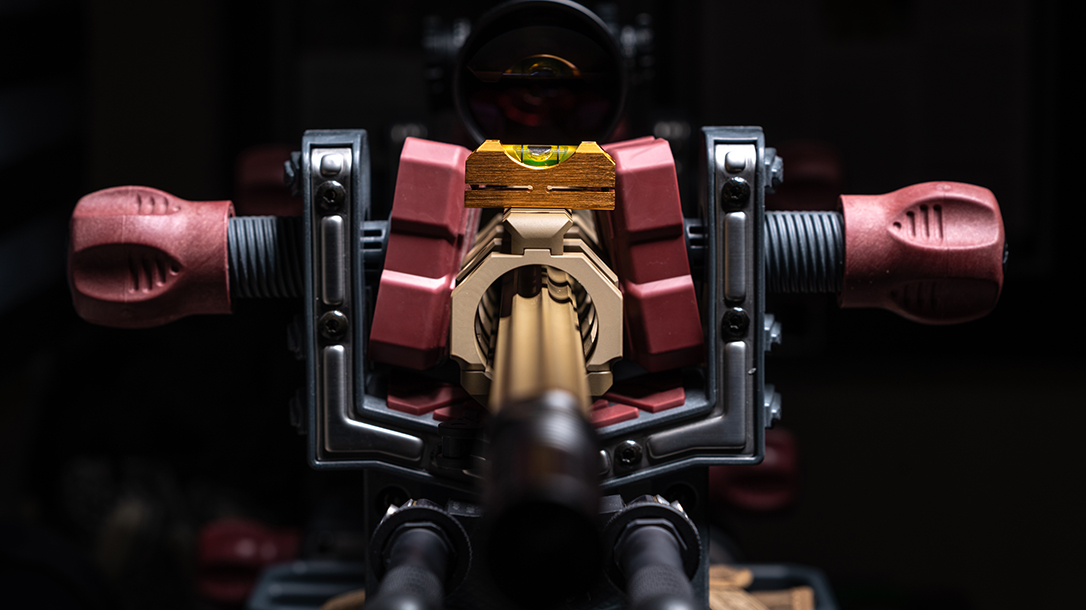
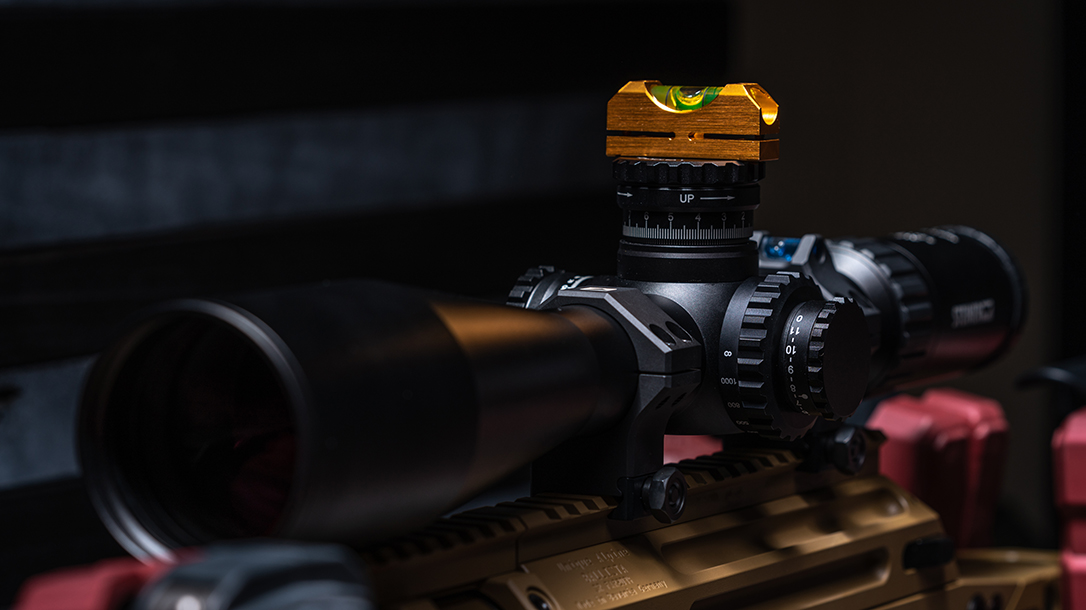
The reticle leveling kit includes a barrel clamp level that features a tuning adjustment knob. It also contains a smaller reference level that can be moved between flat surfaces on the rifle and the scope itself. Kits like these come with everything needed to make getting your scope level easy. And most also include a case for storage.
Check the Eyes
It’s best to use a gun vise for leveling a scope. Sure, it’s doable without one, but you might say some words to make a sailor blush.
Advertisement — Continue Reading Below
Start by placing the scope in the scope rings and lightly tightening the screws, keeping them loose enough to easily move the scope inside the rings. Before focusing on precision leveling, you’ll need to ensure you have perfect eye relief. A good way to address this is by getting down behind the rifle and placing your shoulder and head where they feel completely natural and comfortable. You also need to do this with closed eyes. Otherwise, you will subconsciously adjust your body position to achieve proper eye relief. So, eyes closed, find your perfect position, and then open them. While in position, use your off hand to move the scope slightly forward or back until you have a perfect circle view with no vignetting on the edges. Then, mark the scope tube and rings to make sure you don’t bump it when working on the level.
Getting Your Scope Level
Now that the eye relief is marked, you need to establish true level for the rifle. Start by placing the smaller reference level on a scope base, rail or other flat surface perpendicular to the vertical axis of the gun. Then place the adjustable barrel clamp level to the end of the barrel and secure it with the tension knobs. Once secured, use the adjustment knob on top of the barrel clamp level to align the bubble with the bubble on the smaller reference level. At this point the barrel clamp level is calibrated to the gun’s axis. You can then move the smaller reference level to the top of the scope’s turret cap and slowly turn the scope to align the smaller reference level with the barrel clamp level. Be sure to keep eye relief marks aligned and slowly tighten the scope rings down.
Once again, patience is the name of the game. You need to increase tension uniformly across the ring screws to ensure equal gaps between the top and bottom of the rings on each side. You must also do this while maintaining level and proper eye relief. Once you’ve tightened everything down to the prescribed torque settings give the two levels one last check to make sure they’re aligned before removing them. Now she’s ready to go.
Advertisement — Continue Reading Below

