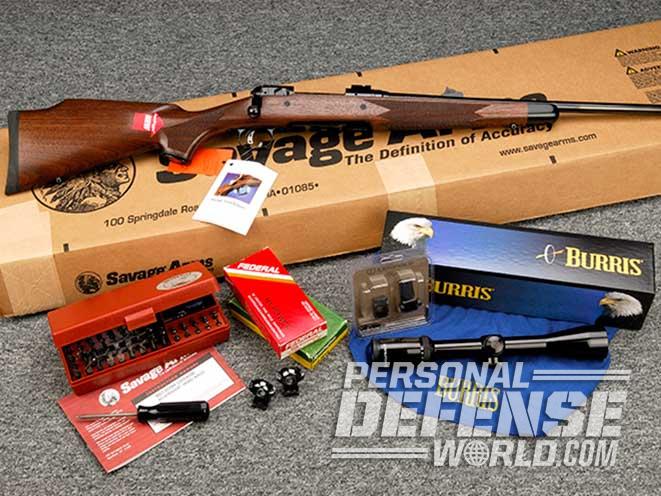
Whether you are buying a rifle for the upcoming big game season or a specialized rig for varmints, picking up a new bolt-action rifle is an exciting part of any hunter’s life. From the original thought suggesting that you do need a new bolt-action rifle, to picking out a cartridge, to adding a scope and then placing the order, it is all part of being a sportsman and enjoying our hobby and pastime.
Once home and unpacking the rifle, the first item on the list you will want to check is matching serial numbers and making sure it is chambered for the cartridge you ordered. I know you did all this at the store, but double checking the end flap of the box at home is the first order of business, along with the bolt and receiver, making sure everything has the same number. This is just to confirm that nothing has separated or been mixed up at the store, which can happen during a busy pre-hunting weekend when store personnel are loaded with paperwork.
When you arrive home, it’s a good idea to sit down with the instruction book with the bolt-action rifle at hand. Go over everything physically, especially if the rifle design is new to you in regards to installing the bolt, adjusting the trigger pull and the safety features of the weapon. Keeping the book handy now is a good time to file the paperwork (receipt, factory warranty, etc.) in a good place for future reference.
Advertisement — Continue Reading Below
Form & Function
Going through the instruction book and with the rifle at hand, now is the time check everything for proper functioning. Install the bolt, making sure it clears the follower without any problems. And if you have a few dummy cartridges, now is the time to try the gun for proper functioning and general operation. Moving the safety, making sure it engages properly is recommended before you even get to the range, as is trying the magazine to see if it will release without any binding or the need for additional pressure to release (or pull) it out of the gun.
RELATED STORY: The Henry U.S. Survival AR-7: A Wildland Survivor
Advertisement — Continue Reading Below
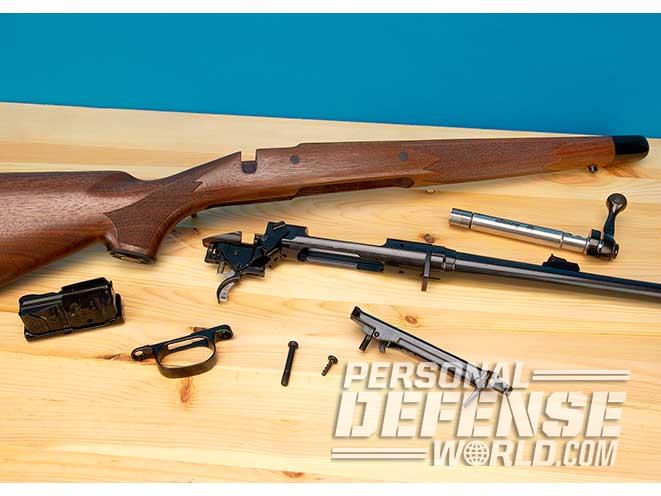
Getting the rifle ready for its first foray to the range is an important part of your relationship with this weapon. Remove the bolt, then back out both the front and rear stock screws. Now separate the action (barrel, receiver, magazine) from the stock. With some of the higher-priced guns, it may be glass bedded and difficult to remove the first time. If this situation presents itself, take the rifle and tap it (forward of the stock) on your bench to separate the barreled action from the stock.
In the past, most of the rifles I’ve handled right out of the box were heavily laden with a preservative to keep the gun fresh and rust free until it got into your hands. Today, with the rush to purchase firearms, it seems a general wiping of the piece with a good factory oil is the accepted practice and something that can be removed easily. Of importance is the firing pin, and when we are cleaning the gun, make doubly sure this is completely free of any lubricant that might hinder its forward movement during a hunt in cooler weather. For the most part, I like to run my rifles dry, just adding a small amount of a light lubricant on the internal raceways as to ease the operation of the bolt.
First Cleaning
Advertisement — Continue Reading Below
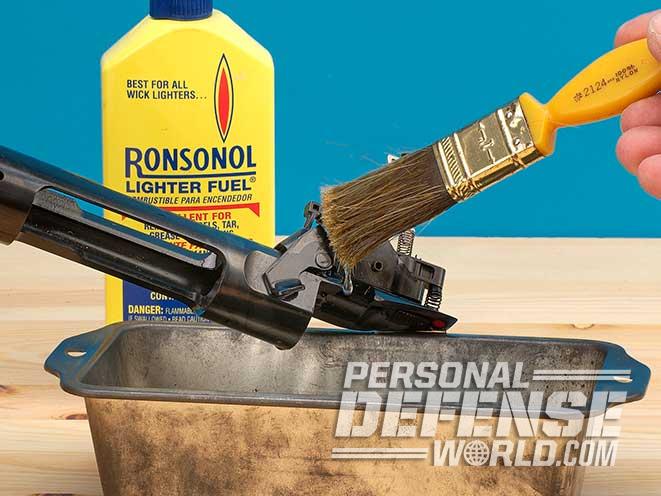
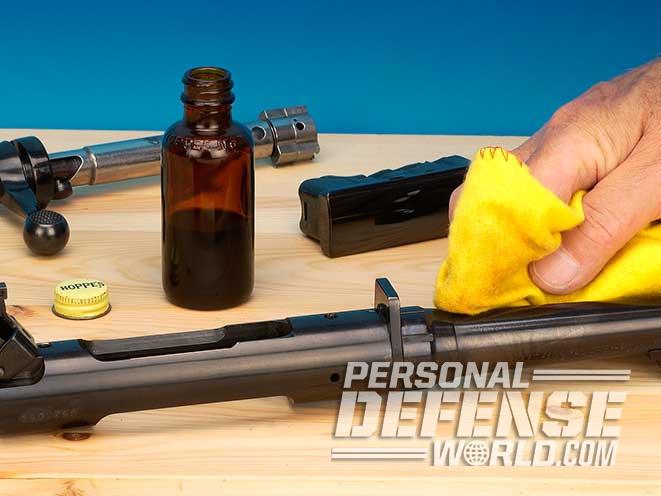
For a general first-time cleaning, I like to use a naphtha- based product like lighter fluid, as it dries fast and is relatively free of fumes. Done outside, it is quick and painless. Also consider firearms-specific products like Remington’s Bright Bore, or a generic gun cleaner and degreaser. With all this, purchase a cake or bread tin, a 1.5-inch paintbrush and an old towel placed on the bench to keep your new rifle stock from being scratched.
With the bolt, magazine and floorplate removed, grab the action by the receiver, placing the barrel end in about an inch or two of your cleaning solution with a bore patch underneath to keep the muzzle fresh. Place the brush into the fluid and drag the liquid up on the barrel, allowing this flowing action to move all the machining oil down and into the tin. Now reverse the action, but spend some additional time around the trigger mechanism, inside the receiver and deep into the magazine.
With the option of mounting a scope, remove the filler screws and clean the threads of cutting oil. For this, wet a simple Q-tip with your cleaning solution, inserting it into each hole and, with a twisting motion, cleaning them to receive the Loctite locking solution later when we mount the bases. During this time, clean the scope base(s), rings and all mounting hardware, placing them in a safe place so they are all handy to retrieve when you mount your favorite optic.
Advertisement — Continue Reading Below
RELATED STORY: 6 Manufacturers Selling Lever-Action Rifles For Home Defense Or Hunting
Leave everything overnight to allow the solvent to dry. The next day, wipe all the metal work down, then coat all of the parts with a thin coating of Hoppe’s #9 to bring back the factory luster. Once the action is again paired up with the stock, wipe the majority of the Hoppe’s #9 off, leaving a thin coating on all of the metal that is covered by the stock (and for the most part inaccessible) as a rust preventative.
When cleaning the stock, I’ll go over the finish of the wood with the solvent, allowing the flow to go from top to bottom, inside and out. Cleaning removes the factory oil on the exterior of the stock as well as any wood (in the form of sawdust or shavings) within the tighter confines of the stock inletting. Once the solvent has evaporated, I go over the outside of the stock (again, depending on the exterior finish) with a good coat of a quality, readily available furniture polish. I like Pledge. For the first coat, spray on a generous coating on the wood and then rub it in with your hand. When it disappears, apply another thin coat, buffing it to a high sheen with a micro-fiber cloth.
Advertisement — Continue Reading Below
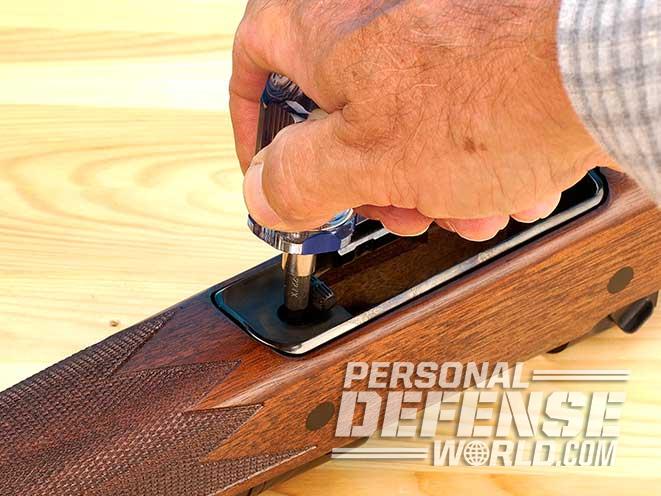
Place the cleaned action back into the stock and then insert the machined stock screws. Depending on the manufacturer, there may be an additional wood screw that anchors one end of the triggerguard or the other. In any event, you will want to start by tightening the front screw first to seat the action within the stock, then install and tighten the rear screw. Once seated, install the wood screw into the triggerguard (if required) to finish the assembly using a moderate amount of pressure—don’t strip it of its holding power in the wood stock.
Add An Optic
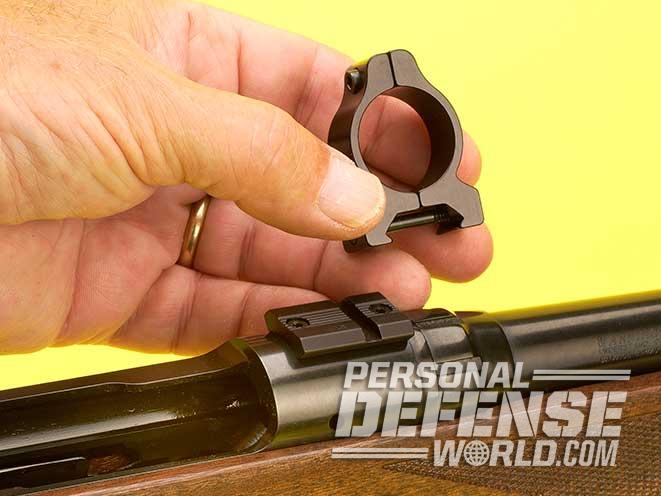
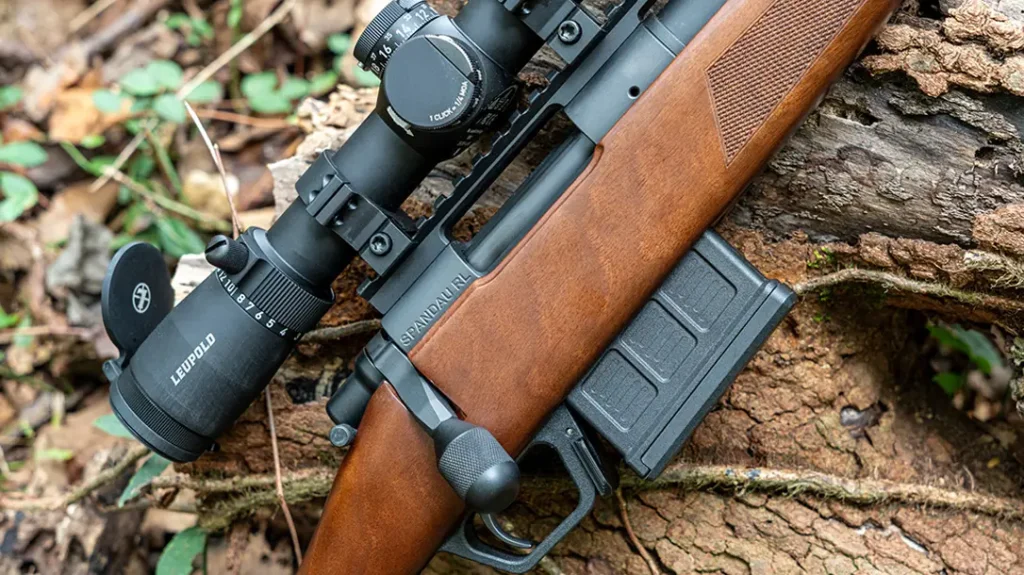
Installing a scope on your new rifle is quick and, for the most part, involves nothing more than the parts and some common sense to make sure any mistakes are corrected now—not later, when you are in the field 2,000 miles from home. Installing a scope is quick and easy, but before you even get close to your rifle, make sure all of the components you purchased, like the rings, base(s) and the scope, are right for your rifle and style of hunting.
Advertisement — Continue Reading Below
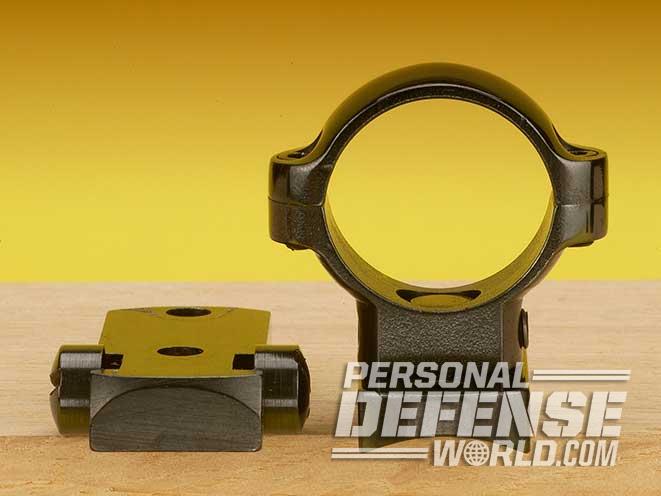
For the most part, referencing the latest optics catalogs from Burris, Redfield, Leupold and Weaver will put you right in line for the basic components necessary to complete the job. It seems the most popular scope is the 3-9x40mm purchased at any chain store or gun shop. Make sure you take the current model number or serial number with you since, over time, things can change on the rifles. For example, at one time Savage rifles had one round front bridge and a flat rear bridge. Now that is changed, so be aware of such advances as you purchase your components. Ruger, as another example, includes its proprietary rings as a value-added accessory without cost that attaches to milled cuts in the top receiver. Most other rifles have standard bases attached by screws, a front right sitting in a bayonet mount and the rear ring set in between a pair of large windage screws.
Ring height is subjective and can deal with the physical features of the hunter (full or round face for instance) and the objective diameter of the scope or the barrel contour as it approaches the receiver of the rifle. Slender optics can be mounted with low rings, more common 3-9x scopes usually need medium-height rings, and long-range and varmint scopes, with their larger objective lenses, may need a set of high rings. For the most part, just about all of my standard hunting rifles use medium-height rings, with compact rifles featuring slender barrels favoring the low rings. Scope manufacturers list page after page of rifles in their catalogs, and this is a good place to start as a reference for your scope-mounting needs.
RELATED STORY: 24 Backup Iron Sights For Your Rifle
Advertisement — Continue Reading Below
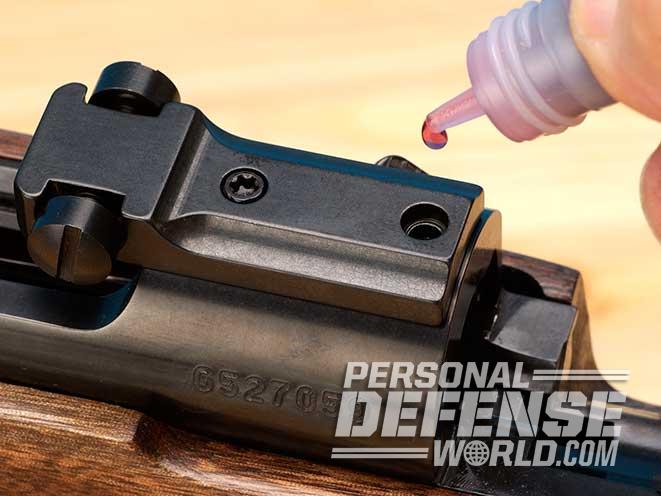
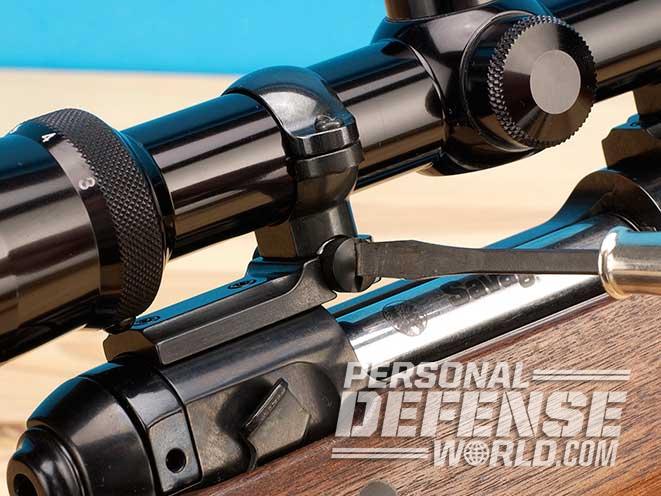
Once you have the scope, rings and bases assembled, do a dry run and mount everything on the rifle, making sure all the parts fit without any misalignments or wide gaps between both halves of the rings. Make sure the mounting holes are dry and free from any solvent or cutting oil, and then place a drop of a commercial-grade locking fluid like Loctite into each hole or on the screw itself. Place the right base on the correct bridge and tighten the screw down with even pressure, making sure to prevent deforming the screw heads.
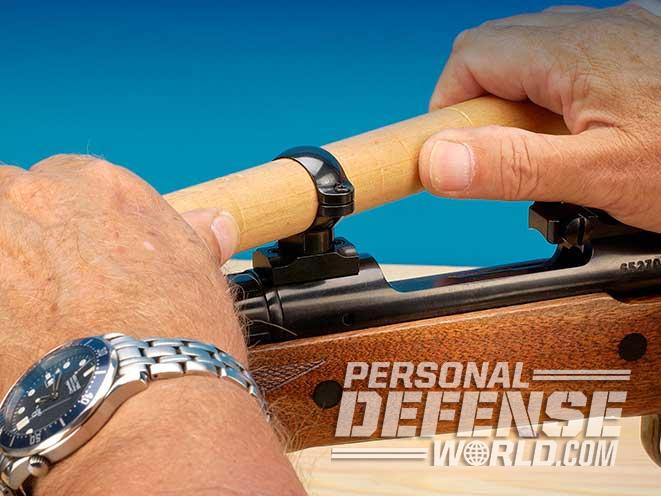
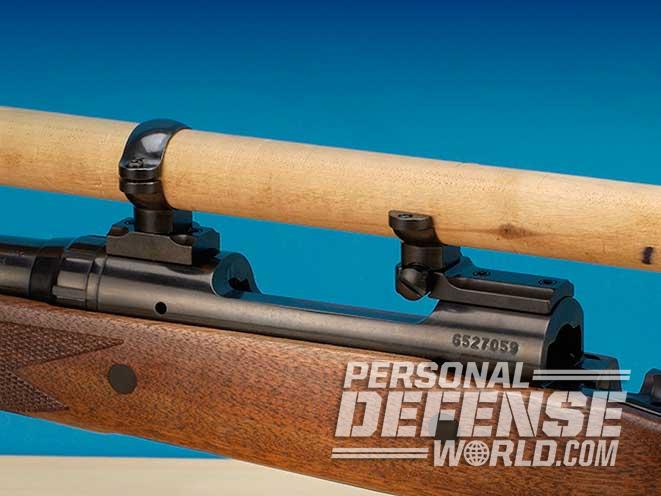
More recently, Torx screws have taken the place of hex or slotted screws, and while they do not recommend any type of locking fluid, for my own piece of mind I place a drop or two on each screw to know nothing will loosen up and ruin a distant hunt. When both bases are secure, install the front ring into the dovetail mount. With a dab of gun lube, turn it to the correct 90-degree orientation with a common 1-inch hardwood dowel. Never, and I mean never, turn this ring with the body of your new scope, as you are just asking for trouble. The scope can kink or bend internally, leaving you with a worthless piece of optical gear that might not be repairable.
When you feel this front ring is correctly installed, review it from above to see if it is perpendicular to the straight or outer edges of the base. Now remove the top part of the rear ring, installing it on the base. Loosen the twin windage screws, allowing the ring to move sideways between the two, then pull the dowel to the rear and align it so it sits perfectly within the bottom part of the rear ring. Tighten the windage screws, but again leave some slack. Remove the top part of the front ring, place the scope on both and check for alignment. If the bottom part of the rear ring is not correct, you will see daylight under the scope. Now it’s just a simple matter of playing with the windage screws until the tube of the scope drops down and is perfectly centered within both rings.
Advertisement — Continue Reading Below
For the sake of appearances, center the scope turret between the rings if possible. Install the top half of both rings and tighten them down leaving enough play to adjust the cant of the scope without scratching it and your preferred amount of eye relief.
Straight Shooter

Now set the rifle on a rest and adjust the scope so the crosshairs line up and down, left and right. As a suggestion, check the eye relief at the higher magnifications (especially on high- powered varmint scopes), as this is when your eye will be closest to the eyepiece. Tighten the screws down a little at time, alternating from front to back and side to side while confirming within the scope that nothing has moved with reference to reticle alignment.
When all the details have been completed, use a bore collimator with the proper arbor to roughly center the scope on your bench, grab a box or two of premium factory ammunition and head for the range. Set a target up at 25 yards, remove the bolt from the rifle and, with the gun in a rest, look down the barrel and bore-sight the rifle so the bullseye on the paper is dead center within the barrel. Without moving the rifle, move your head up and look through the scope. If the crosshairs are off the center bullseye, adjust accordingly by removing the covers on the scope turrets.
Fire a few rounds to confirm your settings, then move the target to 100 yards. Using a rifle rest, place the forend of the gun between the “V” of the front rest and use a small sandbag on the rear or buttstock of the rifle. This rear bag is the most important part of the setup, as it allows you to fine tune your sight picture downrange. For example, moving the bag forward and back allows the crosshairs to move up and down; moving it left and right moves the reticle left or right.
RELATED STORY: Range Masters – How To Improve Your Shooting Skills
With your strong hand on the pistol grip, pulling the rifle into your shoulder, your support hand can adjust the rear sandbag as needed while you squeeze off a round. Try to be as consistent as possible shot to shot and the groups will show it. Keep in mind that, at this point, we are not trying to show how good the shooter is, but how good the rifle will shoot under controlled conditions.
It is also a good idea to develop some parameters for your very own shooting style. Obsessed by smaller-caliber .22 centerfire rifles that I use for woodchuck hunting, I strive for groups generally clustering into an inch or tighter through handloading. For general hunting duties, and again, depending upon the game you’re after, grouping three shots into 1.5 inches or better is good for medium to large animals at modest distances around 100 yards.
If you are new to the sport and your rifle, when it comes to the proper distance, do not be fooled by some individuals that insist it’s okay to take game at 500 to 600 yards. Its not only shows poor sportsmanship, but wounding an animal to die a slow death all alone without the faintest idea what has happened to him (or her) is not what hunting is all about. Three-hundred yards or less is perfect and comfortable for most, and with this personal formula for success I rarely need a second shot to anchor my trophy.
A new bolt-action rifle is the perfect way to start the upcoming hunting season or showing your prowess on all-season varmints. Stick to the details, take your time, sight in around 1.5 inches high at 100 yards to start with most cartridges and you will be set for the hunt of a lifetime.
This article was published in the 2017 edition of the Complete Book of Guns. For information on how to subscribe, please email subscriptions@
