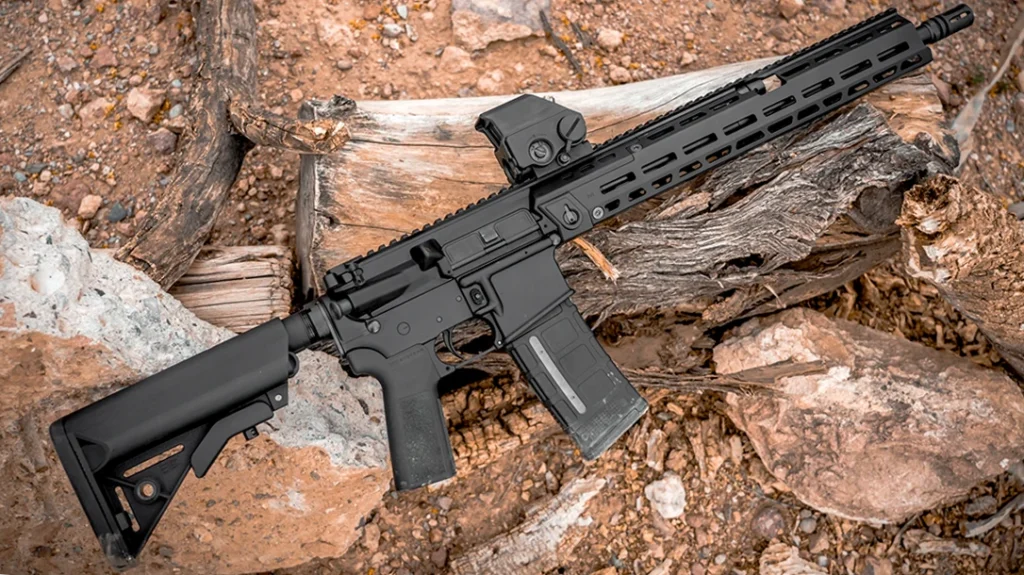
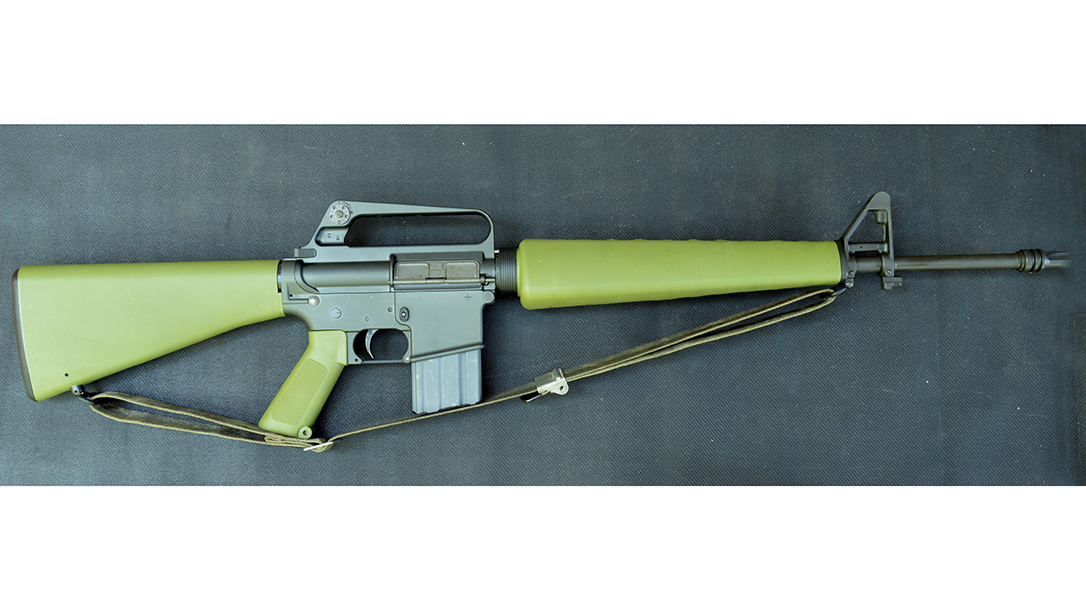
There’s never been a better time to indulge your retro AR nostalgia. I decided to build up my own retro AR based on Colt’s Model 601, the first production model to see military service and the sleekest of the ARs. It had no forward assist or protective raised gate around the magazine release, giving its receiver a slab-sided look you’ll find on vintage civilian Colt SP1 rifles. It also had a distinctive triangular-head charging handle, a three-prong “duckbill” flash suppressor and green furniture instead of the familiar black that came later. A little over 14,000 were made before production ceased in 1963. The Air Force got 8,500, the Army took 1,000 to field test in Vietnam, and Navy SEALs took a few for their operations.
Solid Foundation
For this build project, Brownells was the source for all $648 of the newly manufactured early Model 601 parts, including the gray upper and lower receivers ($150 each), triangular charging handle ($60), early duckbill flash suppressor ($29), green furniture ($80), chromed bolt carrier group without serrations since the 601 had no forward assist ($150), non-captive and easily lost front pivot pin ($15) and aluminum 20-round magazine ($14). I chose the gray anodized receivers because the original black rifle wasn’t really black at all. Brownells had some color consistency problems with the gray anodizing initially, but by the time you read this, that problem will be solved.
Advertisement — Continue Reading Below
The new Brownells Retro parts are overall quite authentically rendered, but neither the parts nor the complete guns are meant to be exact copies of the originals. Brownells nailed the overall impression, but there are differences in the small details like the texturing on the magazine release button, the center holes in the heads of various pins, the metal and furniture finishes, and the receiver marking—or lack thereof.
I am sure a purist will criticize the company’s USAF green stocks, grips and handguards. They’re brighter than the dark olive drab paint applied to the brown fiberglass originals. The Retro stock, made from molded Zytel, may not be a perfect match, but it’s much stronger and will wear better. And if you can’t stand the color, you can just paint the furniture. Brownells also has a big selection of standard AR parts like lower kits, sights, headspace gauges and tools useful for any build.
Upgrading the Vietnam AR
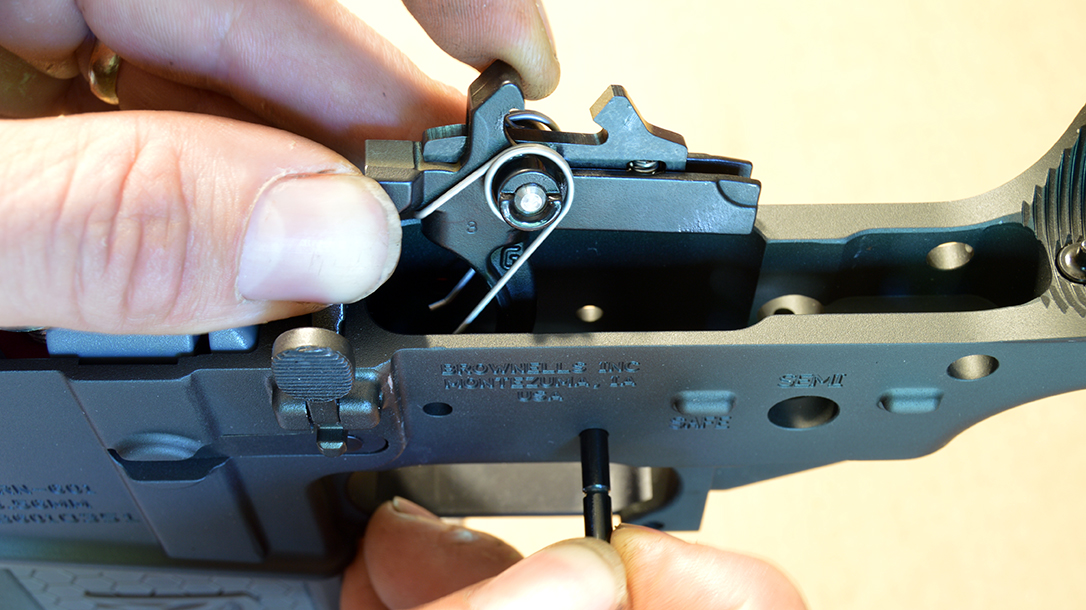
I wanted to build my own Model 601 with some modern enhancements that wouldn’t detract from its old-school look. First on my list was an excellent Geissele Single Stage Precision (SSP) M4 Curved Bow trigger. With its crisp, consistent, 3.5-pound break, it doesn’t cheat the rifle of its accuracy potential like a stock military trigger does. The Geissele is wire-EDM cut from S7 tool steel and given a black oxide finish with polished, butter-smooth contact points. It installs just like the mil-spec unit, but that’s where the similarity ends. At $240, it’s an investment in accuracy.
Advertisement — Continue Reading Below
The original Model 601 had a slim-profile barrel with a 1-in-14-inch twist rate. Brownells’ Retro rifles come with 1-in-12-inch-twist barrels. Both were optimized for 55-grain M193 ammo. You won’t find that surplus anymore, so a 1-in-7-inch- or 1-in-9-inch-twist barrel would be more practical with modern 62-grain M855 ball rounds. Sherluk Defense, specializing in AR and other U.S. military firearms parts, offers 20-inch, 1-in-9-inch-twist “pencil” barrels complete with front sight bases, triangular front handguard caps, barrel nuts, original straight-sided delta rings, weld springs and snap rings for $195.
Brownells offers the same ready-to-install setup but with a 1-in-7-inch twist rate as well as a chrome-lined chamber and bore for $243. I intend to use my retro rifle for general shooting and protection around the property at ranges under 200 yards. Probably more than anything, my son will shoot it with a CMMG .22 LR adapter. For those purposes, a 1-in-12-inch twist is no handicap. I also had a brand-new Vietnam-era Colt GI barrel on hand.
Upgraded Sights
Instead of the standard round, elevation-adjustable front sight and dual-aperture rear sight, I chose XS Sights Systems’ Tritium Stripe front sight and CSAT rear sight. The Combat Shooting & Tactics (CSAT) rear sight has a notch cut into the top of the small aperture that serves as a close-range (7 yards) open sight. Paired with the higher visibility of the tritium front sight in low light or darkness, this is an important consideration for home defense. The tradeoff is that the combination isn’t conducive to long-range accuracy because the rear apertures are same-plane, and the front can only be adjusted in 180-degree turns, which translates to 2.5 inch at 100 yards instead of 1 inch like the military front post. This won’t be my first choice for competitions, but woe to any home invader, ground hog or coyote trying to force their unwelcome presence upon us.
Advertisement — Continue Reading Below
Build Tools & Notes
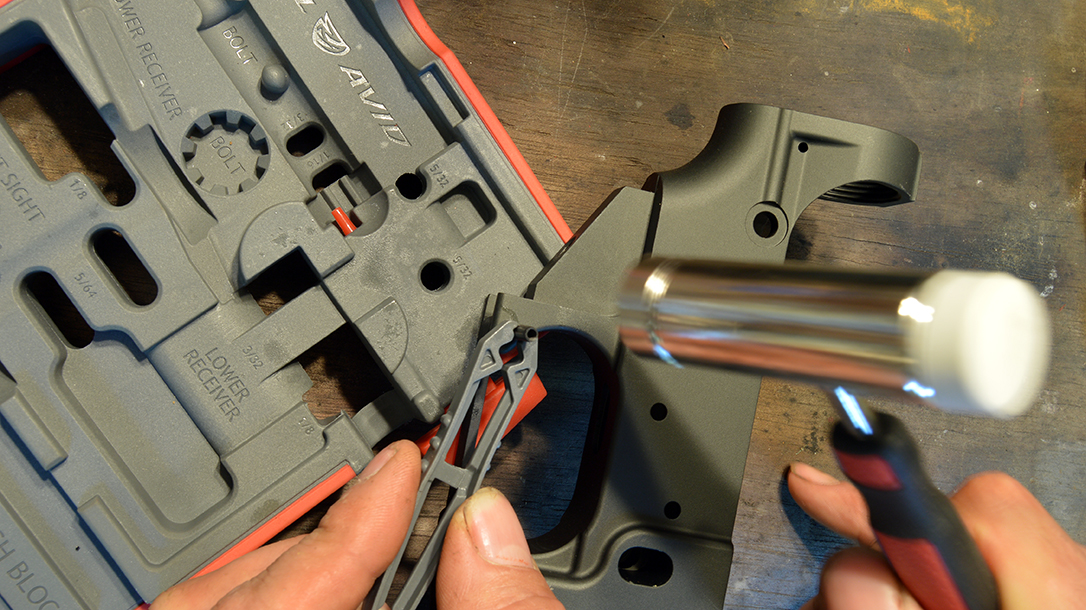
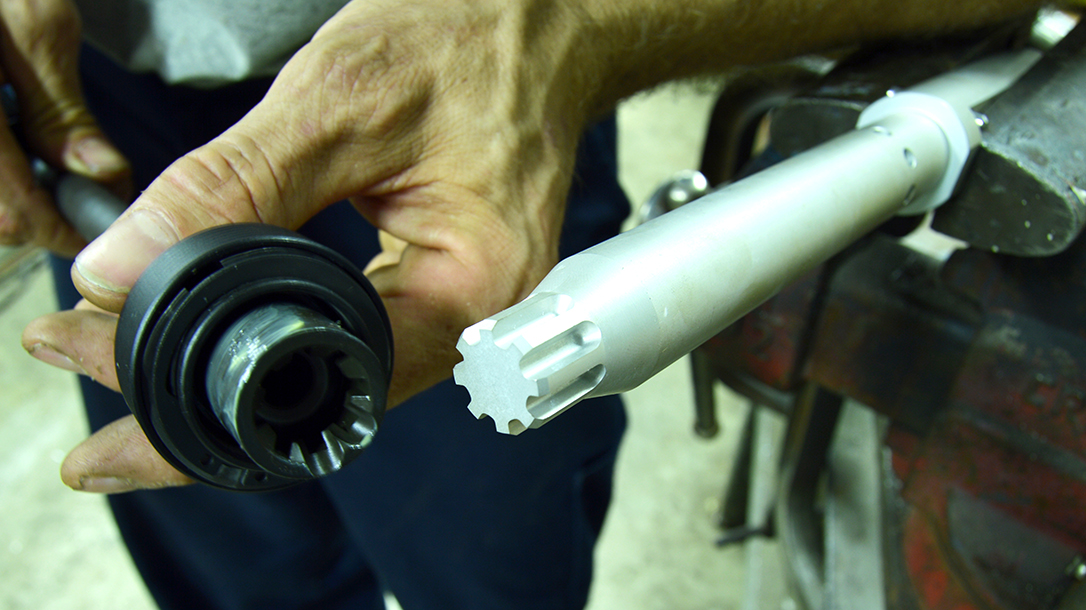
I also tried out some well-thought-out from Real Avid for this build. Useful for any AR build is the Smart-Fit AR-15 Vise Block, which can be tightened in the magazine well to hold any lower still while you work, and the Lug-Lok Vise Block for barrel installation and removal. Instead of gripping the comparatively delicate aluminum upper receiver, the Lug-Lok engages the lugs in the barrel extension to hold it still while you torque the barrel nut down. Very little, if any, twisting stress is put on the upper receiver. The Real Avid AR-15 Master Bench Block is most useful for taking ARs apart, but it’s also great for holding the receiver upright for installation of the bolt-hold-open latch pin and for bracing the front sight base when pinning in the gas tube.
Most AR builds today are carbine-length guns with free-floating barrels. A retro AR build can be done with the same tools as long as your barrel wrench is the open type. The M16 series had triangular fixed front sight bases that you have to work around. Most inexpensive ($20) barrel nut wrenches are open type.
The Importance of Correct Torque
Applying the correct amount of torque to the barrel nut and buffer spring tube can be the most intimidating aspect of a build for beginners. The rest of the assembly can be done on the kitchen table with a small vise bolted to a board and clamped to the table. To get the torque right, you need a few things: a solidly mounted, stable, workbench wise; a fixture like the Lug-Lok to safely support the receiver and barrel in the vise; some grease without graphite like AeroShell 33MS to keep the threads from galling; a barrel nut wrench; a ½-inch drive torque wrench capable of delivering between 30 and 80 foot-pounds of torque; and a basic understanding of the principles of torque. Either a manual needle- or click-type torque wrench will do the job for less than $40. I prefer the manual type because they don’t lose their calibration.
Advertisement — Continue Reading Below
Vietnam AR Toque By the Numbers
Know these principles to accurately apply torque. 1. Only pull the wrench from the handle (make sure it’s centered on the bar with a manual wrench). 2. Anything that lengthens the handle results in the application of more torque than the wrench is reading, so only mount your barrel wrench at a 90-degree angle from the torque wrench handle. The combined tools make a letter “L.” 3. The barrel nut torque value of 30 to 80 foot-pounds is based on lubricated threads. Because of friction, dry threads will reach the same torque value with less tightening than lubricated ones. If you don’t lubricate the threads and torque to the low end (30 foot-pounds), your barrel nut won’t be tight enough.
The procedure to tighten a military AR barrel nut is to torque it up to 30 foot-pounds and then loosen it twice before you go for your final tightening to line up the gas tube hole in the receiver with the first available opening though the castellations on your barrel nut between 30 and 80 foot-pounds. And don’t over-torque! Setting the threads with this method will give you a more accurate reading than using the “one and done” method.
Advertisement — Continue Reading Below
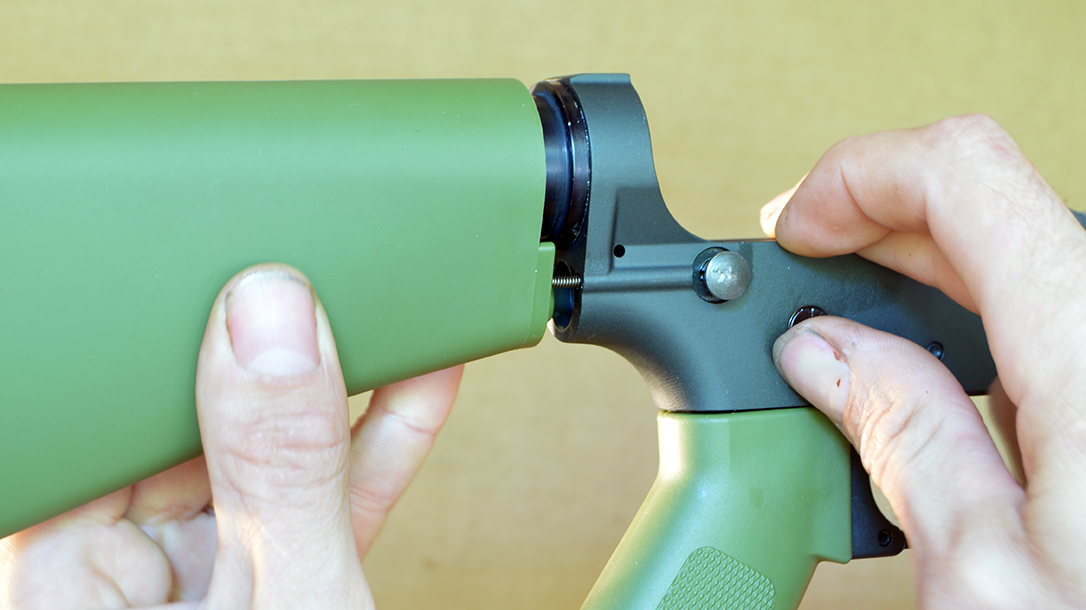
Install the buffer tube without greasing the threads. Use a padded vise to hold the receiver steady along its full length, and use a bolt and washer to secure the wrench on the rear of the tube so it doesn’t slip off and round the edges. Support the end of tube attached to the wrench with your free hand to minimize lateral flexing while you apply 35 to 39 foot-pounds. This is the weakest part of the AR receiver, so make sure you don’t overdo it.
Vietnam AR Finishing Touches
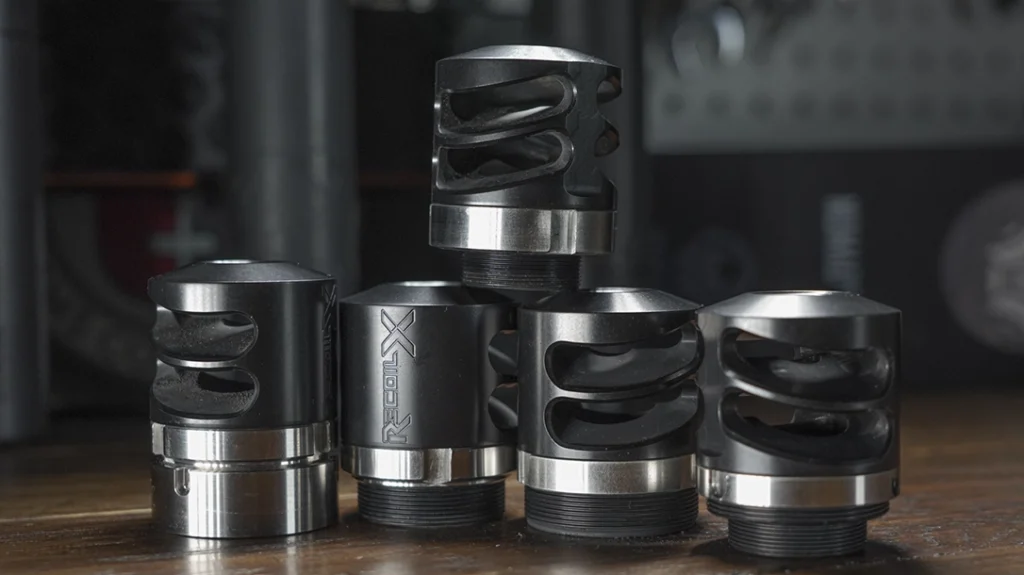
At this point, any anxiety about your build should be behind you. When you try to put the early three-prong flash suppressor on, don’t be alarmed that it lacks wrench flats. Early GI barrel wrenches had slots to tighten it, but you can accomplish the same thing with a butter knife. Contrary to what you might expect, these weren’t clocked any particular way and were held tight with a simple split-lock washer. Get it hand tight and you’re done. It is solid steel and fairly robust despite reports from Vietnam to the contrary. Grunts bent them using the prongs to twist and break the steel straps on Army ration crates. Obviously, you should not do that.
For about the same cost as an off-the-rack Brownells BRN-601 rifle, my build captured the spirit and distinctive appearance of that first military AR-15, but with enhanced shooting characteristics that make it a better and more practical general shooter for my family. After all, getting exactly what you want is the whole reason for building your own rifle.
Advertisement — Continue Reading Below
For more information, visit brownells.com.
Vietnam AR: Custom Model 601 Specifications
- Caliber: 5.56mm NATO
- Barrel: 20 inches
- Overall Length: 38.75 inches
- Weight: 6.63 pounds (empty)
- Stock: Fixed
- Sights: XS Tritium Stripe front, CSAT rear
- Action: Direct impingement semi-auto
- Finish: Gray, green
- Capacity: 20+1