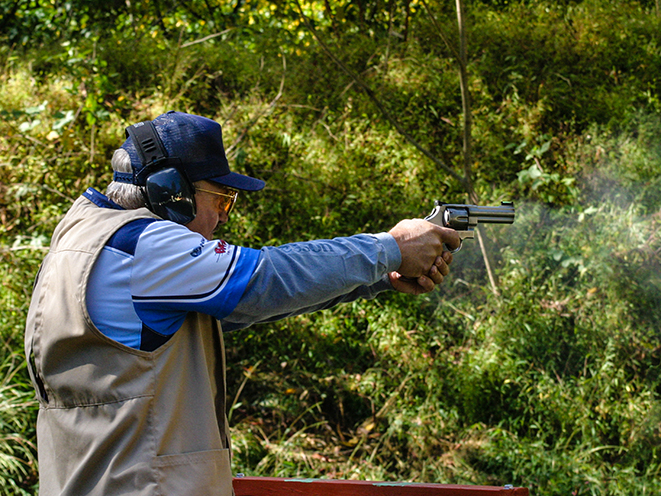
After a day at the range honing handgun skills, it’s obvious that your new pistol isn’t as jiffy clean as it was a few hours earlier. It’s a given: Guns get dirty after use. As such, cleaning your gun is a necessity to keep it functioning reliably and smooth.
To better understand the cleaning process, let’s look at what makes guns dirty.
Advertisement — Continue Reading Below
Why so Dirty?
When you pull the trigger, it releases the firing pin, which strikes the primer, causing a chemical reaction. The impact-sensitive primer ignites, sending a flame toward the powder charge. The burning powder creates gas. The steel of the barrel surrounding the cartridge is stronger than the pressure created by the expanding gas, and the open bore is the path of least resistance, so the escaping gas pushes against the base of the bullet, propelling it down the barrel until it’s free of the bore.
That chain reaction leaves carbon, copper and lead deposits in and around the chamber, bore and action of the gun. Additionally, each subsequent shot deposits more crud. The more you use the gun, the dirtier it gets. A brief shooting session might only require a quick wipe-down with an oily cloth to remove exterior grime. After time and use, enough internal fouling will accumulate to necessitate a thorough cleaning to assure that the gun does not get so gummed up that it fails to function reliably.
Well before your handgun reaches a state of marginal functionality, you must learn how to remove that performance-robbing grunge by giving the gun a proper cleaning.
Advertisement — Continue Reading Below
What You’ll Need When Cleaning Your Gun
Copper, lead and carbon deposits require different solutions for removal from handguns. So you’ll need solvents that work to break down each elemental form. Some chemicals work on carbon and lead, whereas copper removers typically clean only that element.
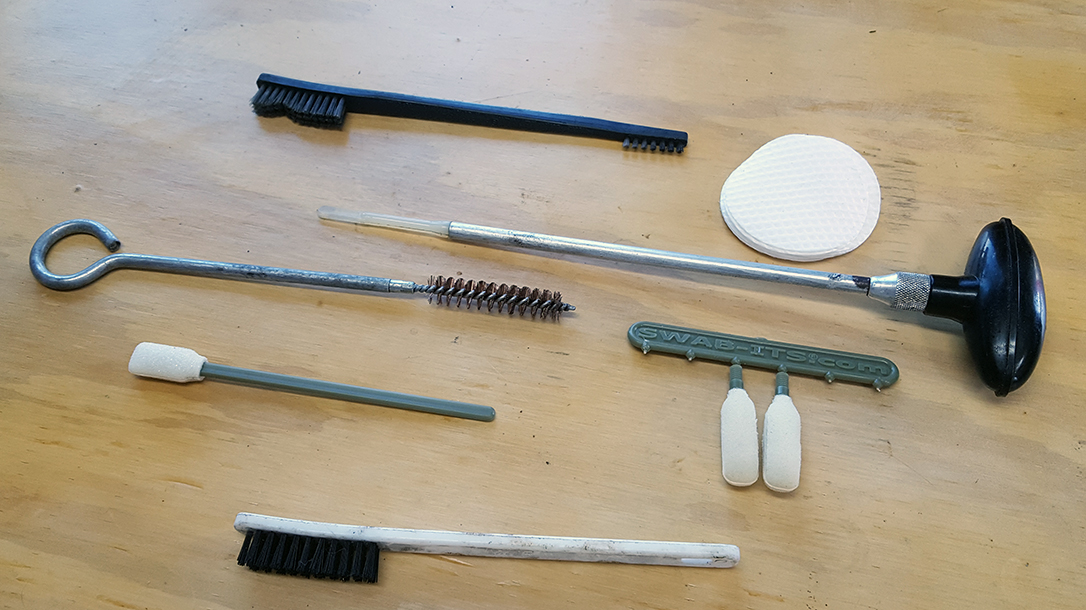
Next, you’ll need a cleaning rod that extends beyond the length of the barrel and an assortment of cleaning jags. These cleaning-rod tips are slotted or just smaller than the bore so you can force down a cloth patch. Bore brushes slightly larger than the bore size connect to the cleaning rod to apply solvents and scrub away grime. Take special care when picking bore brushes. I’m not a fan of steel bore brushes, as they can scratch barrel steel if not used carefully. Instead, pick bore brushes with bronze construction. The bristles can be stiff nylon, brass or bronze.
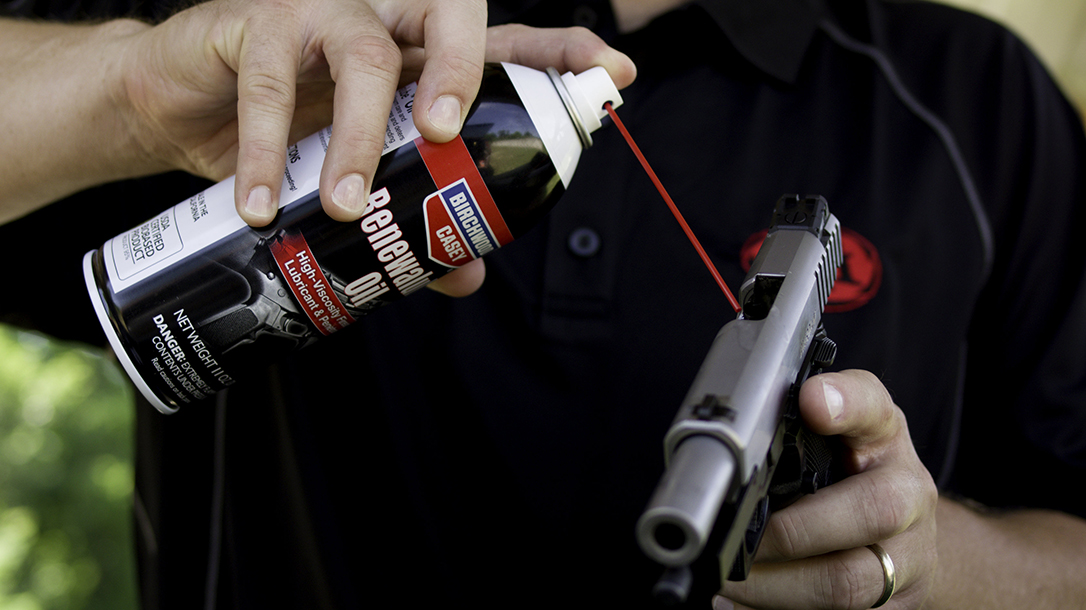
You’ll also need cleaning patches. Appropriately sized cotton patches are the standard, but synthetic-material patches will suffice. Gun oil is the final requirement to clean a gun thoroughly. After cleaning the weapon, apply a light oil coating to metal parts to help prevent rust and lubricate the metal-on-metal friction-wear areas. A final rubdown with a cloth on the exterior metal surfaces will help with excess.
Advertisement — Continue Reading Below
Some Basics When Cleaning Your Gun
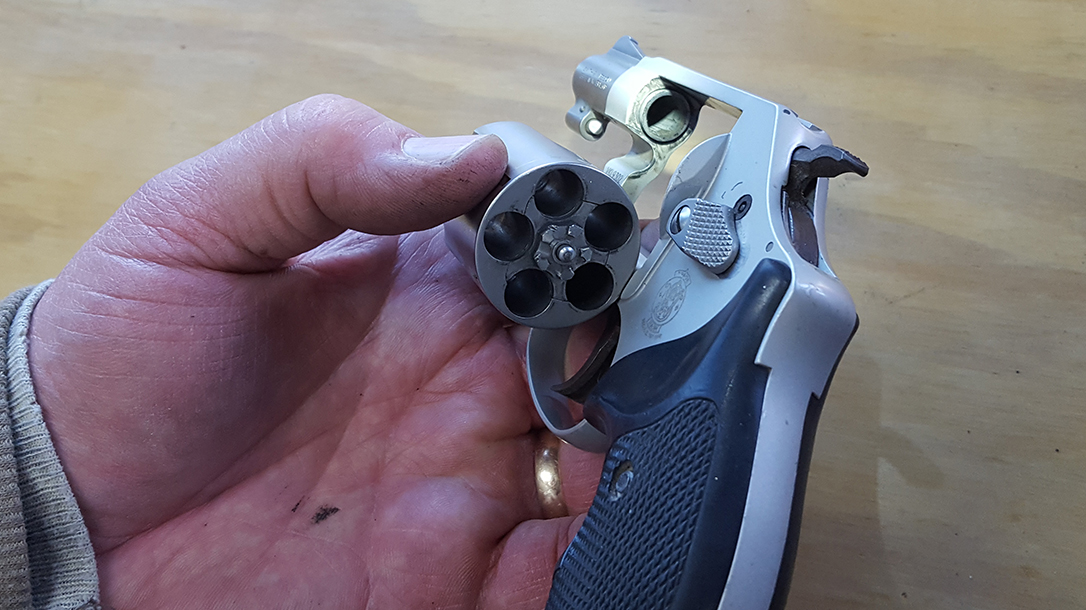
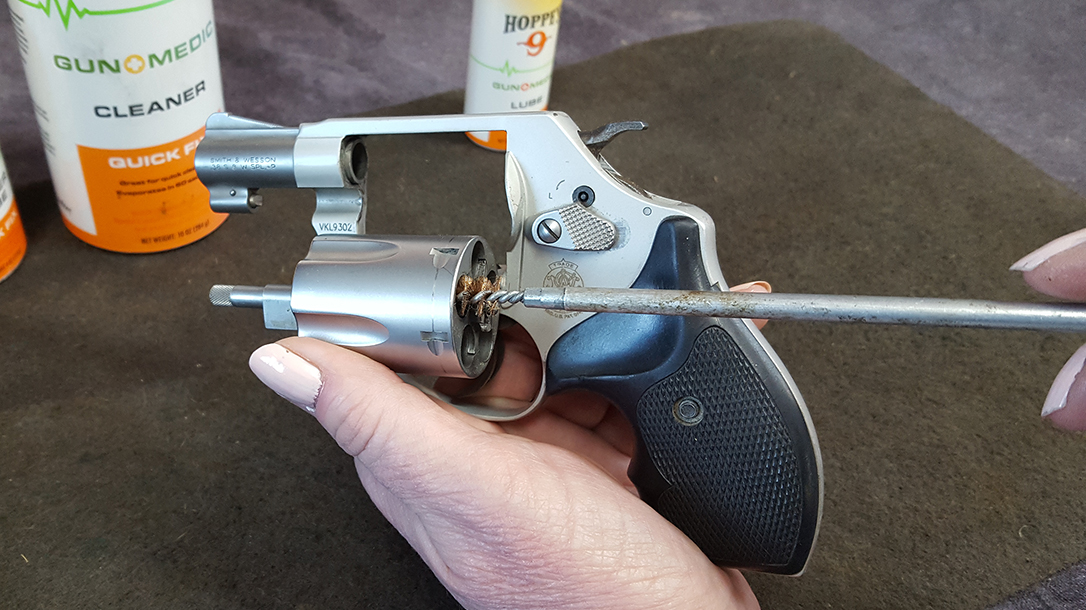
The first rule of cleaning your gun is to be sure it is unloaded. Check it twice. With a double-action revolver, swing out the cylinder and visually check for rounds. A single-action revolver requires that the loading gate be opened and maybe the hammer cocked back one notch to release the cylinder so it rotates freely. Check each chamber of the cylinder to be sure it’s empty.
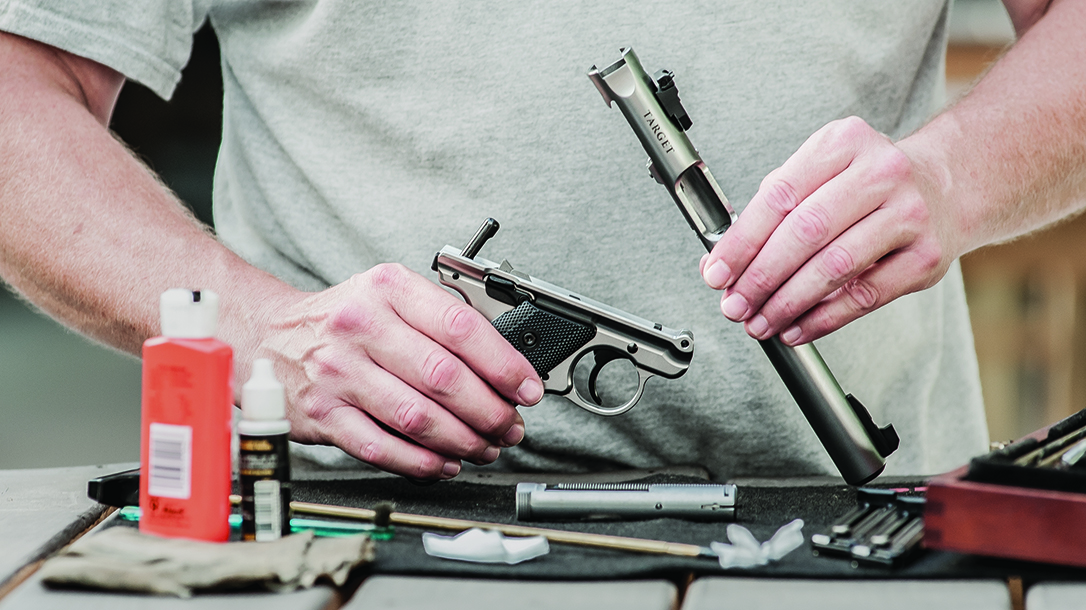
If you’re going to clean a semi-auto, depress the magazine release button and drop the magazine. Next, pull the slide to the rear and eject any round in the chamber. Visually inspect the gun again to be sure a round isn’t in the chamber.
It’s wise to find an uncluttered table or countertop to clean your weapon. Place an old towel on the work surface to catch grime, drops of oil and dirty gun parts. Don’t clean guns on your wooden dining room table. Solvents can penetrate a simple towel and eat the finish of the table underneath.
Advertisement — Continue Reading Below
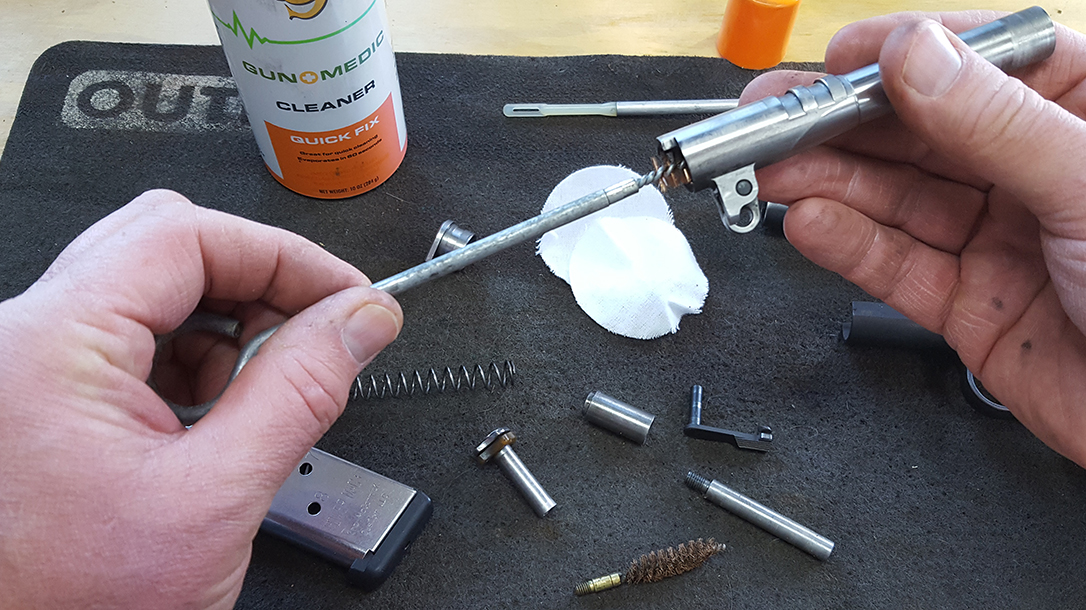
You also don’t need to completely disassemble a handgun—specifically a semi-auto—to properly clean it. Leave that to a gunsmith. You’ll only need to field-strip the gun into its basic parts to get at the dirt. Instruction manuals that come with new guns have step-by-step disassembly and reassembly instructions. If those instructions seem too daunting, take your handgun to a local gun shop and ask for help. A revolver is much simpler. A double-action revolver doesn’t require any disassembly to clean, and a single-action revolver just requires you to pull the cylinder pin and remove the cylinder from the frame.
Cleaning the Bore
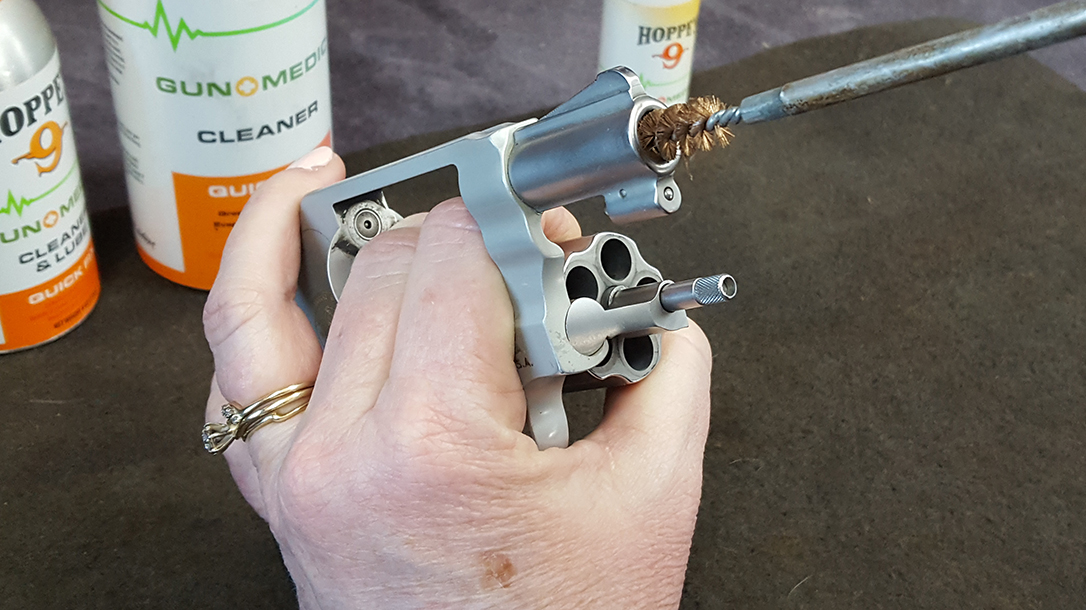
Screw the slotted-tip cleaning jag onto your cleaning rod, and pull a patch halfway through. Then, douse it with cleaning solvent, and run it through the bore several times to saturate the bore. A semi-auto’s barrel can be cleaned from the chamber when it’s removed from the gun, but you must clean a revolver from the muzzle. Also, run a wet patch through each chamber in the revolver’s cylinder. Let it sit for a few minutes. After a brief wait, run a dry patch down the bore to remove loosened carbon. Repeat this three or four times.
This process will remove most of the carbon, but copper and lead fouling require a bit more elbow grease. Every time a bullet is fired, it leaves traces of lead or copper that are ironed into the microscopic pits inside the barrel. This requires alternating between copper and lead solvents if you’ve fired both types of ammunition.
Advertisement — Continue Reading Below
A good practice is to run a wet patch down the bore, switch to a bronze or nylon brush, and then work it up and down the bore. One stroke for every shot fired isn’t unreasonable. Reapply solvent to the brush to keep it wet. Give the solvents time to complete their chemical breakdown within the barrel (and chambers on a revolver). Follow up with a dry patch to remove loosened fouling. Run another wet patch down the bore, followed by one or two more dry patches. Notice that subsequent wet and dry patches will have increasingly less black or green fouling. Copper solvent leaves green deposits on patches as it works. When a patch wet with copper solvent comes out without turning green, you can be certain that no copper remains in the barrel. Revolvers get a bit more attention because each chamber gets dirty.
The Rest of the Gun
After the bore and chambers are clean, move to the rest of the gun. Carbon builds up on the face of the cylinder and the beginning of the barrel, or forcing cone, so wipe solvent with a wet patch over these areas.
Advertisement — Continue Reading Below
The inside of a semi-auto’s slide will need some attention to remove carbon, as will the feed ramp inside the frame. As each bullet gets pushed from the magazine, it deposits lead or copper on the feed ramp.
When the grime from firing is removed from the internal workings of your handgun, use a cloth to apply a light coating of gun oil over the outside metal surfaces. This will also remove any sweat and body oils that contain rust-causing salt. The last thing that should touch the outside metal of a firearm before it is safely stored is an oily cloth. If you are going to carry your firearm immediately, take a dry cloth and remove as much of the oil as possible so it doesn’t transfer to clothing or anything else you don’t want stained.
After you get the hang of cleaning your gun, the firearm should only require a few minutes of maintenance after each shooting session. Clean your gun to take care of your weapon, and it will take care of you.