


It’s going to happen. There’s no way around it. No company’s product is immune, and there’s no magic ammo that can prevent it. At some point, your handgun will malfunction.
A semi-automatic handgun is a machine—a simple one, but a machine no less. It needs maintenance and requires you to do your part. But even when you do everything right, your handgun can still malfunction. The common and generally accepted malfunctions are referred to as follows: Type 1, a failure to feed or fire; Type 2, a stovepipe (failure to eject); and Type 3, a double feed. Type 1 is the least difficult to resolve, and Type 3 is the most difficult.
The goal of any training program should be simplicity and efficiency. In non-diagnostic malfunction-clearance drills, the goal is to simply react to a stoppage or malfunction and clear it without stopping to look, then to think, assess and react. Time is not on your side when it comes to getting a handgun back up and running after a malfunction occurs. Therefore, we are going to cut out “look-think-assess” in our training and skip directly to “react.”
Advertisement — Continue Reading Below
Type 1 Misshaps
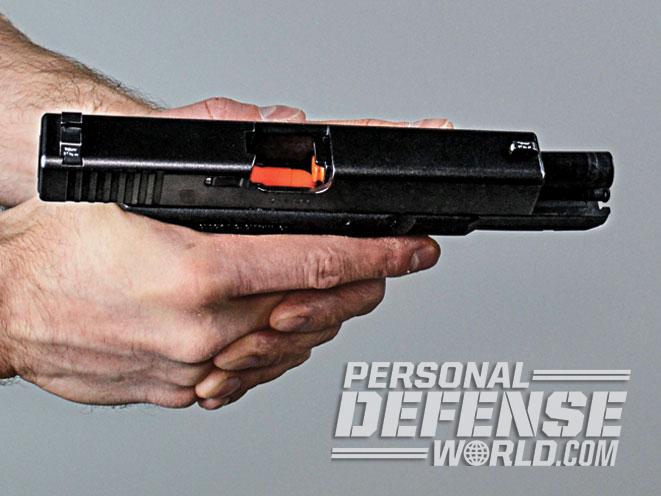
The Type 1 malfunction is commonly referred to as a failure to feed or a failure to fire. A key symptom is the dreaded click you hear after pressing the trigger. On the range, your immediate response would probably be to stop and wonder what went wrong. However, in the middle of a fight, a trigger press followed by a click would induce a response closer to that of getting kicked in the gut by a donkey. It’s that terrifying.
RELATED STORY: Choosing the Right Home Defense Handgun
Advertisement — Continue Reading Below
Common causes for a Type 1 malfunction are a failure to fully seat a magazine, which prevents a round from being stripped into the chamber; a bad round; or the operator’s failure to load the chamber. There are numerous other reasons why you would get a Type 1 malfunction, but these are by far the most common for a properly operating handgun.
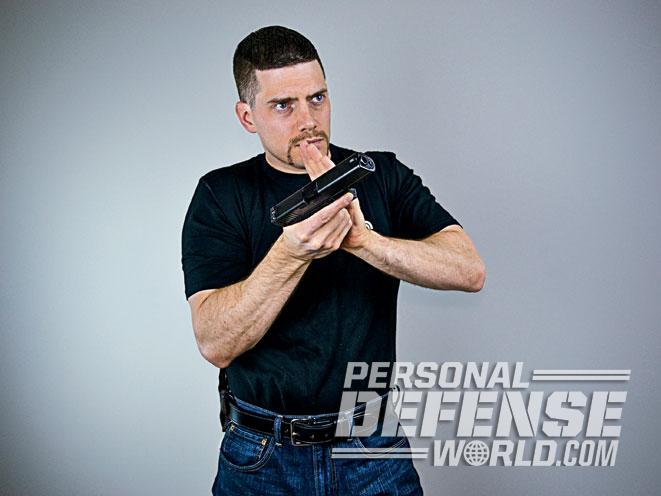
To correct the Type 1, do the following drill: (1) Bring your shooting arm’s elbow back to your ribcage; (2) while keeping the muzzle target-oriented, rotate the ejection port clockwise toward the ground; (3) using the palm of your off-hand, with your fingers pointing up, sharply smack the base of the magazine to ensure it is fully seated; (4) using an overhand grip, rip-rack the slide like you are trying to rip it off of the frame; and (5) reestablish your grip and drive your sights back on target. This drill is often simply referred to as a tap-rack.
Type 2 Blues
Advertisement — Continue Reading Below

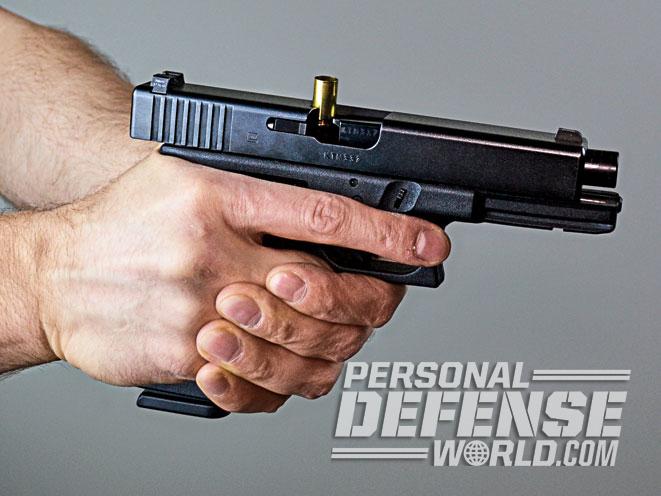
The Type 2 malfunction is often referred to as a stovepipe or a failure to eject. The key symptom of this malfunction is a dead trigger, meaning when you press the trigger, nothing happens. No click. No bang. Just mush. This malfunction gained the nickname “stovepipe” because, when a fired case fails to properly eject and becomes trapped in the pistol’s ejection port, it looks like a stove’s exhaust pipe.
RELATED STORY: 3 Lifesaving Reloading Techniques
Common causes for a Type 2 malfunction are limp-wristing, or not providing solid enough resistance for the handgun during recoil; impeding the slide during recoil; underpowered ammunition; a broken or malfunctioning extractor or ejector; a malfunctioning magazine; or an overpowered recoil spring. By far the first two examples are the most common causes for a Type 2 malfunction, and they are basically due to operator error. This is a good thing because operator errors are easier to prevent and fix than mechanical failures.
Advertisement — Continue Reading Below
The response to a Type 2 is identical to that of a Type 1: an aggressive tap-rack. The reason this works is that the next round to feed from the magazine helps push the stovepiped empty case out of the feed port. And with the feed/ejection port rotated toward the ground, gravity helps the case on its way. So, for the first two types of malfunctions, we only have to train in one response.
Type 3 Debacles
involve either an extractor failure, a magazine failure or a stuck case.”
The Type 3 malfunction (commonly called a double feed) is the mother of all malfunctions, short of a stuck case or a catastrophic part failure that renders the handgun inoperable. In the latter two malfunctions, you need to start thinking Plan B. There is no drill to fix them without tools.
Advertisement — Continue Reading Below
The key symptom of a Type 3 malfunction is identical to that of a Type 2: a dead trigger. In a handgun, a Type 3 is the result of a live round heading into the chamber when another live round is already there. This is fairly uncommon in handguns, but I have seen this happen more frequently with carbines like AR-15s, which feed from magazines that almost have a true double-presentation-style feeding system with dual feed ramps. Common causes of a Type 3 malfunction essentially involve either an extractor failure, a magazine failure or a stuck case. The Type 3 is difficult to deal with, so you definitely want to have a game plan to deal with it.
RELATED STORY: 5 Ways To Tame Recoil
With a Type 3 you will start out with a dead trigger, and if your training kicks in, you will immediately perform a tap-rack as you would with a Type 2. But in doing so, you will then notice that the slide will stop short and you have what appears to be a train wreck in your feed port.
Advertisement — Continue Reading Below
The drill for correcting a Type 3 malfunction is as follows: Without stopping to think or assess, (1) bring your shooting arm’s elbow back to your ribcage; (2) engage the slide stop with your shooting hand’s thumb and, using an overhand grip with your off-hand, rip-rack the slide like you are trying to rip it off of the frame; (3) using your off-hand, rip the magazine from the mag well and throw it to the ground; (4) while keeping the muzzle target-oriented, rotate the ejection port clockwise toward the ground; (5) using an overhand grip, rip-rack the slide three times like you are trying to rip it off of the frame; (6) perform an emergency reload; and (7) reestablish your grip and drive your sights back on target. Rip. Roll. Rack. Reload.
Parting Pointers

The goal of these drills is to train you to use the same motor response for each malfunction clearing. This means less thinking, more doing. The basic tap-rack should become a reflexive response when your handgun doesn’t respond to a trigger press. If that doesn’t fix the problem, immediately go to rip-roll-rack-reload. Remember, the goal is to skip over the process of look-think-assess and jump directly to react. And with non-diagnostic malfunction-clearance drills incorporated into your regular training routine, you’ll be able to do so.