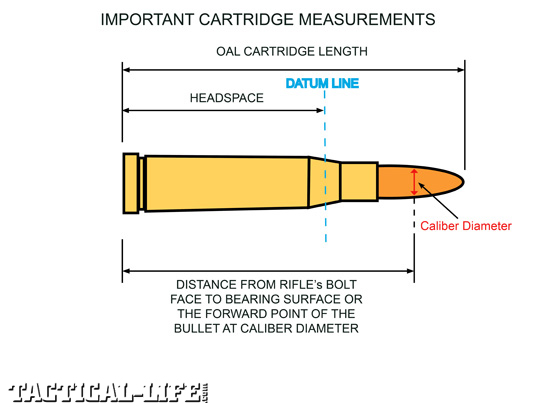
With non-magnum, bottleneck rifle cartridges, headspace is measured from the base of the cartridge to the datum point on the shoulder. Knowing the headspace of your rifle and sizing cases accordingly helps you to wring the most accuracy out of your rifle. It also prolongs case life, because properly sized cases stretch less, and less stretch reduces the possibility of case-head separation.
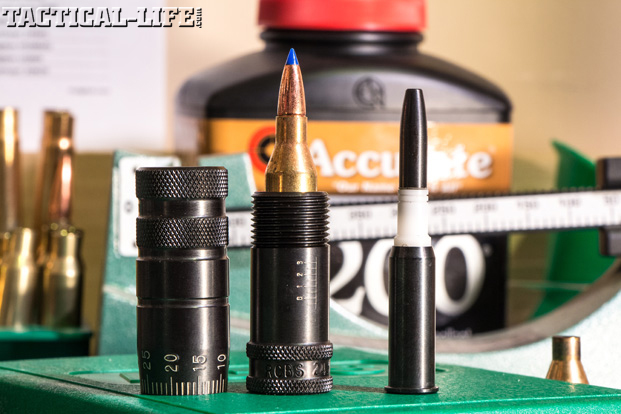
A great way to sort this out is with Precision Mics from RCBS. They come in pairs. One mic helps you determine headspace, and the other helps determine overall cartridge length. The headspace gauge is simple to use; simple, too, is adjusting your sizing die based on your headspace measurement.
Step 1: Measuring
Advertisement — Continue Reading Below
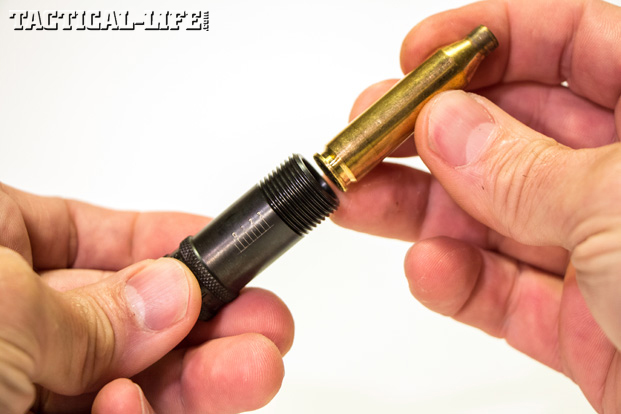
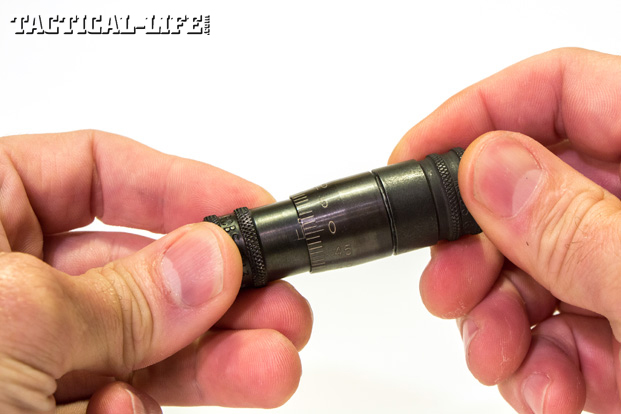
Take five cases that have been fired in your rifle (and they must be from your rifle, because every rifle chamber is slightly different). Measure each with the headspace gauge by dropping the case into the base of the gauge; the base is the one with the linear marks on its side. Then, screw on the other end until it stops. Don’t force it; just screw until it stops.
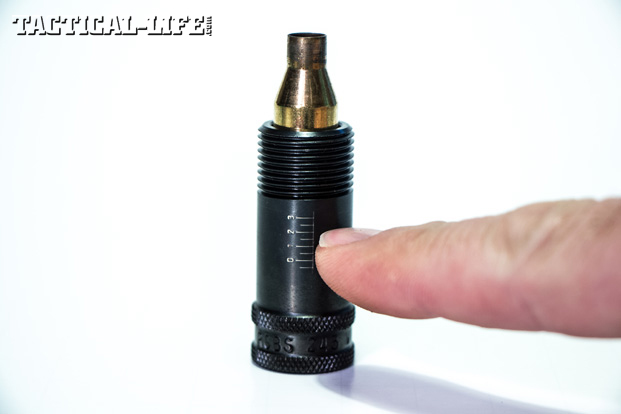
The linear mark with the zero beside it on the base of the gauge indicates the minimum Sporting Arms and Ammunition Manufacturers Institute (SAAMI) headspace. I measured five cases fired in my New Ultra Light Arms Model 20 in .243 Winchester, and all of them measured at -0- on the base mic and plus-1 on the mic with the marks around its circumference. This means the headspace in my rifle is .001 over the SAAMI minimum. When you do this, take the average of the five measurements.
Step 2: MTA
Advertisement — Continue Reading Below
The next step is to adjust your sizing die so it sets the shoulder back between .001 and .002. Lube and size two cases with the sizing die adjusted per manufacturer’s instructions. Check these sized cases with the RCBS Precision Mic. For my .243 Winchester cases, the reading was 0 minus 1. (Remember the 0 plus 1 reading from the fired but un-sized case?) This meant my sizing die was setting the shoulder back .002 inch, or .001 inch under the SAAMI minimum.
Let’s say you find the die is setting the shoulder back .004. To make the correction, screw the sizing die out by about a half turn and lube and size one case. Check the headspace measurement on the case. Continue to back the die out, size a different fired case and then gauge it until the desired reading is obtained.
Key To Consistency
Advertisement — Continue Reading Below
Remember to tighten the lock ring on the sizing die after each adjustment to make sure you get consistent sizing. You should not use this procedure for rifles that require full-length sizing or a small base-sizing die—for example, rifles featuring certain kinds of auto or lever-feed actions.
If you’re having accuracy problems with your handloads or are experiencing case-head separation after just a few reloads, you might have a headspace/sizing issue. If case-head separation is not an issue, but you feel the accuracy of the rifle is sub-standard, it might be the case that your overall cartridge length (OAL) needs adjustment.
When setting the OAL of a handloaded rifle cartridge, you must make sure that your loaded rounds fit the rifle’s magazine. If you build your ammo to the specifications listed in the load manual, this is generally not a problem. Nor is it a concern in the case of single shots. However, you can sometimes improve the accuracy of a certain load by shortening or lengthening the distance between the point at which the bullet’s bearing surface begins and the point at which the rifling lands start in the chamber.
Advertisement — Continue Reading Below
With magazine-fed rifles, it may be impossible to shorten the aforementioned distance, because seating the bullet farther out will make the cartridge too long to work in the magazine. Also, with single shots, you may find that the throat is cut long, making it necessary to seat bullets farther out so that the jump to the lands is not excessive.
There are a number of ways to do this, but always helpful is the cartridge-specific RCBS Precision Mic set that you used to set headspace. It will tell you the distance from your bolt face to the lands in your rifle’s chamber.
Free-bore Reading
Advertisement — Continue Reading Below
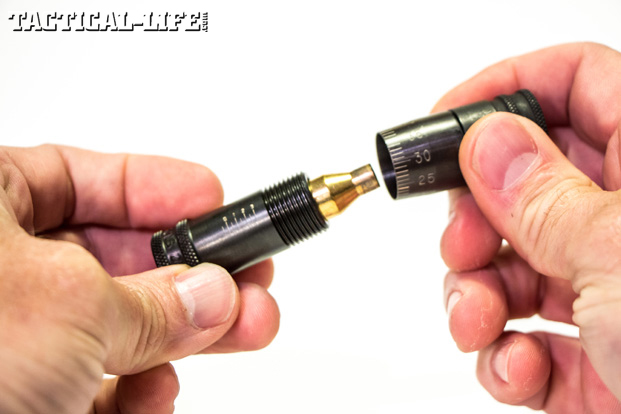
Each RCBS Precision Mic Set comes with a base that resembles a cartridge case. There’s also a bullet-shaped tip for the base, which has a nylon connector. In the bottom of this connector is a screw that allows you to tighten the nylon connector in the base. This is called a free-bore tool. To determine the distance from your bolt face to the lands in your chamber, start by inserting the nylon connector a quarter of an inch into the base. Then, place the free-bore tool into the base of the gauge. Install the land nut and check the length. Adjust the free-bore tool until the reading is approximately .300 inch.
Remove the tool from the gauge and while holding the tool by the nylon section, tighten the screw using a hex wrench through the base. Next, you’ll need to chamber the free-bore tool in the rifle. Be careful to ensure that the rim of the base is behind the extractor and that the tool does not hit against the edges of the chamber during insertion. When you close the action, the tip of the free-bore tool will engage the lands, and the nylon connector will set back into the case. Be careful while removing the free-bore tool from the rifle so as not to alter the reading.
Now, insert the free-bore tool back into the base of the Precision Mic and gently screw on the land nut so it contacts the tip of the free-bore tool. Do not tighten excessively; this will further push the tip into the base of the free-bore tool and give you an incorrect reading. Write this reading down and assemble a dummy round, seating the actual bullet you intend to load so that it gives the same reading when measured with the Precision Mic. When chambered, this dummy round should just contact the lands of the rifling in your chamber.
Advertisement — Continue Reading Below
OAL Set & Test
After you’ve made sure that a cartridge with this OAL will work in your rifle’s magazine, you can proceed to determine the OAL that will provide for the best accuracy. Start by loading nine rounds with the bullet seated .010 back from the lands. Obtaining this .010 set back is now easy: Simply seat the bullet so the cartridge OAL is .010 shorter than the dummy round you loaded to mimic the free-bore tool. Load 18 additional rounds—nine seated .020 back from the lands and nine seated .030 inch back. (These cartridges would have OALs .020 and .030 inches shorter than the OAL of the dummy.)
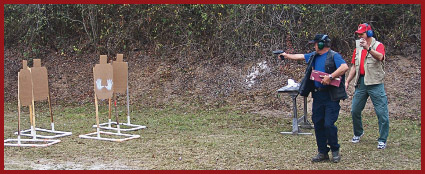
The next step is to shoot three three-shot groups with each cartridge length. Average the results to determine which OAL produced the best accuracy. You may find that your particular load likes to be seated farther back from the lands or that the distance between the bullet and the lands has no bearing on accuracy at all.
As a final note, keep in mind that the closer you position the bullet to the lands, the higher the pressures produced are likely to be. If you decide to attempt the procedure using your pet load—which is at book maximum — and end up creating a load that positions the bullet closer to the lands, you may be faced with a high-pressure situation. When decreasing the distance from the bullet-bearing surface to the lands, cut the powder charge by 10 percent and work back up, looking for pressure signs along the way.
The savvy thing to do is to determine the OAL of a cartridge in which the bullet is positioned .010 inch off the lands before beginning to work up a load. If accuracy is unacceptable when you reach a maximum load, you can shorten the OAL .01 inch at a time, looking for better accuracy as you go.
RCBS’s Precision Mics are great tools to help you load ammunition to match the headspace of your rifle and to determine the best cartridge OAL for each load. They are available for 33 different cartridges and retail for about $60. For more information, visit rcbs.com or call 800-533-5000.
Check out this article about 5 Common-Sense Handloading Tips.