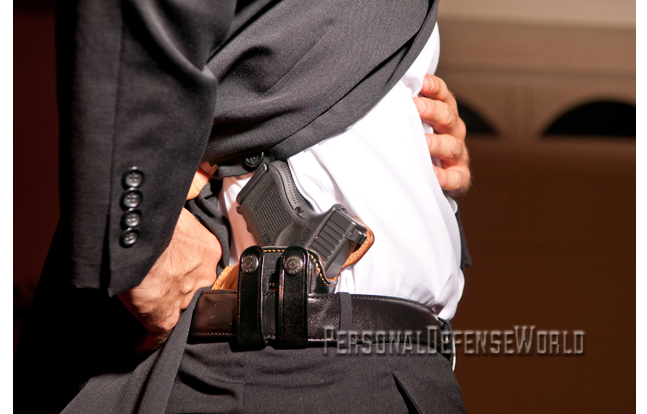

When you wear your gun at the four o’clock position, you can easily conceal it while maintaining your ability to make a quick-draw.
One of the most important skills you can practice on a daily basis is improving your draw speed. After all, it won’t matter if you’re the world’s best shot if you can’t get your gun out fast enough in a deadly force situation. But first let’s take a look at a few ways to speed up your draw that don’t include practicing in front of a mirror or at the range.
For starters, you’ll need to decide if you’re going to use open or concealed carry. With open carry you shave off about a half-second from your draw speed, but then you lose the element of surprise, so it’s obviously a personal decision to how you’re going to carry. Next, decide on the type of holster you’re going to wear. Will your holster have a retention device, such as a strap you must break or a button you must push? If you use open carry, I believe it’s important to have a retention device because you don’t want someone behind you to have easy access to your gun. But for concealed carry, I prefer an open-top holster without any retention device slowing me down.
Another consideration is the location you’re going to wear the holster. If you wear your primary gun on your ankle, or in the small of your back, you’re not doing yourself any favors when it comes to getting your gun out fast. This is why I prefer to wear my gun at the 4 o’ clock position, but naturally you should use what works best for you.
Advertisement — Continue Reading Below
Get Down & Drillin’
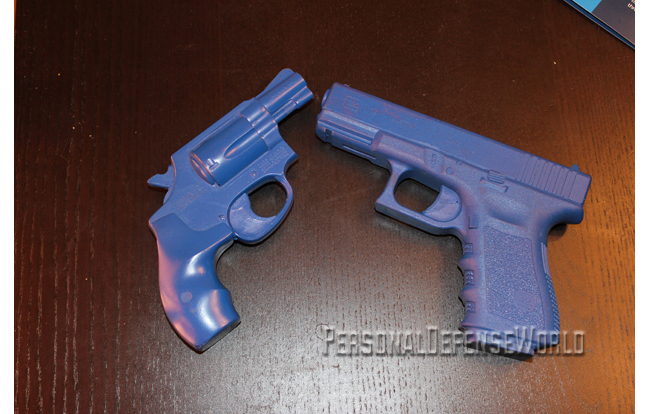
Once you’ve taken into account all of the above factors, it’s time to do some dry-fire drills. Find yourself a safe location, and triple-check that your gun is empty. If you can’t find a safe dry-fire location, then get a blue training gun for practice. I use these often, especially in hotel rooms, where it’s difficult to find a safe direction to point a gun.
When you’re all set to go, the first thing you want to work on is your grip. You need to be able to acquire a solid three-finger grip on the gun while the gun remains in the holster. Also, you need to make sure that your grip is high on the gun’s backstrap. If you can’t get a solid grip, move your holster to a location that is easier to reach—or you may need to get a new holster. (I’ve tested out leather holsters that chewed up my hands when I was getting my grip, so I obviously didn’t keep them around for very long.) When you’re able to consistently get a solid grip, then you can move on to the next part of the draw.
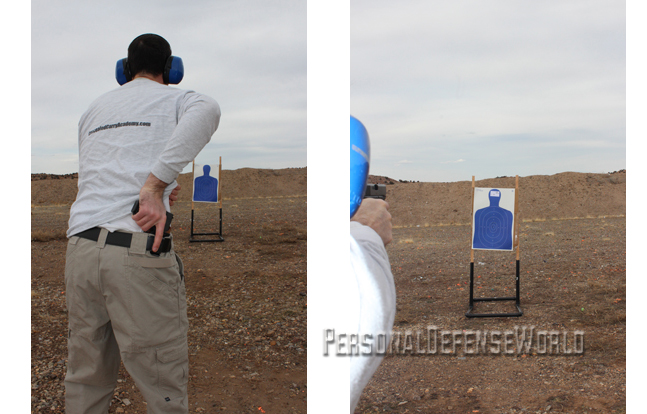
With a solid grip, pull the gun straight up out of the holster. As soon as the gun clears the holster, rotate it toward the target. This position is often referred to as close-quarters combat or close-quarters battle because you’re able to fire from it if need be. Next, have your hands meet in the center of your chest to acquire a two-handed grip, and then press the gun out in a straight line, fully extending your arms. As you’re pressing out, you should begin to pick up the front sight, which allows you to fire the gun before you’re fully extended, if the situation calls for it.
Advertisement — Continue Reading Below
As you’re practicing the complete draw, you’ll want to watch yourself in a mirror or have a friend watch you to ensure you are moving in the most efficient manner possible. For instance, as you’re drawing the gun, the only body parts that should be moving are your arms. If your head or legs move, then that’s wasted movement, which should be corrected. Also, since the arms are the only parts moving, it is critical they are moving in a straight line at all times. A lot of folks tend to go “bowling” or “fishing” when they draw their gun, which means they either bring the gun up at an angle (bowling) or go in a circle to finish the draw (fishing). If you find yourself using either of these “methods,” correct that immediately as it’s detrimental to your draw speed.
When you believe you have an efficient draw, then you’ll want to test it out by doing what Colonel Jeff Cooper referred to as a “blind draw.” With this, you’ll draw the gun with your eyes closed and, as Colonel Cooper stated, “Complete the stroke to hammer fall with your eyes shut, hold steady and open your eyes.” Cooper noted that, if your stroke has been good, you will be exactly on target, as your sights will verify.
An excellent training tool to use for the blind-draw drill is a laser trainer, such as the LaserLyte system. Once you’ve pulled the trigger and opened your eyes, the laser trainer will clearly tell you if you were on target or not. You’ll want to practice the blind-draw drill over and over until you’re consistently on target. When you achieve that consistency, you will want to internalize your drawstroke and the position of your body. In other words, memorize how the draw feels so you can repeat it every time your gun comes out of the holster.
Advertisement — Continue Reading Below
Go Live
Now, the good news is everything I’ve described above can be done in your home via dry-fire training. But you’ve also got to do some live-fire drills to work on your draw speed. When you’re at the range, start out by placing a 3-by-5 index card about 3 yards away from you. Work on your new draw, which when completed should have your front sight squarely on the index card. If you’re at a range by yourself, such as at your local public outdoor range or someplace where you’re certain nobody else is around, then do the blind draw and see if you’re able to hit the index card. When you can dependably hit the index card, it’s time to introduce a timer.
Personally, I use the Pocket Pro competition timer, but any timer will do. My belief is that you need to be able to draw your gun from concealment and hit your target in under two seconds. So, depending on your skill level, you may want to start out by setting the timer at three or four seconds. But practice to the point that you can draw your gun from concealment and hit the index card in under two seconds.
After you’ve become proficient at hitting the card in under two seconds from 3 yards, move the target back to 7 yards. Again, from this new distance you’ll want to get to the point where you can hit the 3-by-5 index card in less than two seconds when drawing from concealment. As you move the target further and further back, I encourage you to videotape yourself or have a friend watch you to make sure you’re completing the draw in the most efficient manner possible and not bringing back any bad habits.
Advertisement — Continue Reading Below
If hitting the target at 7 yards is easy for you, then let me introduce you to a drill that was shared with me by Louis Awerbuck, former chief rangemaster at Gunsite: When talking about drills one day, Louis asked me if I wanted to know about “a murderous drill that would wreck my self-confidence.” Naturally I told him yes. He said that Colonel Cooper taught him a drill where, from 25 yards, you have 2.5 seconds to get one shot into an 8-inch circle while drawing from concealment. It’s a very humbling drill, and if you try it, I recommend a steel target so you get instant feedback. Also, with this drill it is crucial that you have the perfect draw and there is absolutely no wasted movement.
But before you start driving yourself crazy trying to hit steel from 25 yards, take as much time as you need to perfect your draw. The speed will come, especially if you spend 10 to 15 minutes each day working on your draw, as I do.