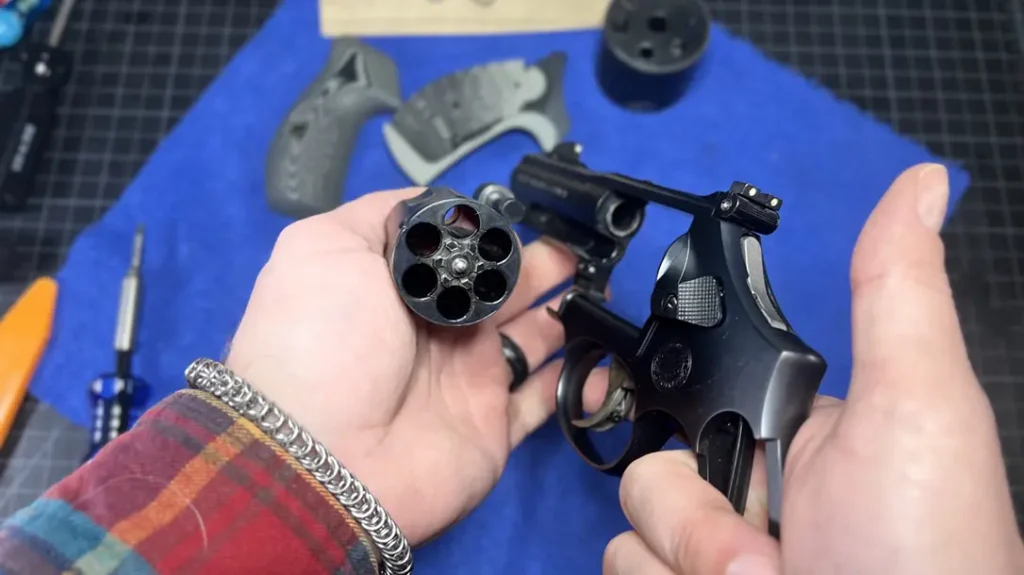
Smith & Wesson revolver maintenance involves more than just a quick wipe-down of the exterior and a pass-through of the bore with a cleaning rod. Revolvers are known for their reliability. However, neglecting the internal mechanisms can lead to sluggish performance, timing issues, or even malfunctions at the worst possible moment.
Smith & Wesson Revolver Maintenance
If you’ve been relying solely on surface-level cleaning, it’s time to step up your maintenance game. This guide will walk you through how to open your S&W revolver properly, clean and lubricate the internal components, and ensure it is functioning flawlessly before returning it to use.
Step 1: External Cleaning and Inspection
Before diving into the internals, you should first clean the exterior of your revolver following your standard procedure:
Advertisement — Continue Reading Below
- Unload the firearm and verify it is clear. Always triple-check the chamber and cylinder, and remove ALL ammunition from the bench.
- Clean the bore and cylinder chambers using a cleaning rod, bore brush, and solvent.
- Inspect for wear and damage. Check for excess lead or carbon buildup, corrosion, or any unusual wear patterns on the forcing cone, cylinder notches, and barrel crown.
– Remove lead or carbon and reference manuals for unusual wear patterns/damage.
This initial cleaning helps prevent contaminants from entering the internals when you remove the side plate.
Step 2: Tools You’ll Need
Disassembling and cleaning the internals of your revolver requires the right tools. Using improper tools—especially the wrong screwdrivers—can easily damage screws or mar the finish.
Essential Tools and Supplies:
Advertisement — Continue Reading Below
- Properly sized hollow-ground screwdrivers (avoid standard tapered screwdrivers, as they can damage screw heads)
- Modern Spartan Systems (MSS) Cleaning Kit (or similar high-quality solvent and lubricants)
- Needle-nose oiler (for precision lubrication without overapplying oil)
- Moly grease (for select metal-on-metal contact points)
- Plastic picks and cotton swabs (for detail cleaning inside the action)
- Microfiber cloths (to prevent scratches)
- Non-marring hammer or Nylon screwdriver handle (for tapping the side plate loose)
Step 3: Removing the Side Plate
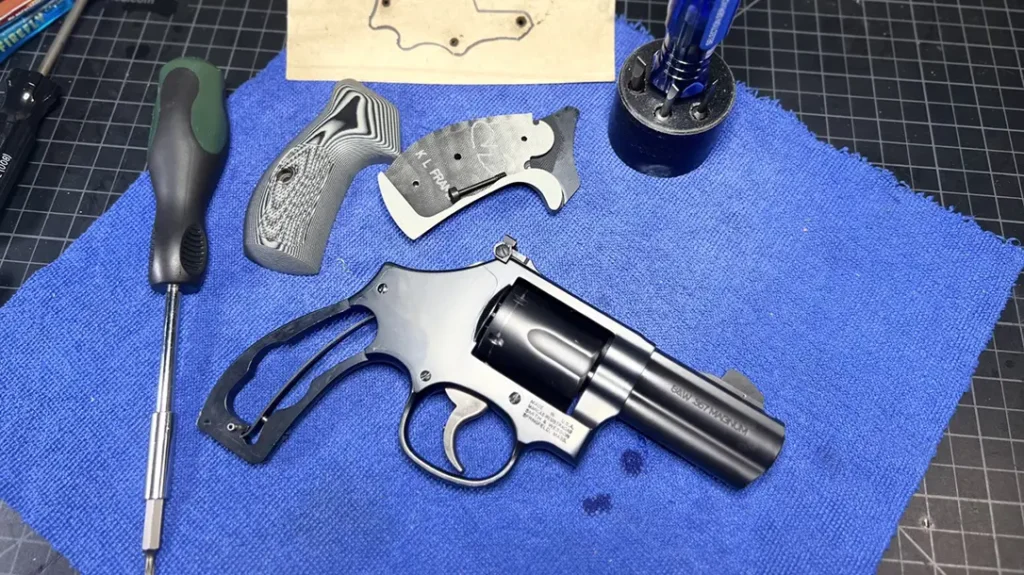
To clean the internals of your revolver, you’ll need to remove the side plate. Here’s how to do it properly:
- Remove the grips using the appropriate screwdriver.
- Take the weight off the mainspring screw (located on the front strap of the grip frame). Loosen it until there is (almost) no tension, but do not fully remove it yet.
- Remove the cylinder and yoke:
- Unscrew the side plate screw located above the trigger.
- With the revolver tipped slightly downward, pull the cylinder and yoke assembly free.
- Remove the two remaining side plate screws carefully. Keep them organized—side plate screws are not interchangeable. A simple trick is to trace the outline of the side plate on a piece of cardboard and insert each screw in its proper position.
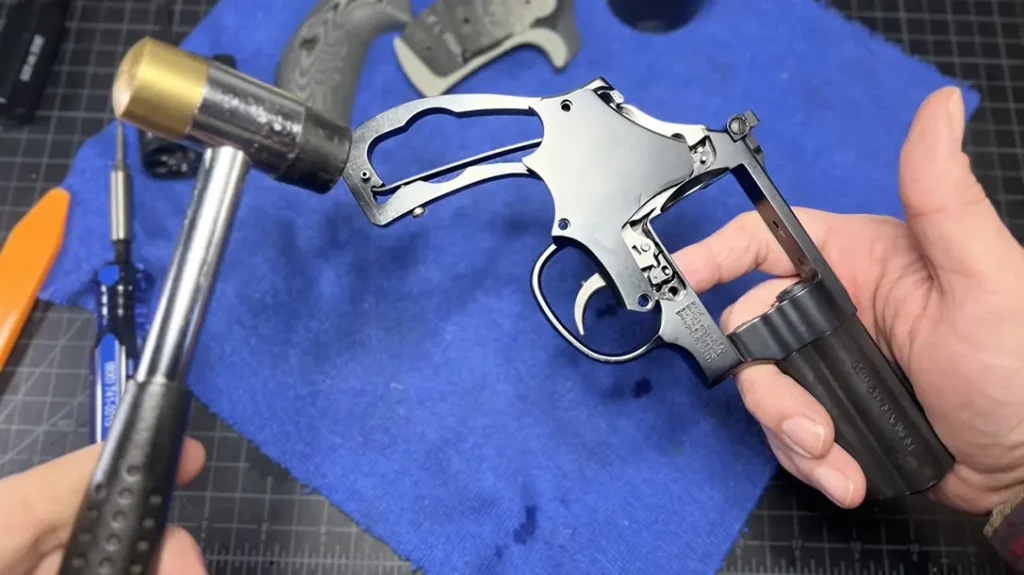
- Tap the frame gently at the bottom of the grip with a plastic or nylon screwdriver handle. Never pry the plate off—doing so could warp it and mar it internally. A few taps should make it pop loose. Be patient—keep tapping.
- Lift the plate off carefully and set it aside. You now have access to the internal components.
Advertisement — Continue Reading Below
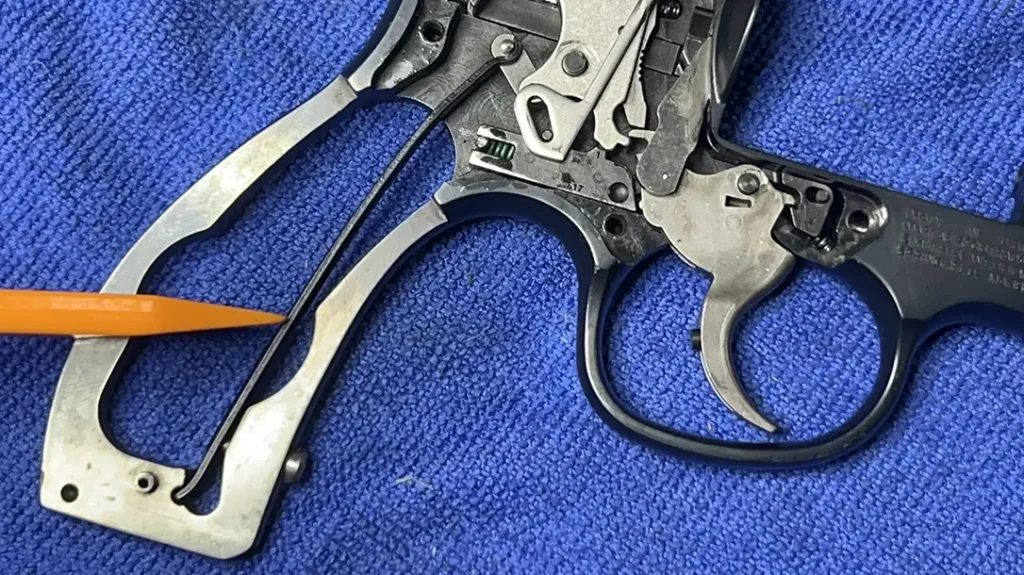
Step 4: Cleaning and Lubricating Internal Components
Once the internals are exposed, you can clean out built-up grime and lubricate the necessary components.
If the internals aren’t excessively dirty, you can clean them in place. However, if there’s heavy fouling, consider fully disassembling the action for a more thorough cleaning.
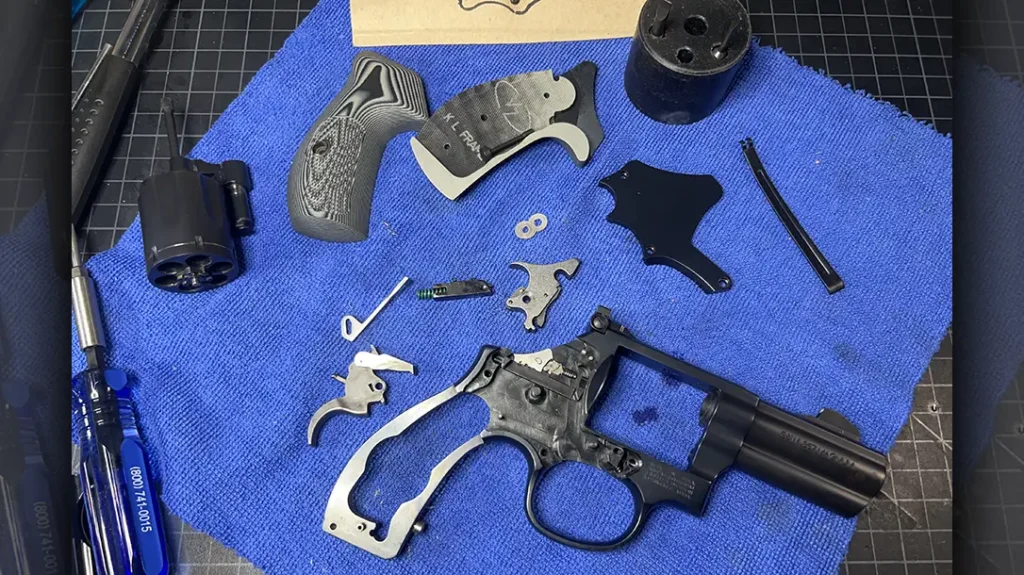
Disassembly for Deeper Cleaning:
Advertisement — Continue Reading Below
- Remove the mainspring. Fully loosen the mainspring screw and hammer shoe (if you have one) and set the spring/shoe aside.
- Lift out the hammer block safety. Note its orientation and where it fits into the side plate, as it needs to be correct for reassembly.
- Remove the trigger return block carefully. Cup your hand with a rag over it before lifting it out—its spring is under tension and may launch if not handled properly. The back of the trigger contains an arm that is loose.
- Remove the Trigger and Hand. Pull the cylinder latch to the rear to unlock the action. Then, pull the hand back and out of the window.
- Remove the Hammer. Pull the cylinder latch again and remove the hammer.
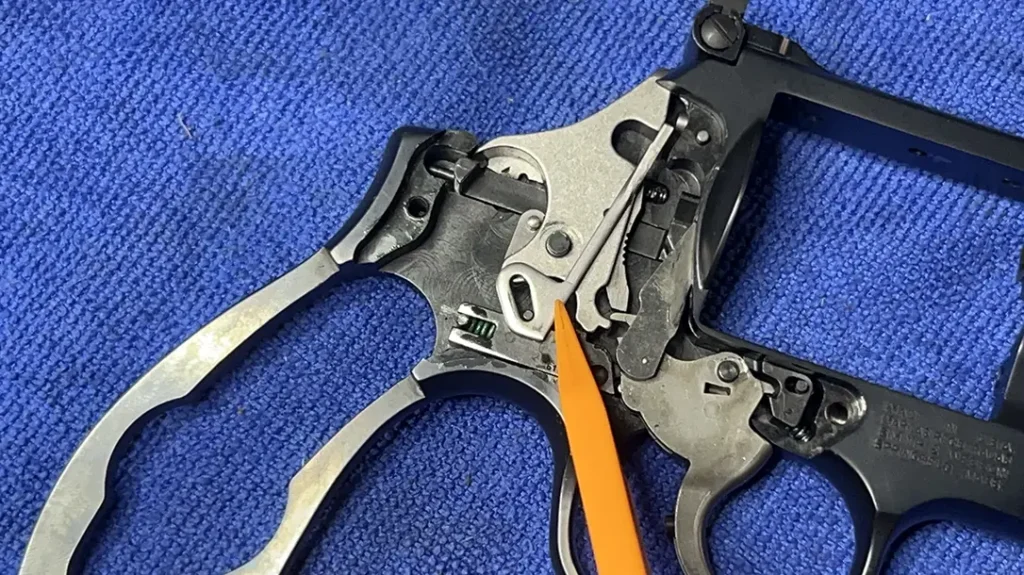
When disassembling the revolver for cleaning, be mindful of the orientation of all parts and springs to ensure proper reassembly later. If you need to remove the cylinder latch for cleaning, take extra caution, as it contains a spring and plunger that can fly out.
To remove it safely, place the revolver securely on the bench open side down. With the thumb latch removed, gently push the threaded stud down while using a loose rag to catch the plunger and spring as they are released. During reassembly, double-check that all springs and components are returned to their correct positions and orientations to ensure proper function.
The firing pin can be mounted in two ways. A) In the frame. B) On the hammer. It’s retained in the frame with a small pin. Pull that pin and the firing pin is free to be removed and cleaned.
The bolt can be removed by lowering it out of the frame window and lifting it out. It is sprung, so use a cloth or cupped hand to retain it.
Advertisement — Continue Reading Below
Proper Lubrication:
Revolvers require minimal lubrication—too much oil will attract debris and slow down the action. Here’s what to lube and what to leave dry:
Do:
- Apply a very thin layer of moly grease on metal-to-metal sliding contact points.
- Use a single drop of oil on each action pin (hammer, trigger, and rebound slide).
- Lubricate the rebound spring by rubbing a small amount of oil between your fingers and running the spring through.
- Place a drop of oil inside the yoke and ejector rod assembly, then rotate the cylinder to distribute it.
Don’t:
Advertisement — Continue Reading Below
- Oil the firing pin. Excess oil can attract dirt and cause light strikes.
- Over-oil the hammer and trigger assembly. Excess oil can cause sluggishness and collect residue.
Step 5: Reassembly and Function Testing
After cleaning and lubricating, reassemble the revolver in reverse order:
- Reinstall the Hammer and Trigger (hand attached)
- Reinstall the trigger return block and spring. Ensure it snaps into place properly.
- Replace the hammer block safety.
- Reinstall the mainspring and tighten the strain screw enough to hold it in place.
- Set the side plate back in place. It should sit flush without force—never hammer it down.
- Reinstall the cylinder and yoke, then replace the yoke screw.
- Replace and tighten the side plate screws in their original positions.
- Finish tightening the mainspring screw.
- Reattach the grips.
Final Function Test:
Before returning the revolver to service, perform a function check:
- Trigger Reset Test: Cock and dry-fire the revolver in both single and double action, ensuring smooth trigger reset.
- Cylinder Rotation Check: Open and close the cylinder, verifying proper lockup and alignment.
- Ejector Rod Function: Press the ejector rod to confirm smooth ejection of empty chambers.
- Hammer Check: Manually cock the hammer and ensure it falls with proper force.
If everything functions smoothly, your revolver is properly maintained and ready for use.
Common Maintenance Mistakes and How to Avoid Them
Even experienced firearm owners make mistakes when servicing their firearms. Here are some of the most common pitfalls to avoid:
- Over-lubrication: Too much oil leads to sluggish movement and attracts dirt. Use only the necessary amount.
- Using the wrong screwdrivers: Standard flathead screwdrivers can damage screws—use properly fitted hollow-ground bits.
- Prying the side plate: This can warp the plate and damage the frame. Always use the tap method to remove it.
- Skipping function checks: A small reassembly mistake can cause timing issues or light primer strikes. Always test before carrying.
Final Thoughts: Keep Your Revolver Running Smoothly
A Smith & Wesson revolver is one of the most durable and reliable firearms you can own. However, even the best revolvers require proper maintenance. By cleaning and lubricating the internals, you’ll ensure smooth operation, prevent malfunctions, and extend the life of your firearm.
If you’ve never taken apart your revolver beyond basic cleaning, this guide will help you build the confidence to do it right. Just take your time, use the right tools, and always perform a function test before returning your gun to service.
With proper care, your Smith & Wesson wheelgun will be ready when you need it most—whether for the range, competition, or self-defense.
Shoot safe.